Best Router Table Starter Pins for Safe, Accurate Routing
What's inside
As an Amazon Associate I earn from qualifying purchases. This post may contain affiliate links at no extra cost to you.
The best router table starter pin for most woodworkers is a smooth, rigid 1/4-inch-diameter pin with the same thread as the table insert; choose a 3/8-inch or 1/2-inch pin only when your workpiece needs more starting support or your table manufacturer specifies that size.
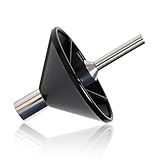
A router table starter pin is a fixed guide post positioned beside the router bit. You press the edge of the workpiece against the pin before moving it into the cutter, which makes starting a cut more controlled than beginning directly against a spinning bit. The pin does not replace a fence, guard, or safe feed technique, but it can make freehand routing substantially more predictable.
As an Amazon Associate we earn from qualifying purchases at no extra cost to you.



Contents
What to check before buying
Starter pins are simple, but a pin that fits the hole and still has the wrong thread, height, or shoulder can be unsafe. Check these specifications in order:
- Thread: The pin’s screw must match the threaded insert in the router table or mounting plate. 1/4-20 UNC is common on North American equipment; M6 × 1.0 is common on metric equipment. These threads are not interchangeable.
- Diameter: A larger pin supports more of the stock but leaves less room beside the cutter. A smaller pin is less intrusive and suits narrow parts.
- Height: The pin should stand high enough to support the workpiece’s edge without contacting the cutter or interfering with the bit’s bearing.
- Material: Hardened or stainless steel resists bending and wear. Brass and aluminum are gentler on delicate stock but can mark or deform more easily.
- Shoulder and seating: A flat shoulder should sit fully against the table insert. The pin must not wobble, rock, or rotate during use.
Starter-pin sizes compared
| Pin diameter | Typical best use | Advantages | Limitations |
|---|---|---|---|
| 1/4 in (6.35 mm) | Narrow stock, small templates, light edge work | Leaves more working room; least likely to obstruct a small bit | Offers less support when starting wide or flexible stock |
| 3/8 in (9.53 mm) | General-purpose router-table work | Good balance of support, clearance, and control | May be too large beside compact bits or tight profiles |
| 1/2 in (12.7 mm) | Wide stock, heavy cuts, large templates | More bearing surface and a steadier starting point | Needs more clearance; can limit access around the cutter |
| 5/8 in (15.88 mm) or larger | Specialty tables and unusually large workpieces | Maximum support for demanding starts | Often excessive for ordinary routing and incompatible with some table layouts |
For a first purchase, 3/8 inch is usually the most versatile choice. A 1/4-inch starter pin is the better choice when you work with small parts or use compact trim bits. Select 1/2 inch when the stock is broad, difficult to hold flat, or likely to twist as it contacts the cutter.
Thread compatibility: the fit that matters most
Do not identify the thread by measuring only the outside diameter. A 1/4-20 pin and an M6 pin are close in apparent size, but their thread pitch differs. Forcing one into the other can damage the insert and leave the pin inadequately secured.
Confirm the table’s specification in its manual or measure a known compatible screw. A 1/4-20 thread has 20 threads per inch. An M6 × 1.0 thread has a nominal 6 mm diameter and a 1 mm pitch. Some aftermarket router plates use other threads, so “standard router table pin” is not a sufficient specification.
Also check whether the table uses a removable threaded insert, a tapped hole in the plate, or a separate accessory holder. A pin with the correct thread may still fail to seat if its shoulder is too wide or its threaded section is too long. The screw should tighten firmly without bottoming out before the shoulder contacts the table.
Material and construction: what lasts
Hardened or stainless steel
Steel is the safest general-purpose material when you want rigidity. It resists bending if a workpiece catches the pin and usually tolerates repeated tightening. Stainless steel offers better corrosion resistance, especially in humid workshops, although “stainless” does not automatically mean hardened. Inspect the pin for a smooth, burr-free surface; a rough pin can scratch the stock or catch fibers.
Brass
Brass is useful when minimizing marks on light-colored or easily dented wood matters. It is generally softer than steel, so its surface can develop grooves over time. Replace it if it becomes visibly bent, deeply scored, or loose in the threaded insert.
Aluminum and plated steel
These can be practical lightweight options, but the coating or softer metal may wear at the contact point. They are reasonable for occasional light routing, provided the pin remains straight and the surface stays smooth. For frequent production work, steel is usually the more durable ownership choice.
Best choice by situation
| Your situation | Recommended specification | Why |
|---|---|---|
| Beginner building a general-purpose setup | 3/8 in steel, correct 1/4-20 or M6 thread | Balanced support and clearance with fewer limitations |
| Mostly small boxes, signs, and narrow parts | 1/4 in steel or brass | Preserves room around small cutters and reduces contact marks |
| Large panels or flexible workpieces | 1/2 in steel with a broad shoulder | Provides a more stable starting reference |
| Occasional use in a humid shop | Stainless or corrosion-resistant steel | Less maintenance and less risk of surface rust |
| Existing table has a metric insert | M6 × 1.0 pin, verified against the manual | Prevents cross-threading and insecure engagement |
| Very tight layout around the bit | Smallest pin that still supports the stock | Maximizes clearance between pin, cutter, and workpiece |
How to install and use a router table starter pin
- Disconnect power. Unplug the router before installing the pin, changing the bit, or checking clearances.
- Clean the insert. Remove dust and pitch from the threaded hole. Debris can make the pin appear tight before it has fully seated.
- Check the thread by hand. Turn the pin several rotations without force. If it binds immediately, stop and verify the thread standard.
- Seat the shoulder. Tighten the pin until its shoulder sits flat against the table. Do not use excessive force; the goal is a rigid seat, not a damaged insert.
- Check clearance. Rotate the bit by hand with the router unplugged. Confirm that the cutter, collet, bit nut, and workpiece path cannot contact the pin.
- Set the fence or guard as appropriate. A starter pin is not a substitute for a fence when the operation requires one. Use a guard and suitable push accessories whenever they improve control.
- Start with the workpiece against the pin. Keep both hands in safe positions, support the stock, and feed in the direction recommended for the bit and operation. Avoid climbing cuts unless you fully understand the risk and have a specific reason.
For a typical 3/8-inch pin, leave enough open space for the stock to approach the cutter without striking the pin after the cut begins. The exact clearance depends on the bit diameter, cutting profile, and table opening. Dry-run the movement with the router unplugged before making the cut.
Ownership, maintenance, and common mistakes
The pin itself normally has no consumable parts, but the threaded insert and contact surface wear first. Dust packed into the threads can prevent full seating; pitch or rust can make the pin rough; repeated over-tightening can strip an aluminum plate or insert. Brush the threads clean, wipe the pin after use, and apply only a very light corrosion-protection film if the manufacturer permits it. Keep oil away from the wood-contact surface because it can transfer to unfinished stock.
Replace the pin if it bends, develops a sharp burr, spins after tightening, or shows enough wear to change the workpiece path. A bent pin can shift the starting position and may deflect under pressure. Do not “fix” a loose fit with tape, random washers, or a mismatched screw. Use the correct insert or replace the damaged hardware.
The most common setup mistake is choosing the largest pin because it appears more stable. Stability is useful only if the pin does not obstruct the bit or force an awkward approach. Another mistake is assuming that a pin’s diameter determines its thread. Diameter and thread compatibility are separate specifications.
Bottom line
Choose a 3/8-inch steel router table starter pin for the broadest range of work, then verify the exact thread, shoulder, and available clearance on your table. Move down to 1/4 inch for small parts and tight layouts, or up to 1/2 inch for wide, flexible, or heavy stock. A correctly seated pin with the right thread is safer and more useful than a premium-looking pin that does not match the table.