Best Router Bit Storage Ideas for an Organized Workshop
What's inside
- Choose router bit storage by workshop situation
- Best options for different bit counts
- Wall storage versus drawer storage
- Pay attention to shank size and bit dimensions
- DIY router bit storage that costs little
- Moisture and cleaning: the details that prevent damage
- Make identification faster
- Final recommendation
- Related Guides
- Choose router bit storage by workshop situation
- Best options for different bit counts
- Wall storage versus drawer storage
- Pay attention to shank size and bit dimensions
- DIY router bit storage that costs little
- Moisture and cleaning: the details that prevent damage
- Make identification faster
- Final recommendation
- Related Guides
As an Amazon Associate I earn from qualifying purchases. This post may contain affiliate links at no extra cost to you.
The best router bit storage idea depends on four decisions: how many bits you own, whether they use 1/4-inch or 1/2-inch shanks, how much wall or drawer space is available, and how quickly you need to identify a profile. For most workshops, a divided drawer insert is the best all-round choice; a compact router bit storage box suits small collections, while a wall-mounted rack works best when visibility and fast access matter more than dust protection.
As an Amazon Associate we earn from qualifying purchases at no extra cost to you.



Contents
- Choose router bit storage by workshop situation
- Best options for different bit counts
- Wall storage versus drawer storage
- Pay attention to shank size and bit dimensions
- DIY router bit storage that costs little
- Moisture and cleaning: the details that prevent damage
- Make identification faster
- Final recommendation
- Related Guides
Choose router bit storage by workshop situation
| Workshop situation | Best storage type | Practical capacity | Typical cost range | Main advantage | Main compromise |
|---|---|---|---|---|---|
| Up to 20 bits, limited bench space | Foam or molded router bit storage box | 12–24 bits | $15–$40 | Portable and inexpensive | Small labels and limited expansion |
| 20–60 bits, frequent use | Drawer-mounted router bit storage inserts | 24–72 bits | $25–$100 | Good protection with efficient use of space | Requires a suitable drawer |
| 30–100 bits, wall space available | Wall rack or pegboard holder | 30–100 bits | $20–$90 | Fast visual identification | More exposed to dust and humidity |
| More than 60 bits, mixed shank sizes | Custom cabinet with removable inserts | 60–200 bits | $60–$250 | Scalable and easy to organize by size | More planning and installation work |
| Mobile tools or job-site use | Lockable case with individual pockets | 12–48 bits | $30–$120 | Secure transport and strong protection | Slower browsing than an open rack |
Best options for different bit counts
Small collection: a compact router bit storage box
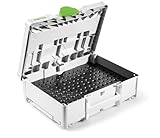
If you have fewer than 24 bits, a box with individual holes or sleeves is usually more practical than building a cabinet. Choose one that keeps each bit upright and separates the cutting edges from neighboring bits. A rigid plastic, aluminum, or hardwood box is preferable to a soft bag because loose bits can strike one another and become dull or chipped.
Look for clear labeling space on the lid or beside each opening. A box that stores bits in two tight rows may hold more, but it can make the back row difficult to read. For quick identification, a 12-bit layout with large labels may be better than a 24-bit layout with cramped markings.
Medium collection: drawer inserts
Router bit storage inserts are the most balanced solution for a growing collection. They keep bits upright, protect the shanks, and allow categories such as round-over, rabbeting, straight, flush-trim, and joinery bits to be separated.
Before buying or making an insert, measure the drawer’s usable internal width, depth, and height rather than its advertised size. Allow at least 10 mm of clearance around the insert so it can be removed without scraping the drawer sides. A useful layout is 20 mm to 25 mm between bit centers for common profiles, with wider spacing for large-diameter cutters.
Use one insert for 1/4-inch shank bits and another for 1/2-inch shank bits whenever possible. Mixing them in the same row increases the chance of grabbing the wrong cutter and makes the holes harder to size accurately. If both sizes must share a drawer, mark each row clearly and use different colored labels.
Large collection: a modular cabinet
Once the collection exceeds roughly 60 bits, a modular cabinet becomes easier to maintain than several unrelated boxes. Shallow drawers are preferable to one deep drawer because they let you see every bit without lifting a tray. Removable inserts also allow you to reorganize as your collection changes.
Reserve wider openings for panel-raising, spoilboard, and other large-diameter bits. Do not force large cutters into standard small-bit holes: the cutting edges may touch the insert, and the heavier bits can pull a lightweight tray out of alignment.
Wall storage versus drawer storage
A wall rack wins when speed matters. You can scan the profiles at eye level, return a bit to the same location, and see which cutter is missing. It is especially useful beside the router table for bits used every week.
Drawer storage wins in dusty, humid, or crowded workshops. A closed drawer reduces airborne dust on the bearings and cutting edges, while using vertical cabinet space more efficiently than a shallow wall rack. It also protects carbide tips from accidental impacts caused by clamps, boards, or moving tools.
For the best compromise, keep frequently used bits on a small labeled wall rack and store occasional-use or expensive bits in closed drawers. A rack holding 12 to 20 bits is usually large enough to improve workflow without exposing the entire collection.
Pay attention to shank size and bit dimensions
Router bits commonly use 1/4-inch or 1/2-inch shanks. A storage hole should support the shank without gripping the cutting flutes. For a simple wooden insert, drill holes slightly larger than the shank: approximately 9/32 inch for 1/4-inch shanks and 17/32 inch for 1/2-inch shanks. Test on scrap material first, because the actual fit depends on the drill’s accuracy and the insert material.
For a 1/4-inch bit, allow roughly 50–75 mm of vertical clearance in the storage opening. For a 1/2-inch bit, 75–100 mm is more comfortable, particularly when the cutter has a bearing or a wide profile. Measure the tallest bit in your collection before choosing a box or drawer; a lid that touches the cutting edge can cause damage even when the shank fits.
DIY router bit storage that costs little
A DIY router bit storage insert can be made from hardwood, plywood, dense plastic, or a thick piece of closed-cell foam. Hardwood gives the most durable holes, while foam is faster to cut and cushions delicate profiles. Avoid ordinary open-cell packing foam because it absorbs moisture and breaks down into dust.
- Sort the bits. Separate 1/4-inch and 1/2-inch shanks, then group bits by profile or frequency of use.
- Measure the space. Record the drawer or cabinet opening and subtract clearance for removal.
- Plan the grid. Leave extra spacing around large cutters and reserve a few empty positions for future purchases.
- Drill or cut the openings. Make them deep enough to support the shank, but never deep enough for the cutting edges to contact the material.
- Label before loading. Write the profile, shank size, and maximum cutting diameter on the insert or drawer front.
- Seal wooden parts. Apply a thin coat of finish to reduce moisture absorption, then let it cure fully before storing bits.
For example, a 500 mm-wide drawer using 25 mm bit spacing can hold about 20 positions in one row. Two rows provide 40 positions, but only if the drawer is deep enough to prevent the front row from blocking the rear row. If the back row is difficult to see, reduce capacity rather than creating a storage system that slows every bit change.
Moisture and cleaning: the details that prevent damage
Storage protects router bits only when the bits are clean and dry first. Resin and pitch left on the cutter can attract dust and moisture, while damp shanks may develop surface rust that interferes with collet seating.
- Brush or wipe debris from the bit after use; use a suitable resin remover when necessary.
- Dry the bit completely before returning it to a closed box or drawer.
- Keep a small desiccant pack in sealed storage, replacing it when saturated.
- Do not store bits directly on a concrete floor or against an unsealed damp wall.
- Inspect bearings and screws periodically; replace a noisy or rough bearing rather than storing it indefinitely.
- Keep cutting edges separated from metal tools and loose hardware.
What usually wears first is not the storage box but the labels, foam, drawer runners, and bearing components on the bits. Foam openings can enlarge, labels can peel, and fine dust can make drawer slides sticky. A system with replaceable labels and removable inserts is easier to repair than a permanently glued layout.
Make identification faster
Organize by the way you work, not only by cutter shape. One practical order is: everyday profiles first, joinery bits second, flush-trim and pattern bits third, and specialty cutters last. Within each group, label the profile, shank size, and cutting diameter. For example: “Round-over, 1/2-inch shank, 1/4-inch radius.”
Color coding can speed up selection, but use it as a supplement rather than the only identification method. A colored label for shank size combined with printed text remains readable when lighting is poor or a bit is covered in dust. Leave one empty slot beside common bits so a replacement can be added without rebuilding the entire insert.
Final recommendation
Choose a compact box for fewer than 24 bits, drawer inserts for a normal working collection, and a modular cabinet once capacity and expansion matter. Use a wall rack for fast access to frequently used bits, but keep valuable or occasional-use cutters in closed, moisture-conscious storage. The most useful router bit storage ideas are not the ones that hold the largest number; they are the ones that keep the correct bit protected, visible, and easy to return after every project.