Best Combo Sanders for Versatile Woodworking Projects
What's inside
As an Amazon Associate I earn from qualifying purchases. This post may contain affiliate links at no extra cost to you.
The best combo sander for most home workshops is a 4-by-36-inch belt-and-6-inch-disc machine, while frequent furniture makers and small production shops should step up to a 4-by-36-inch belt with an 8-inch disc or a heavier 9-inch model. The right choice depends less on maximum motor power than on available footprint, useful sanding angles, table support, dust collection, and whether you mainly shape edges or smooth broad surfaces.
As an Amazon Associate we earn from qualifying purchases at no extra cost to you.
Contents
Combo sander comparison: the important differences
| Type or example | Belt and disc size | Typical footprint | Useful angles | Best suited to | Typical market range |
|---|---|---|---|---|---|
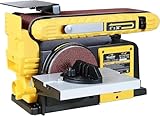
| Compact 4 x 36 / 6-inch class, such as the WEN 6502T | 4 x 36 in belt; 6 in disc | About 22 x 18 in | Belt usually 0–90°; disc table about 0–45° | Small shops, beginners, light furniture and craft work | About $150–$250 |
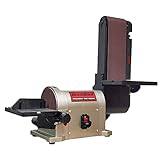
| Mid-size 4 x 36 / 8-inch class, such as the RIKON 50-120 | 4 x 36 in belt; 8 in disc | About 23 x 20 in | Tilting belt; adjustable disc table | More frequent use and larger edge-jointing tasks | About $250–$400 |
| Heavy 4 x 36 / 8-inch class | 4 x 36 in belt; 8 in disc | About 24 x 22 in | Tilting belt; miter-capable disc table | Serious hobby work where floor space is limited | About $300–$500 |
| Production 9-inch class, such as the JET JSG-96 | Typically 9 x 48 in belt; 9 in disc | Roughly 35 x 25 in or more | Broad belt-angle adjustment; tilting work tables | Cabinet parts, repeated shaping and demanding stock removal | About $1,000–$2,000+ |
Dimensions vary by revision and stand configuration, so check the manufacturer’s current specification sheet before ordering. The comparison is useful because it shows the practical jump: an 8-inch disc gives a larger usable sanding radius and usually a sturdier table, while a 9-by-48-inch belt machine is a different class of equipment rather than merely a larger benchtop tool.
Belt-and-disc sanders compared by project
For a small workshop or occasional repairs
A compact 4-by-36-inch combo sander is the sensible starting point. The long, narrow belt can flatten or bevel board edges, and the disc handles end grain, small curves and short joinery parts. Its footprint is often small enough to leave on a bench, although the machine should still be bolted down when sanding narrow workpieces.
The limitation is pressure capacity. A compact motor and short work tables are not ideal for grinding away large amounts of hardwood. Use several light passes rather than forcing the stock into the abrasive. This reduces belt slipping, heat buildup and premature wear on the platen and drive components.
For furniture parts and regular weekly use
An 8-inch disc is a worthwhile upgrade when you routinely sand chair parts, cabinet components, drawer fronts or hardwood blanks. The larger disc offers more working area and tends to stay flatter under moderate pressure. Look for a cast-metal table, a positive miter gauge, a rigid belt platen and a belt-tracking adjustment that can be locked securely.
A 4-by-36-inch belt remains versatile: use it horizontally for edges and vertically for end grain or small contours. However, it is still not a substitute for a wide belt sander. A combo sander is designed for localized work; sanding a wide panel on a narrow belt can introduce dips and uneven pressure.
For repeated shaping or a production-oriented shop
A 9-inch belt-and-disc machine provides more power, longer abrasive life and better support for repeated work. Models in this class occupy substantially more floor space and may require a dedicated dust collector circuit or a carefully planned hose arrangement. They make sense when the machine will be used for hours each week, not when it will sit unused for months.
The extra cost also buys better adjustment hardware. A rigid table that stays square after repeated angle changes is more valuable than a nominally larger motor. If your projects require accurate 90-degree edges, check whether the table can be squared with a reliable stop and whether the miter slot is machined or merely stamped.
Buying criteria that matter more than motor horsepower
- Footprint and mounting: Measure the machine with its dust ports, belt guard and table fully adjusted. Leave at least 12 inches of clearance around the active sanding surfaces so workpieces do not collide with walls or neighboring tools.
- Belt dimensions: A 4-by-36-inch belt is widely available and supports edge work, bevels and small faces. Longer 4-by-48-inch and 9-by-48-inch belts provide more abrasive area and usually tolerate longer sanding sessions.
- Disc diameter: Six-inch discs keep the machine compact. Eight-inch discs provide a better balance of support and price. Nine-inch discs are more appropriate for frequent, demanding work.
- Angle adjustment: A tilting belt is valuable for bevels and compound shaping. A disc table that adjusts from roughly 0 to 45 degrees is useful for miters, but only if it locks without flexing.
- Dust collection: A 2-1/4-inch port is common on compact machines; larger models may use 4-inch ports. A shop vacuum can handle many compact tools, but a 4-inch port benefits from a dedicated dust collector. Good extraction reduces abrasive clogging, but it does not eliminate the need for eye and respiratory protection.
- Table rigidity: A table that moves while sanding ruins repeatability. Prefer cast or thick-gauge metal tables with a positive locking mechanism.
- Abrasive availability: Confirm that replacement belts and discs are sold in the grits you use, especially 80, 120 and 180. Proprietary sizes can make a cheap machine expensive to own.
Decision matrix: which combo sander fits your situation?
| Your situation | Recommended configuration | Why |
|---|---|---|
| Under $250, limited bench space, occasional projects | 4 x 36 belt and 6-inch disc | Lowest entry cost and broadest availability of replacement abrasives |
| Beginner learning edge shaping and small joinery | 4 x 36 belt and 6- or 8-inch disc with tilting belt | Enough adjustment range without the mass and cost of a floor machine |
| Weekly furniture work with hardwood | 4 x 36 belt and 8-inch disc, preferably 1/2 hp or stronger | Better table support and disc coverage for repeated parts |
| Very limited space but frequent use | Heavy benchtop 8-inch class, bolted to a mobile stand | More rigid than a compact machine while remaining movable |
| Several hours of sanding per week or batch production | 9 x 48 belt and 9-inch disc class | Longer abrasive path, larger tables and improved heat management |
How to set up a combo sander accurately
- Square the tables first. Unplug the machine, place a reliable engineer’s square against the disc table and adjust it to 90 degrees. Do the same with the belt platen or work support.
- Track the belt before applying pressure. Run the belt briefly and use the tracking knob until it stays centered. A belt riding against the edge can damage both the abrasive and the guard.
- Install the correct grit for the task. Use 80 grit for controlled stock removal, 120 for general smoothing and 180 or finer for final preparation. Starting with an unnecessarily coarse belt can remove corners faster than expected.
- Connect extraction before sanding. Check that the hose does not restrict table movement. Empty a shop-vac filter or dust collector drum before a long session so airflow does not fall halfway through the job.
- Make a test pass on scrap. This confirms the angle, tracking and abrasive direction before the finished part reaches the disc.
Ownership realities: what wears first
Abrasives are the first consumable. Replace a belt when it stops cutting efficiently rather than pressing harder; excessive pressure creates heat, stretches the belt and can glaze wood. Disc edges also wear faster than their centers, especially when users repeatedly sand small parts in one spot.
Next come dust-related problems: clogged extraction passages, packed bearings and switches contaminated by fine dust. Vacuum the housing after use, keep the belt guard clear and inspect the drive belt for cracking or slack. Do not lubricate sealed bearings unless the manufacturer specifically permits it. Check table fasteners periodically because vibration can change the sanding angle over time.
One common mistake is using the disc’s lower half as though it were a general-purpose grinder. Feed wood against the disc’s downward-moving side so the workpiece is pushed toward the table rather than lifted. Keep fingers away from the abrasive, support small parts with a jig when practical, and never sand stock that is too small to control safely.
Final recommendation
Choose a compact 4-by-36-inch belt and 6-inch disc combo sander for light work, limited space and the lowest ownership cost. Choose an 8-inch disc model when furniture projects are regular and table rigidity matters. Move to a 9-inch production-class machine only when its larger footprint, price and dust-collection requirements are justified by frequent use. Across all three categories, a stable table, available abrasives and effective dust extraction will make a larger difference to results than a small increase in advertised horsepower.