Best Router Bits for Detailing: Profiles for Decorative Edges
What's inside
- Best Router Bits for Detailing: Profiles for Decorative Edges
- Quick comparison: compact profile options
- Choose by job, not by the biggest profile
- Bearing style: what the guide changes
- Shank size and collet fit
- A practical selection matrix
- Setup that protects the profile and the workpiece
- Ownership: what wears and what causes trouble
- Related Guides
- Best Router Bits for Detailing: Profiles for Decorative Edges
- Quick comparison: compact profile options
- Choose by job, not by the biggest profile
- Bearing style: what the guide changes
- Shank size and collet fit
- A practical selection matrix
- Setup that protects the profile and the workpiece
- Ownership: what wears and what causes trouble
- Related Guides
As an Amazon Associate I earn from qualifying purchases. This post may contain affiliate links at no extra cost to you.
Contents
- Best Router Bits for Detailing: Profiles for Decorative Edges
- Quick comparison: compact profile options
- Choose by job, not by the biggest profile
- Bearing style: what the guide changes
- Shank size and collet fit
- A practical selection matrix
- Setup that protects the profile and the workpiece
- Ownership: what wears and what causes trouble
- Related Guides
Best Router Bits for Detailing: Profiles for Decorative Edges
The best router bits for detailing are compact, sharp profile cutters with a small pilot bearing and a shank that fits your router collet: a 1/4-inch-shank round-over or chamfer bit is a manageable starting point, while a beading or cove bit suits more defined decorative lines. Choose by the amount of material the profile removes, whether its bearing can follow your workpiece, and whether your router accepts the shank—not by profile name alone.
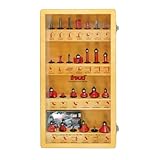
Quick comparison: compact profile options
The dimensions below are representative sizes, not specifications for every cutter in a profile category. Check the individual bit drawing before buying: cutting diameter, radius, bearing diameter, and cutting height vary by manufacturer.
As an Amazon Associate we earn from qualifying purchases at no extra cost to you.


| Profile | Representative cutter size | Typical cut depth or radius | Bearing arrangement | Useful for |
|---|---|---|---|---|
| Round-over | 1/4 in. radius; about 3/4 in. cutting diameter | 1/4 in. radius | Small bearing at the tip | Softening table edges, rails, and narrow trim |
| Chamfer | 45°; about 3/4 in. cutting diameter | Width depends on bit height and setup | Tip bearing or no bearing | Beveled edges and crisp shadow lines |
| Cove | 1/4 in. radius; about 5/8 in. cutting diameter | 1/4 in. concave radius | Usually no bearing; guided by fence | Small recesses in face frames and trim |
| Beading | 1/8 in. bead radius; about 1/2 in. cutting diameter | 1/8 in. bead | Often a pilot bearing | Narrow decorative lines on molding and panels |
| Roman ogee | About 1/2 in. cutting height | Two linked curves; varies by cutter | Commonly a bearing at the tip | More elaborate edges on wider stock |
“Cut depth” is not one universal measurement: a round-over’s radius describes its curve, while a chamfer’s finished width depends on how high the cutter sits above the work. For all profiles, compare the manufacturer’s drawing and maximum cutting dimensions before setting up.
Choose by job, not by the biggest profile
- For small trim and narrow parts: Start with a 1/8- or 1/4-inch round-over or a modest chamfer. Both create a visible edge treatment without removing as much material as a large ogee. Keep the bit’s cutting height within the stock thickness.
- For a decorative line on a molding: A small beading bit creates a distinct bead, while a cove bit cuts a recessed curve. These shapes are easy to overdo on narrow stock, so test on an offcut of the same thickness.
- For wider furniture edges: A Roman ogee can combine curves into a more prominent profile. It needs enough stock width and careful setup; it is not automatically a better choice for small-scale work.
- For routing an inside edge or template: Use a bearing arrangement that can actually contact the guiding surface. A bearing-guided bit needs an accessible edge or template; a fence-guided bit needs a stable, aligned fence.
- For a handheld compact router: Favor a small-diameter cutter with a 1/4-inch shank, provided the router manual permits it. Larger cutters and aggressive profiles place greater demands on the tool and the operator.
Bearing style: what the guide changes
Tip-bearing bits
A bearing at the cutter tip can follow a template or an existing edge, depending on the workpiece and bit geometry. It is convenient for shaping a small edge without setting a router-table fence, but the bearing must ride on a clean, continuous surface. Gaps, glue squeeze-out, or a dent in the reference edge can make the cutter wander or reproduce the defect.
Top- and bottom-bearing bits
The bearing’s position determines which face can serve as the guide. A top bearing is useful when the template is above the work; a bottom bearing may suit a template beneath the work or an edge-following setup. Before switching on, confirm that the bearing contacts the guide before the cutting edge can remove unintended material. Bearing diameter also affects the cut: a larger bearing leaves less material to cut than a smaller one against the same template.
Bearing-free bits
Cove cutters and many chamfer cutters are guided by a router-table fence or an appropriate edge guide. This can make sense for repeated cuts, but it requires a secure workpiece and carefully positioned fence. Do not improvise a fence-guided setup if the router or work support cannot control the stock safely.
Shank size and collet fit
Common router-bit shanks include 1/4 inch and 1/2 inch. A 1/4-inch shank fits many compact routers and provides access to a broad range of small detailing profiles. A 1/2-inch shank can offer more rigidity, but only if the router has a matching collet. Never force a shank into a mismatched collet or use an adapter unless the router manufacturer specifically approves it.
For light edge detailing, a 1/4-inch shank is often the practical match for a compact router. If you have a full-size router and make frequent cuts in hardwood, a comparable profile with a 1/2-inch shank may be worth considering. The router’s permitted cutter diameter, speed guidance, and collet instructions take precedence over general advice.
A practical selection matrix
| Your situation | Profile and shank to consider | Why |
|---|---|---|
| Occasional projects, limited budget | Single 1/4-in. round-over, 1/4-in. shank | Versatile for easing edges; buy a quality cutter rather than a large set of seldom-used shapes. |
| New to routing decorative edges | Small round-over or 45° chamfer with a bearing | A defined guide and modest profile make setup and test cuts easier to evaluate. |
| Frequent small trim work | Round-over, beading, and chamfer bits sized to the stock | A few complementary profiles cover softening, a raised detail, and a crisp bevel. |
| Repeated production on a router table | Profile matched to a stable fence setup; shank matched to router | Repeatability and support matter more than collecting extra profiles. |
Setup that protects the profile and the workpiece
- Check the cutter and collet. Confirm the shank matches the collet, inspect the cutting edges for chips, and remove dust or resin from the collet and shank. Seat the bit as directed by the router manual; do not bottom it out unless the manufacturer specifies that method.
- Set a shallow first pass. For a deep profile, raise or lower the bit in stages rather than cutting the full shape at once. A lighter pass reduces strain and gives you a chance to spot a setup error before it ruins the edge.
- Make a test cut in matching scrap. Check the profile, bearing contact, and edge distance. Change the height in small increments: even a small adjustment can noticeably change a compact decorative detail.
- Support and secure the stock. Narrow trim can tip or shift. Use a suitable fence, hold-downs, or other safe workholding for the setup, and keep hands away from the cutter. Follow the router and bit makers’ operating guidance.
- Inspect the result before repeating. Tear-out, burning, chatter, or a wandering cut can point to a dull or dirty cutter, an overly aggressive pass, unsupported stock, or a poor guide surface. Address the cause rather than forcing the next pass.
Ownership: what wears and what causes trouble
Cutting edges dull or chip first, especially when a bit encounters grit, a hidden fastener, or a hard knot. Resin buildup can also make a sharp cutter behave poorly and leave burn marks. Clean bits with a product intended for router cutters, following its directions; avoid scraping carbide edges or using a method that can damage the brazed joint. Store cutters so their edges do not knock against other tools.
Bearings are another wear point. Dust and resin can impede rotation, and a damaged or seized bearing may mark the work or stop guiding smoothly. Check that it turns freely before use, and replace a worn bearing with the correct compatible part rather than assuming all bearings fit. A larger, more complex profile also tends to be less useful on thin stock: if the cut leaves a fragile edge or removes too much material, choose a smaller profile instead.
For most detail work, a modest bearing-guided round-over or chamfer is the sensible first purchase. Add a small bead or cove bit when you have a specific trim detail to make, and reserve larger ogees for stock wide enough to show the profile without overwhelming the piece.