Woodworking Clamping Techniques
Key takeaways
- A criteria-led guide to woodworking clamping techniques, from clamp spacing and alternating pressure to cauls, squaring carcases, and the mechanical details that matter.
What's inside
As an Amazon Associate I earn from qualifying purchases. This post may contain affiliate links at no extra cost to you.
Most failed glue-ups have nothing to do with owning too few clamps. They come from pressure applied in the wrong place, in the wrong order, or with the wrong tool for the shape on the bench. Sound woodworking clamping techniques are what turn milled stock into a flat panel and a square carcase, and they matter more than the badge stamped on the bar.
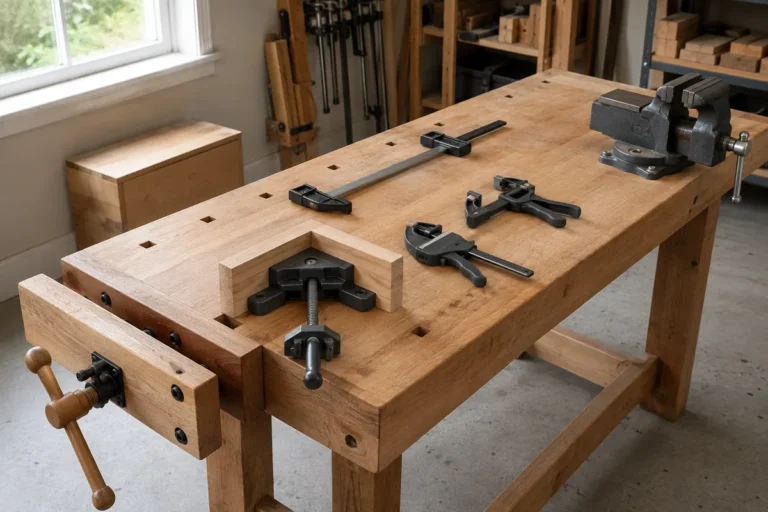
Hardware still sets the ceiling. A bar that bows under load cannot spread even pressure across a wide panel, and a jaw that tips out of square pulls a case out of true no matter how carefully you measure the diagonals. So we work the way we judge tools on the review desk: mechanical criteria first, then the methods each class of clamp actually supports.
As an Amazon Associate we earn from qualifying purchases at no extra cost to you. Product prices and availability are accurate as of the date shown and are subject to change.


| Clamp Type | Best Job | What to Watch |
|---|---|---|
| Parallel jaw | Panels, doors, carcases | Bar deflection at full reach |
| F-style bar | General shop holding | Pad swivel and screw backlash |
| Pipe clamps | Long panels on a budget | Pipe sag and poor footing |
| Hand screws | Tapered or angled parts | Slow to set, large footprint |
| Band or strap | Miter frames and chairs | Ratchet slip, needs corner blocks |
| Cauls and battens | Flattening across a panel | Must be crowned, not dead straight |
How We Judge Clamps and Woodworking Clamping Techniques
A clamp is a spring and a screw. Almost everything that matters follows from how far the spring deflects and how predictably the screw delivers force.
Bar stiffness
Load a long clamp near the end of its reach and watch the bar. Steel I-beam and box sections resist bending far better than flat aluminum of the same length, and thin-wall pipe sags under its own weight. Deflection is not cosmetic. When the bar bows, pressure collapses toward the pads and you get squeeze-out at the ends over a starved center.
Jaw parallelism and pads
Close the clamp on a scrap and sight the jaw faces. Jaws that tip inward at the top drive a panel into a cup. Jaws that stay parallel let you clamp on the centerline of the stock thickness, which is the whole argument for the design. Pads that release cured glue and do not bruise soft maple matter more in daily use than a higher force rating on the box.
Threads and one-handed setup
Slack in the screw shows up as a handle that spins before anything happens, and across a dozen clamps that costs real minutes of open time. We also favor clamps that stand upright unassisted, since loading one-handed while the other hand steadies a stile prevents most glue-up panic.
Parallel-Jaw Bar Clamps (Starter Set of Four)
If you buy one clamp type properly, buy this one. Judge bar cross-section and throat depth before price, and start with 24-inch and 36-inch lengths rather than a spread of short bars you will outgrow in a month.
Panel Glue-Ups: Alternation, Spacing, and Cauls
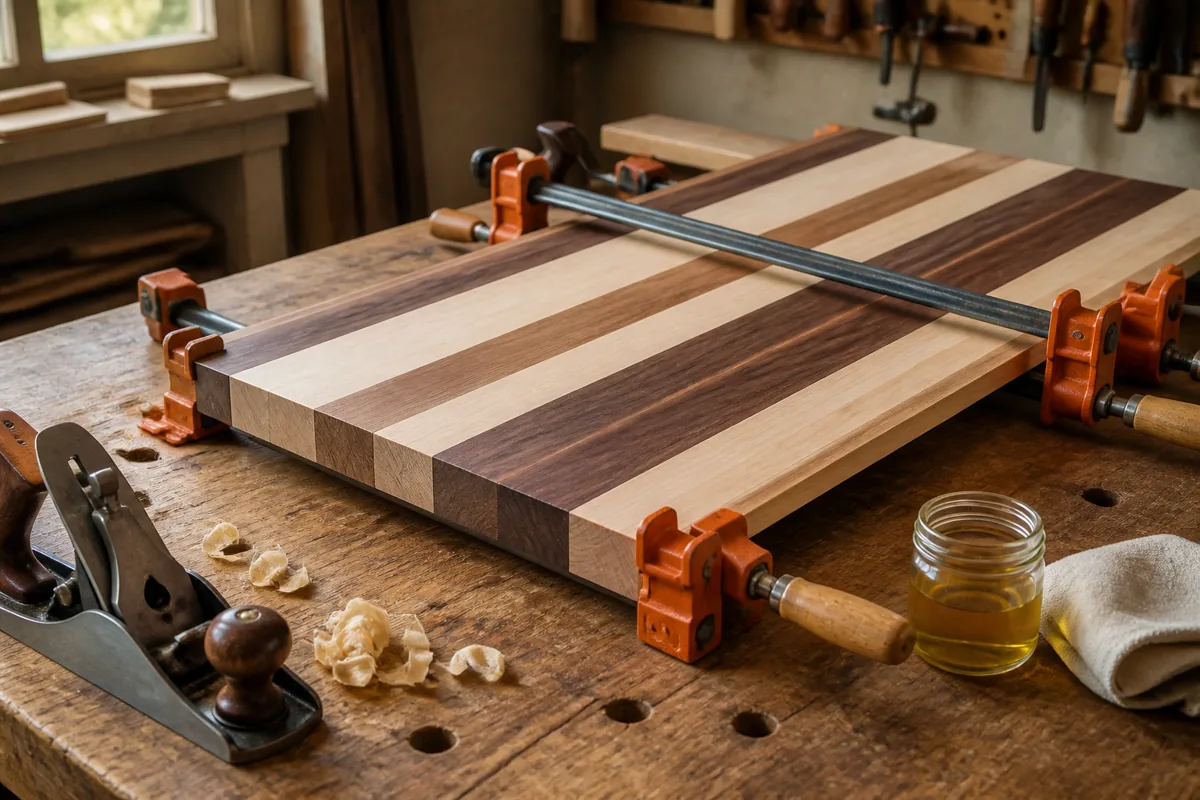
Dry clamp every panel first. You are confirming that the edges close without gaps under light pressure, that the clamps reach, and that every one you need is open and within arm’s reach before glue touches wood.
Pressure spreads from each pad in a cone of roughly 45 degrees, so clamps must sit close enough for those cones to overlap. On 3/4-inch stock that generally means one every 6 to 10 inches. Alternate them above and below the panel. A clamp on one face only creates a bending moment that lifts the center; alternating cancels it.
Tighten in stages from the middle outward until a thin continuous bead of squeeze-out appears along the whole joint. That bead is the signal to stop. If the panel still wants to bow, add cauls across the width, crowned very slightly so the center touches first, with tape between the caul and the joint line.
- ✔ Jaws stay square, so panels come off the bench flatter
- ✔ Wide bars stand upright for one-handed loading
- ✔ Deep throat reaches into carcase and door assemblies
- ✔ Cured glue pops off most pad materials
- ✘ Heavy and bulky to store in quantity
- ✘ Several times the cost of a pipe clamp per inch of reach
- ✘ The longest models still deflect near the end of the bar
Carcase Work: Squaring While the Glue Is Open
A case can be tight at every joint and still be a parallelogram. Measure both diagonals as soon as the clamps are snug. If they disagree, angle the bars slightly toward the long diagonal and retighten. That shift squares a case more reliably than tapping corners.
Keep the bars in line with the joint. A clamp sitting proud of the panel face levers the joint open on the inside while closing it on the outside. Full-width cauls fix that on dadoed and rabbeted cases and spare the edges from pad dents.
Miters and anything with an odd number of sides belong to strap clamps, and corner blocks are not optional there. Without them the band bridges the corner and crushes the outside of the miter.
Band and Strap Clamp Set with Corner Blocks
Buy for the ratchet, not the webbing. Cheap mechanisms slip a tooth under load and let a frame open right as the glue grabs. Corner blocks with a wide bearing face matter more than total strap length for furniture work.
Odd Shapes, Small Parts, and Repairs
Hand screws still own tapered and angled work, because the two-screw jaw can be set deliberately out of parallel and still grip full-face. Wooden jaws also clamp into a vise or over a bench dog, which turns the tool into a fixture.
On small parts, force is rarely the limit. Painter’s tape stretched across a closed miter and folded back over the open joint delivers plenty of pressure for frames and boxes. Spring clamps hold edge banding while the glue tacks. Curved laminations want go-bars or a form with cauls, since raw clamp pressure always finds the path of least resistance.
F-Style Bar Clamps, Medium Duty
The clamp you grab when the job is not a panel: holding stops, locking down a fence, pinning a jig to the bench. Check that the sliding jaw locks without rocking and that the pad swivels, then buy in pairs.
Clamping Mistakes We See Most
Over-tightening. Excess pressure bows bars, prints pad marks into the wood, and on a well-fitted joint can push out more adhesive than the joint can spare.
Bare steel against wet glue on oak. The tannin reaction leaves black stains along the joint line. Tape the bar, use cauls, or slip in a barrier strip.
Gluing up on an unflat surface. A twisted bench transfers straight into the panel. Work on a flat assembly table or across two straight beams.
Clamping cross-grain assemblies rigid. Solid wood moves seasonally. Breadboard ends and wide cleats need slotted fasteners or floating tenons, not more clamping force.
Frequently Asked Questions
How many clamps do I need to start? Four is the practical floor for panels, six is comfortable, and most shops settle around eight to twelve across two or three lengths. Buy in matched pairs so alternating above and below a panel is always possible.
Can I over-tighten a glue joint? Yes, in two ways. You can starve a very tight-fitting joint of adhesive, and you can distort the workpiece or bow the bar. A thin, even bead of squeeze-out along the full length is the target.
Are pipe clamps still worth buying? For long panels on a budget, yes. You are buying reach per dollar. Expect to add cauls and feet, and expect to work harder to keep a panel flat than you would with parallel jaws.
The Verdict
Technique carries most of the load here. Alternating clamps, spacing them so the pressure cones overlap, checking diagonals before the glue sets, and stopping at a thin bead of squeeze-out will improve your work tonight without buying anything. When you do upgrade, spend on bar stiffness and jaw squareness first, in the lengths you actually use, and treat pipe clamps as reach insurance rather than the backbone of the collection. Established lines such as Bessey K-Body, Jorgensen Cabinet Master, and Irwin Quick-Grip all cover the common cases, but judge the clamp in your hand against the criteria above rather than the name on it.
Check prices on Amazon →