Best Woodworking Vises
Key takeaways
- A criteria-led guide to the best woodworking vises, judged on thread quality, racking, jaw depth and mounting rather than marketing copy.
What's inside
As an Amazon Associate I earn from qualifying purchases. This post may contain affiliate links at no extra cost to you.
Bench vises photograph badly. Two cast-iron face vises can look identical in a listing and behave nothing alike once a board is clamped six inches out from the screw. That is where the money goes: thread form, guide bar spacing, casting stiffness, and how far the front jaw twists before it bites. The best woodworking vises stay close to parallel under off-center load, mount solidly to the bench you already own, and keep working after a decade of seasonal movement in the top.
We have organized this guide the way we assess the hardware itself: mechanism first, jaw geometry second, mounting third, convenience last. There are no prices or part numbers here, because vise inventory rotates constantly and the same casting appears under several labels. The mechanics do not rotate.
As an Amazon Associate we earn from qualifying purchases at no extra cost to you. Product prices and availability are accurate as of the date shown and are subject to change.



Five Vise Types and What Each One Is For
Most frustration with vises comes from buying the wrong category rather than the wrong brand. A quick-release face vise is a general-purpose gripper. A twin-screw is a joinery fixture. They are not interchangeable, and a one-bench shop often ends up wanting both.
| Vise type | Where it mounts | Typical jaw width | Main mechanical limit |
|---|---|---|---|
| Quick-release face vise | Front apron, general work | 7 to 10 in | Racks under off-center load |
| Leg vise | Front leg, long stock on edge | Width of the leg | Needs a parallel guide or crisscross |
| Twin-screw (Moxon) | On top of the bench | 16 to 24 in between screws | Occupies bench real estate |
| Tail or wagon vise | Bench end, works with dogs | Dog-hole spacing | Demands real joinery to install |
| Clamp-on utility vise | Any thin top, portable | 4 to 6 in | Limited clamping force |
How We Judge the Best Woodworking Vises
Our criteria are mechanical and inspectable, and most can be checked in the first ten minutes after unboxing, while a return is still easy.
Screw, nut, and travel
A woodworking vise wants a fast, coarse thread with broad flanks, not a fine machine-screw pitch. Coarse threads close quickly and tolerate dust and grit. The screw should turn smoothly through its whole travel; resistance that rises and falls usually means a rough casting or a misaligned nut. Grease it, do not oil it, since oil migrates onto your work.
Guide bars and racking
Racking is the standard complaint about face vises. Clamp a board near one end of the jaw and the screw pulls from the center, so the jaw pivots and grips at one corner. Wide-set guide bars, close-fitting bushings, and a stiff casting reduce it. Nothing removes it. Treat any claim of perfect parallelism without a mechanism as marketing copy.
Casting quality and jaw flatness
Lay a straightedge across each jaw. Slight toe-in at the top is deliberate and useful; a wave or a twist is not. Check that the movable jaw is thick behind the screw boss and that the quick-release lever engages without slop. Ductile or malleable iron shrugs off the mallet strike that cracks cheap gray iron, and a broken jaw is a replacement, not a repair.
Jaw depth and mounting depth
Depth decides how far below the benchtop you can support a workpiece, and it is the figure buyers skip. Deeper helps with handsaw work and with drawer sides held on edge. Opening capacity matters less; most joinery is clamped under three inches. Measure your apron thickness before ordering, because mounting depth turns a good vise into a weekend of shimming.
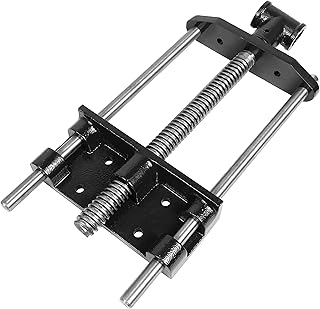
Quick-release cast-iron face vise
If you are buying one vise, buy this class. Weigh the casting, the guide bar spacing, and pre-drilled jaws for wooden liners above any headline capacity number.
Face Vises: The Default Pick and Where It Gives Up
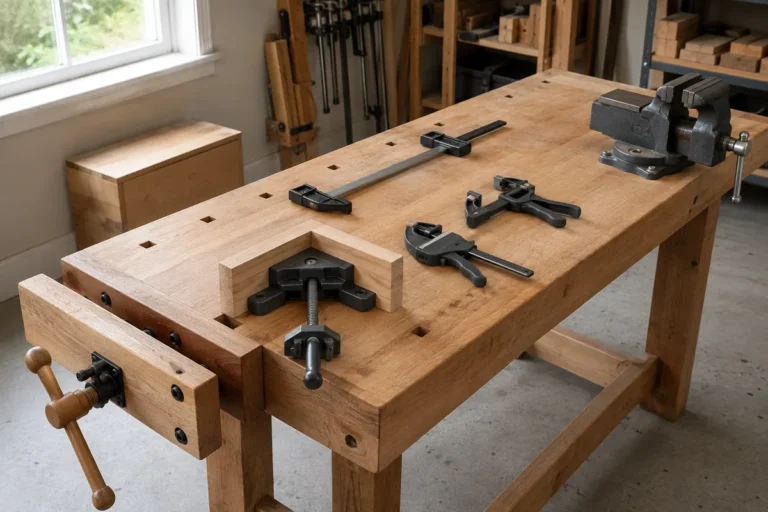
A quick-release face vise under the front left corner of the bench handles most clamping in a furniture shop. The release mechanism, usually a split nut disengaged by a lever, is what keeps it in daily use; without it you spin the handle a dozen turns between operations and quietly stop reaching for the vise.
Its limits are geometric. The screw sits at the center of the jaw, so anything clamped off center rotates the jaw slightly, and the fixed jaw width supports a wide panel at one point instead of two. That is the gap the other types fill.
- ✔ Fast quick-release action for repetitive work
- ✔ Bolts to almost any bench with a solid apron
- ✔ Cast-iron mass damps chatter while sawing
- ✔ Jaws accept wooden liners for delicate stock
- ✘ Racks noticeably under off-center clamping
- ✘ Fixed jaw width limits support on wide panels
- ✘ Needs a thick apron or laminated spacer block
- ✘ Cheap gray-iron castings can crack at the jaw ears
Twin-Screw, Leg, and Tail Vises
A twin-screw or Moxon vise places two screws sixteen to twenty-four inches apart, which removes racking as a practical concern and raises dovetail work toward elbow height. Most are sold as hardware kits, so thread quality and screw length are what you are actually judging; the jaws you make yourself.
Leg vises trade speed for capacity and mechanical advantage, but they need a parallel guide, a crisscross linkage, or a roller to control the bottom of the jaw. Tail and wagon vises hold stock flat against bench dogs for planing and require real joinery to install. None of these is a first vise. All three are good second ones.
Twin-screw (Moxon) vise hardware kit
The right answer for dovetails and tenon cheeks. Compare kits on thread cut quality, nut type, and whether the screws are long enough for the jaw thickness you intend to build.
Mounting Is Where Good Vises Get Ruined
More vises are spoiled by installation than by manufacture. Set the jaws a sixteenth of an inch below the benchtop so a plane never meets metal. Bolt through solid wood or a laminated spacer with washers, never into a thin apron alone. Then fit hardwood liners and give the top edges a business card of toe-in so the jaws grip at the top first. If your bench is a folding or portable model, do not hang a fifty-pound casting on it; a clamp-on vise is the honest answer.
Clamp-on utility vise
For apartment shops, job sites, and folding benches. Clamping force and jaw depth are both limited, so treat it as a holder for small parts rather than a bench vise substitute.
Frequently Asked Questions
What jaw width should I look for? A seven to ten inch face vise covers nearly all furniture work, and jaw depth matters more than width. Go wider only if you routinely hold long boards on edge, and even then a twin-screw does that job better.
Do I need a quick-release mechanism? On your main clamping station, yes. Spinning a handle through full travel between cuts is why unused vises sit closed. On a dedicated joinery vise you move the jaw an inch or two at a time, so it matters much less.
Can I stop a face vise from racking? Not completely. Manage it with a shop-made stepped spacer or tapered blocks set opposite the workpiece, which takes seconds and costs nothing. Vises with wide guide bars and rigid castings start from a better place.
The Verdict
For a first vise, a heavy quick-release cast-iron face vise with deep jaws, wide guide bars, and pre-drilled cheeks is still the most useful thing you can bolt to a bench, assuming the apron can carry it. Add a twin-screw on top when hand-cut joinery becomes routine. Leg and tail vises repay the installation work on a traditional bench, but they suit an established shop rather than a first purchase. Judge the screw, the guide bars, the jaw faces, and the mounting depth; the rest of the listing is decoration.
Check prices on Amazon →