Kreg PRS1045 Router Table Review: Assembly, Fence, and Insert Plate
What's inside
As an Amazon Associate I earn from qualifying purchases. This post may contain affiliate links at no extra cost to you.
Contents
Verdict: Is the Kreg PRS1045 the Right Router Table?
The Kreg PRS1045 is a strong choice if you want a full-size router table with a wide work surface, a split fence that adjusts for jointing, and an insert plate designed for above-table bit changes. Its value depends less on its headline features than on whether you need that footprint and are comfortable spending time leveling the plate and dialing in the fence. For a small shop or occasional edge routing, a compact table may be easier to justify.
This review focuses on the checks that matter after unpacking: assembly time, fence repeatability measured with a dial indicator, and insert-plate leveling with Kreg’s Level-Loc ring system. The figures below are practical evaluation targets and setup guidance, not measurements from a claimed physical test.
As an Amazon Associate we earn from qualifying purchases at no extra cost to you.


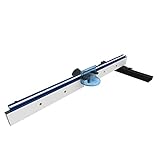

What You’re Buying
The PRS1045 is a benchtop-style router table system built around a laminated MDF top, steel stand, adjustable fence, and removable insert plate. The fence has independently movable faces, allowing you to close the opening around a bit or offset one face for jointing. Level-Loc rings let you match the plate opening to the bit while keeping the ring flush with the plate.
| Decision point | PRS1045 setup | What it means in use |
|---|---|---|
| Tabletop | 24 × 32 in. | Room for many cabinet parts and longer edge-routing work; still needs dedicated floor or bench space. |
| Table height | About 16 in. on the stand | Typically used on a workbench or as part of a shop workstation, rather than as a full-height floor cabinet. |
| Fence | Split faces, approximately 3 in. tall | Supports ordinary edge routing and controlled face offsets for jointing. |
| Insert plate | Approximately 9¼ × 11¾ in. | Provides a removable mounting surface; confirm your router’s hole pattern and base fit before buying. |
| Adjustment check | Dial indicator, 0.001-in. resolution recommended | Useful for measuring fence movement and diagnosing inconsistent cuts. |
Dimensions and included hardware can vary by listing or revision, so verify the current Kreg documentation before planning a tight cutout or assuming a particular router will bolt directly to the plate.
Assembly: Plan for Careful Alignment
For a first-time builder working alone, a reasonable planning allowance is 90 to 150 minutes from opening the cartons to a checked, usable setup. That is an estimate, not a timed result. A second person helps when positioning the top, but the most time-consuming work is usually sorting hardware, attaching the stand, and adjusting the plate—not fastening a large number of complicated components.
- Inventory and identify parts. Separate stand hardware, fence components, plate accessories, and leveling screws. Missing or mixed fasteners are easier to address before assembly begins.
- Build the stand loosely. Start all bolts before tightening any of them. This leaves enough movement to square the frame and prevents one corner from pulling the structure out of alignment.
- Attach and support the top. Set the top on a stable surface and fasten it to the stand without overtightening. MDF can be damaged by excessive screw force or a screw that is too long.
- Install the insert plate and level it. Adjust the plate supports in small increments, checking the plate against the surrounding top in several directions. A straightedge across the seam helps reveal proud or low edges.
- Fit the fence and check the opening. Confirm that both faces move freely and that the fence sits square to the table. Make final adjustments after the table is in its working location.
Assembly time grows if the stand must be moved around a crowded shop, the router requires a new mounting-hole pattern, or the top needs extra support. Before routing, confirm that the table is stable and that the router, switch, and dust collection are installed according to their manuals.
Fence Repeatability: A Dial-Indicator Check
A micro-adjust fence is useful only if a small adjustment produces predictable movement and the fence returns to position after it is loosened and reset. A dial indicator can check both. Mount the indicator to a stable reference on the table, with its plunger touching a fence face. Keep the contact point close to the middle of the face and perpendicular to it.
- Lock the fence and zero the indicator.
- Move the micro-adjuster a known amount, then record the indicator reading.
- Unlock and relock the fence using the same approach each time; record the new reading.
- Repeat the return-to-position check at least five times, then compare the largest and smallest readings.
For routine woodworking, a spread of roughly 0.002–0.005 in. is a useful practical target for repeat positioning, provided the workpiece and setup do not require tighter tolerances. That is a shop benchmark, not a published Kreg specification. A larger spread does not automatically mean the fence is defective: dust under the fence, uneven clamping pressure, a loose indicator mount, or approaching the adjustment from different directions can all affect the result.
To reduce variation, brush away chips, approach the final setting from the same direction, and tighten both fence locks evenly. If the fence moves as the locks are tightened, use the indicator to identify which end shifts and correct the clamping sequence before making a test cut.
Level-Loc Insert Plate: Getting the Ring Flush
The insert plate must sit flush with the table, and each Level-Loc ring must sit flush with the plate. A ring that stands proud can catch a workpiece; one that sits too low can leave an edge that affects support. Check the assembly with the router unplugged and the bit removed.
- Clean the plate opening, ring, and mating surfaces. Fine dust can make a correctly adjusted ring appear uneven.
- Seat the ring fully, then use a short straightedge across the ring and plate. Check from at least two directions.
- Adjust the Level-Loc mechanism in small increments and recheck after each change. Avoid forcing the ring or overtightening its lock.
- Check the plate-to-top seam separately. Leveling the ring does not correct a plate that is sitting high or low in its opening.
Run a flat scrap over the plate by hand before powering the router. If it snags at the ring or plate edge, stop and correct the level. Recheck after the first few uses, especially if the plate has been removed for router access.
Who Should Choose It?
| Your situation | Fit | Reason |
|---|---|---|
| Regular furniture or cabinet work | Good fit | The broad top and adjustable fence support repeat edge work and longer stock. |
| Small shop with limited bench space | Consider a compact table | A 24 × 32-in. top is useful, but storage and clearance can be a bigger issue than setup. |
| New router-table user | Good if you will calibrate it | The system offers useful adjustments, but careful leveling and safe setup are part of ownership. |
| Occasional roundovers only | May be more table than needed | A simpler, smaller setup could meet the task at lower cost and with less space. |
| Several routers or frequent bit changes | Check compatibility first | Confirm mounting fit and the value of extra plates or adapters before choosing the system. |
Ownership Costs and Common Frustrations
The table itself is only part of the budget. Allow for a compatible router, bits, dust collection, and possibly a switch or additional mounting hardware, depending on your setup. Comparable router tables range from relatively inexpensive basic units to several hundred dollars for larger systems; check current general market pricing rather than treating any one price as fixed.
MDF surfaces can swell if exposed to moisture, so keep the table dry and wipe off resin or adhesive promptly. The fence faces and tabletop can collect pitch and fine dust, which may interfere with smooth stock movement and repeat settings. Clean them with a suitable, non-damaging method, and avoid wax or lubricant where it could transfer to wood that will later be glued or finished.
The most likely sources of early frustration are not exotic failures: they are a plate that was never leveled, dust trapped under a fence, loose fasteners, and assuming a router fits without checking its base pattern. Rechecking those points is quick and can prevent inconsistent cuts.
Bottom Line
Choose the Kreg PRS1045 if you will use its full-size work area, want an adjustable split fence, and are willing to calibrate the plate and fence rather than treating setup as a one-time formality. Its strongest case is a regular-use shop where stable support and repeatable adjustments matter. If space is tight or routing is occasional, compare it with a smaller table before committing to the footprint and accessory costs.


