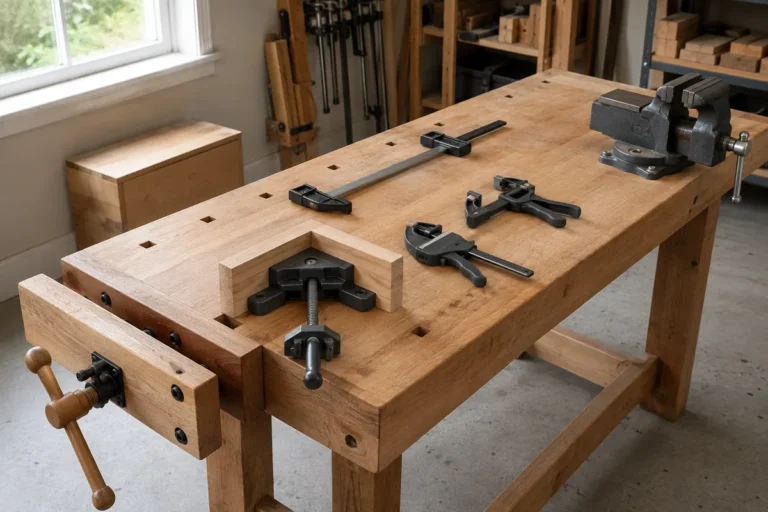
Bar Clamps Buying Guide for Beginners
What's inside
- What to look for in a bar clamp
- Choose clamp length by the work, not by the largest number
- Throat depth: the overlooked measurement
- Rail strength and clamping force
- Handle styles: speed versus control
- A practical buying decision matrix
- How many bar clamps do you really need?
- Features worth paying for
- Durability, maintenance, and common mistakes
- Bottom line
- Related Guides
- What to look for in a bar clamp
- Choose clamp length by the work, not by the largest number
- Throat depth: the overlooked measurement
- Rail strength and clamping force
- Handle styles: speed versus control
- A practical buying decision matrix
- How many bar clamps do you really need?
- Features worth paying for
- Durability, maintenance, and common mistakes
- Bottom line
- Related Guides
As an Amazon Associate I earn from qualifying purchases. This post may contain affiliate links at no extra cost to you.
For most beginners, the best starting point is a mix of four 12-inch bar clamps, two 24-inch clamps, and two longer clamps sized to your largest planned project, with at least 2½ inches of throat depth and a steel rail that does not visibly flex under load.
As an Amazon Associate we earn from qualifying purchases at no extra cost to you.


Contents
- What to look for in a bar clamp
- Choose clamp length by the work, not by the largest number
- Throat depth: the overlooked measurement
- Rail strength and clamping force
- Handle styles: speed versus control
- A practical buying decision matrix
- How many bar clamps do you really need?
- Features worth paying for
- Durability, maintenance, and common mistakes
- Bottom line
- Related Guides
What to look for in a bar clamp
A bar clamp has a fixed head, a sliding jaw, a rail, and a handle-driven screw or trigger mechanism. Its advertised size usually refers to the maximum opening, not the length of the complete tool. A “12-inch clamp” may therefore be roughly 17 to 20 inches long when closed.
For beginners, six specifications matter most:
- Maximum opening: how far the jaws can separate.
- Throat depth: how far the clamp can reach across a board from its edge.
- Rail strength: resistance to bending and twisting.
- Clamping force: pressure available at the jaws.
- Handle style: how quickly and comfortably you can apply pressure.
- Quantity: how many clamps are needed to keep a project aligned while glue dries.
Choose clamp length by the work, not by the largest number
Clamp capacity should exceed the width of the assembly by enough room to position the jaws comfortably. A useful target is 2 to 4 inches of spare opening. A clamp that is barely large enough can be awkward to fit, while an excessively long clamp is heavier, slower to adjust, and more likely to sag or get in the way.
| Typical project | Useful clamp length | Recommended quantity | Reason |
|---|---|---|---|
| Small boxes, picture frames, repairs | 6–12 inches | 4–8 | Short clamps fit narrow assemblies and are easy to position |
| Cutting boards and small panels | 12–24 inches | 4–6 | Enough span for edge-gluing strips or boards |
| Chair parts and cabinet components | 24–36 inches | 4–8 | Useful for wider frames, cases, and stretchers |
| Tabletops and wide panels | 36–50 inches | 6–10 | Long assemblies need pressure distributed along the joint |
| Large cabinet carcasses | 24–48 inches | 6 or more | Several clamps maintain square alignment during glue-up |
For example, a 20-inch-wide panel does not automatically require a 24-inch clamp. A 24-inch clamp gives only 4 inches of spare capacity, which is workable but tight. A 36-inch clamp offers more positioning freedom, although it may be unnecessarily cumbersome if the same clamps will mainly be used on small projects.
Throat depth: the overlooked measurement
Throat depth is the distance from the rail to the center of the jaw pad. It determines how far the clamp can reach over a panel or into a frame. Most general-purpose bar clamps provide approximately 2 to 3 inches of throat depth. Heavy-duty models may provide around 3½ to 4½ inches.
Choose at least 2½ inches for general furniture work. Deeper throats help when clamping wide boards, attaching edging, or reaching past a thick frame member. However, deeper is not always better: a long, deep jaw can twist the rail or tip the clamp when pressure is applied near its limit.
Rail strength and clamping force
The rail carries the load between the fixed head and sliding jaw. Look for a cold-drawn or reinforced steel rail with a substantial cross-section. A thin, flat rail may be acceptable for light repairs but can bow during panel glue-ups. Many bar clamps use a steel rail around ⅝ to 1 inch wide; heavier models may use a thicker or boxed rail.
Clamping-force figures vary by manufacturer and testing method, so treat them as a comparison rather than a guarantee. Typical ranges are:
- Light-duty trigger clamps: approximately 100–300 pounds.
- General-purpose screw bar clamps: approximately 500–900 pounds.
- Heavy-duty parallel or steel bar clamps: approximately 1,000–1,700 pounds.
More force is not automatically safer for a glued joint. Excessive pressure can squeeze out too much adhesive, bow thin boards, or leave dents. For most beginners, a rigid rail and smooth adjustment are more useful than choosing the highest advertised force.
Handle styles: speed versus control
Trigger-style handles
Trigger clamps adjust quickly with one hand. They are convenient for temporary positioning, holding a guide, or securing a workpiece before a stronger clamp is installed. Their usual limitations are lower force, shorter service life in inexpensive models, and less precise final tightening.
Screw handles
A traditional screw handle takes longer to adjust but provides better control. The threaded screw can apply substantial pressure, and many models include a rotating or swiveling jaw pad that adapts to slightly uneven surfaces. Screw bar clamps are the better general-purpose choice for furniture glue-ups.
Parallel clamps
Parallel clamps use broad jaws that remain approximately parallel as they tighten. They are excellent for cabinet boxes and panel assemblies because they help keep edges aligned and reduce tipping. They are usually heavier, more expensive, and slower to store than basic bar clamps.
Pipe or track-style alternatives
Pipe clamps and modular track clamps can be economical for very long work. Pipe clamps require compatible pipe, while track systems can be extended or joined depending on the design. They are useful when project sizes vary widely, but they are less convenient if you want a compact beginner setup.
A practical buying decision matrix
| Your situation | Best starting choice | Why | What to avoid |
|---|---|---|---|
| Limited budget and occasional repairs | Four 12-inch screw clamps plus two trigger clamps | Covers small glue-ups and quick holding tasks | Buying a full set of long heavy-duty clamps |
| Beginner making boxes and small furniture | Four 12-inch and four 24-inch general-purpose clamps | Balanced coverage for frames, panels, and cases | Only buying two clamps; assemblies need several pressure points |
| Frequent cabinet or furniture construction | Six to eight parallel clamps in 24–40-inch sizes | Broad jaws support square, even cabinet glue-ups | Light trigger clamps as the only clamps |
| Small workshop with little storage | Short screw clamps and a few modular track clamps | Compact tools can cover several lengths | Many 48-inch clamps that are difficult to store |
| Large tabletops or long panels | Six or more 36–50-inch clamps, optionally with cauls | Distributes pressure across the complete assembly | Relying on short clamps at the ends only |
How many bar clamps do you really need?
Plan on at least two clamps per joint or assembly section, then add one clamp every 8 to 12 inches for a long panel. This is not a rigid rule, but it gives a useful starting estimate.
Suppose you are gluing a 36-inch-wide tabletop from four boards. Three glue joints run along the length, so you need pressure across the boards. Six clamps placed alternately above and below the panel provide roughly one clamp every 6 inches across the width if arranged along the panel’s length. For a 60-inch-long panel, you may want six to eight clamps spaced along the length as well, depending on board flatness and joint quality.
Remember that clamps do not correct badly cut joints. Before applying glue, dry-fit the parts, check that the assembly is square, and use cauls where necessary. A caul is a straight scrap board placed between the clamp pad and the workpiece. Cover it with packing tape or use a protective barrier so squeezed-out glue does not bond it to the project.
Features worth paying for
- Non-marring jaw pads: reduce dents and protect finished surfaces.
- Removable pads: make replacement easier after wear or glue contamination.
- Large sliding jaw: adjusts smoothly and is less likely to twist.
- Swiveling pressure pad: maintains better contact on angled or uneven parts.
- Comfortable handle: matters when tightening several clamps in succession.
- Clear force range or positive locking mechanism: helps prevent accidental jaw movement.
General market pricing is roughly $15–$35 for light-duty trigger clamps, $25–$70 for basic screw bar clamps, and $50–$150 or more for heavy-duty parallel clamps, depending on length and brand. Buying pairs or small matched sets often costs less per clamp, but only buy sizes you can store and use.
Durability, maintenance, and common mistakes
Glue buildup is one of the main causes of sticky sliding jaws and damaged pads. Wipe wet glue away promptly, allow dried glue to harden, and remove it carefully with a plastic scraper rather than striking the rail. Keep the threaded screw lightly lubricated with a suitable dry or light machine lubricant, while avoiding excess oil near wood surfaces.
The parts that usually wear first are jaw pads, trigger mechanisms, screw threads, and the sliding-jaw lock. Replaceable pads and a robust screw are more valuable than decorative finishes. Store clamps off the floor, avoid dropping them onto the rail, and do not use them as levers or pry bars.
Common beginner mistakes include tightening only at the ends of a panel, using too much force, placing clamps directly on finished wood, and buying every clamp at one length. A mixed collection is more versatile: begin with four 12-inch screw clamps and two 24-inch clamps, then add longer or parallel clamps when a specific project proves that you need them.
Bottom line
The best bar clamps buying guide for beginners leads to a balanced collection rather than one oversized set. Prioritize a rigid steel rail, at least 2½ inches of throat depth, smooth adjustment, protective pads, and enough clamps to distribute pressure evenly. Start with common 12- and 24-inch sizes, choose screw handles for glue-ups, use trigger clamps for quick positioning, and expand into 36-inch or parallel clamps only when your projects demand their extra reach and stability.