Table Saw vs Drill Press for Boring Repetitive Shelf-Pin Holes
What's inside
As an Amazon Associate I earn from qualifying purchases. This post may contain affiliate links at no extra cost to you.
For boring repetitive shelf-pin holes, a drill press is the right machine. A table saw is useful for making the cabinet parts and the indexing jig, but it is not a practical or safe substitute for a drill press. The key requirement is not simply making a hole. It is making a long row of holes that are straight, evenly spaced, and at the same distance from the cabinet’s front edge.
As an Amazon Associate we earn from qualifying purchases at no extra cost to you.


Contents
The basic choice
A table saw cuts material with a rotating blade. It has no normal provision for holding a drill bit in the correct position, controlling drilling depth, or advancing a workpiece into a bit. Trying to use the arbor as a drilling setup would require unsafe modifications and would not provide the accuracy a shelf-pin system needs.
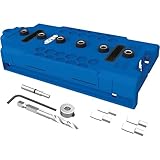
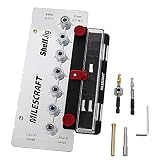
A drill press is designed to lower a rotating bit in a controlled vertical path. With a fence, stop, and indexing jig, it can bore repeatable 5 mm or 1/4-inch holes in cabinet sides, bookcase standards, and adjustable shelving parts. For occasional work, a handheld drill and a commercial shelf-pin jig may be cheaper and faster to set up. For multiple cabinets or long rows of holes, the drill press is more consistent and less tiring.
| Factor | Table saw | Drill press |
|---|---|---|
| Primary job | Ripping, crosscutting, and joinery | Vertical drilling and boring |
| Shelf-pin accuracy | Useful for making the jig, not boring the holes | Good with a fence, stop, and indexing system |
| Hole depth control | Not built in | Depth stop or quill setting provides control |
| Best purchase decision | Buy it for cabinet parts and other sawing | Buy it for repeated, perpendicular holes |
Why perpendicular matters
Shelf pins carry surprisingly little load individually, but they work poorly when the holes are misaligned. A bit that wanders toward the inside or outside face can leave a pin tilted. The shelf then rocks, sits low on one corner, or refuses to seat fully. A row that slopes by only 1/16 inch over 24 inches can be noticeable when a shelf spans the cabinet.
Use a brad-point bit rather than a standard twist bit. The center point starts the hole accurately, and the outer spurs cut the perimeter before the waste is removed. A 5 mm bit is common for metric shelf pins; a 1/4-inch bit suits imperial pins. Do not assume the two sizes are interchangeable. A 5 mm pin is about 0.197 inch, so it will be loose in a 1/4-inch hole.
For clean holes, put the finished face against a sacrificial backer or drill from the finished side with a sharp bit. Reduce tear-out by backing the workpiece fully, especially when drilling through thin plywood or melamine. Shelf-pin holes are often only 3/8 to 1/2 inch deep, so a depth stop is important. A hole that is too deep can break through a 3/4-inch panel or leave a visible mark on the opposite face.
Setting up a drill press
A floor-standing machine gives more support for tall cabinet sides, but a benchtop benchtop drill press is sufficient for most parts if its throat depth reaches the hole line. Check the distance from the bit to the column before buying. A 12-inch nominal swing gives roughly 6 inches of throat depth, which may not reach a hole line placed far from the edge of a wide panel.
Install a straight auxiliary fence on the table and set it so the bit is the required distance from the cabinet’s front edge. For a typical inset shelf-pin layout, that distance may be 1 to 1 1/2 inches, but measure your hardware and design rather than copying a generic number. Add a stop block or a fixed reference mark to control the first hole location.
Spacing is usually 32 mm in European cabinet construction, while many shop-made layouts use 1-inch spacing. A simple indexing jig can have a row of accurately spaced holes. Drill one hole, insert a steel pin or dowel in that hole, move the workpiece until the indexing pin enters the next jig hole, and repeat. This avoids measuring every hole and prevents cumulative errors.
Clamp the panel against the fence. Do not rely on one hand to keep a large workpiece square while lowering the quill. If the bit catches, the panel can rotate, damaging the part or your hand. Set the drill press speed according to the bit manufacturer’s recommendation; sharp brad-point bits generally cut cleanly at moderate speeds, while excessive speed burns the edges and dulls the spurs.
Where the table saw helps
The table saw still has an important role. It can rip cabinet sides to identical width, crosscut shelves to length, and cut the stock for a drilling jig. A straight plywood jig with a fence and a row of holes can be made using the table saw for the straight cuts, then drilled accurately with a drill press or router setup.
You can also use a table saw to make a thin sacrificial strip or spacer that establishes the front-edge setback. This is useful when processing several cabinet sides. But these accessories support the drilling operation; they do not turn the saw into a boring machine.
When a hand drill is enough
If you are drilling one bookcase or repairing a cabinet, a handheld drill paired with a shelf-pin jig is often the economical choice. The jig guides the bit and controls spacing, so the result can be very good. It also works on assembled cabinets where a drill press cannot reach.
The trade-off is depth control and operator consistency. Use a stop collar, tape flag, or preferably a jig with a built-in depth stop. Keep the drill square to the guide bushings and clear chips frequently. A worn guide bushing or bent bit will transfer errors to every hole.
What to buy for repeat work
Choose a drill press with a rigid quill, minimal spindle play, a usable depth stop, and enough throat depth for your panels. A 1/2-inch chuck is more versatile than a small 3/8-inch chuck, though either can hold shelf-pin bits. Add a sacrificial MDF spoilboard, a fence, clamps, and an indexing jig before spending extra on digital readouts or high power.
If the shop already has a table saw, keep using it for sizing and jig construction. Buy a woodworking drill press with a depth stop when repeated shelf-pin work justifies the space and cost. For a single project, spend that money on a quality jig and sharp bit instead.
