
Best Band Saws for Cutting Veneer from Thick Lumber
What's inside
As an Amazon Associate I earn from qualifying purchases. This post may contain affiliate links at no extra cost to you.
A band saw is usually the practical choice for slicing veneer from thick lumber. Its narrow kerf wastes less wood than a table saw, and the workpiece stays supported on a broad table. But a large throat and a tall cutting capacity do not guarantee thin, even sheets: blade choice, setup, feed rate, and a way to flatten the slices all matter.
As an Amazon Associate we earn from qualifying purchases at no extra cost to you.

Contents
What to buy for veneer work
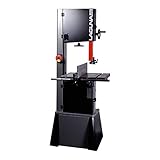
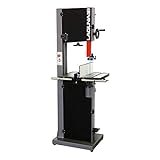
For occasional cuts in stock under about 6 inches wide, a well-tuned 14-inch band saw can be enough. Look for a rigid frame, a fence that stays square, and enough resaw capacity for your actual lumber. A riser block can add height to some saws, but it does not make a light frame more rigid or increase motor power.
For frequent resawing or stock around 8 inches and taller, a heavier saw with a larger resaw capacity and a motor suited to sustained cuts is a better fit. A 1 to 1.5 horsepower saw can handle moderate work with a sharp blade and patient feed; dense hardwood, wide stock, and long sessions place more demands on the motor. Check the manufacturer’s stated capacity and electrical requirements rather than judging by throat size alone.
Compare 14-inch band saws suited to resawing with larger 18-inch band saws. The smaller class costs less and takes up less shop space; the larger class generally offers more capacity and mass, but costs more and may need a dedicated circuit. Treat capacity as a limit, not a promise of effortless cuts at that height.
Which band saw class fits?
| Band saw class | Best fit | Main trade-off |
|---|---|---|
| 14-inch, standard frame | Occasional veneer from modest stock | Less height and often less reserve for demanding cuts |
| 14-inch with riser | More height on a budget, if the saw is otherwise adequate | Added capacity does not add frame stiffness or motor power |
| 18-inch or larger | Regular resawing and taller, heavier boards | Higher cost, footprint, and power needs |
These are broad categories, not performance guarantees. Two saws with the same nominal wheel size can differ substantially in frame stiffness, guides, fence quality, and usable resaw capacity.
Blade and setup matter more than a fancy fence
For resawing, start with a sharp, wide blade—often 3/4 inch for a saw that can tension it correctly. A wider blade resists twisting and helps keep the cut straight. A coarse tooth pitch, commonly around 3 teeth per inch, clears sawdust from a tall cut better than a fine blade. Use the widest blade your saw can properly tension and guide; putting an oversized blade on a small machine can make tracking and tension worse, not better.
Set the guides close to the blade without pinching it, check that the blade tracks properly, and square the table to the blade. Confirm the fence is parallel to the blade’s actual drift line: some blades naturally cut at a slight angle, so a fence aligned only to the table slot can steer the board off course. Make a test cut in scrap before using valuable lumber.
A poor blade or dull teeth can leave a wandering cut, burn marks, or a rough face that costs more wood during flattening. If the motor slows sharply, the blade heats, or the cut curves, do not force the feed. Stop, check for dull teeth, poor tension, packed sawdust, or a blade that is too narrow for the job. For quality veneer, a dedicated resaw blade is a more useful upgrade than decorative accessories.
How to get usable slices
Joint one face of the board flat and one edge square before resawing. A board that rocks against the table or fence can produce tapered slices even when the saw is adjusted correctly. Mark the desired thickness on both ends and along the board; this makes a drift or taper easier to spot early.
Set the fence for the target thickness, allowing extra material for the rough saw surface and later flattening. If the finished veneer should be 1/8 inch thick, a rough slice around 3/16 inch may leave useful cleanup room, though the exact allowance depends on blade condition and how flat the cut comes off. Feed steadily, keep the board pressed to the fence, and let the blade cut at its own pace. A featherboard or tall auxiliary fence can improve control on suitable stock, but never put hands in line with the blade.
Long boards may need infeed and outfeed support so their weight does not pull them away from the fence. For expensive or figured lumber, resaw a short test piece first. A slice can cup or bow after release because the board’s internal stresses change; leave it stickered and weighted to acclimate before final flattening. Thin veneer is fragile, and aggressive planing can tear it up. A drum sander, wide-belt sander, or careful hand work may be safer for final thicknessing.
When the cheaper saw is fine
A basic 14-inch saw is reasonable if you resaw occasionally, work with relatively short or narrow stock, and accept slower feeds and more sanding. You may get better results by spending first on a sharp blade, solid support, and dust collection rather than buying a larger machine. If your lumber exceeds the saw’s rated capacity, or you routinely cut dense hardwood at full height, a larger saw is the more dependable purchase.
Before choosing, measure your tallest real workpiece, check the shop’s available floor space and power, and budget for blades and a way to flatten the slices. If you need repeated, close-to-finished-thickness veneer, a band saw alone is not the whole setup: consistent stock preparation and post-cut flattening determine how much usable material you keep.
