How to Connect a Jointer to a Dust Collection System
What's inside
As an Amazon Associate I earn from qualifying purchases. This post may contain affiliate links at no extra cost to you.
Most jointers throw chips fast and in volume. Without dust collection, a 6-inch jointer can fill the cabinet and pack chips around the cutterhead in under 10 minutes of face jointing, which overheats the motor and leaves washboard cuts. Connecting it to proper collection keeps the cut clean and keeps fine dust out of the shop air. The hookup itself is simple, but getting the right hose size, airflow, and airtight fittings makes the difference between actually collecting dust and just making noise.
Contents
Jointer Dust Port Sizes and What They Expect
Almost every stationary jointer built in the last 20 years has a single dust port at the base, directly under the cutterhead. 6-inch benchtop and small shop jointers usually have a 2-1/2 inch port. Full-size 6-inch and 8-inch floor-standing jointers use a 4-inch port. A few 8-inch and 12-inch jointers use a 5 or 6-inch port, but they are uncommon outside industrial machines.
Check your actual port with calipers before buying anything. Manufacturers often list the outside diameter, while hoses and fittings are sold by inside diameter. A nominal 4-inch port often measures 3-15/16 inches OD and needs a 4-inch flex hose clamped over it. If you measure 2-1/4 inches OD, you have a 2-1/2 inch system that needs an adapter.
Do not reduce a 4-inch jointer port down to 2-1/2 inches to fit a shop vac if you can avoid it. You cut airflow by more than half, chips fall out of the airstream in horizontal runs, and the cabinet clogs. If you only have a shop vac, it will catch the fine dust on edge jointing, but plan to clean the cabinet by hand after face jointing wide boards.
Shop Vac vs. Dust Collector: What Works
Jointers need volume (CFM), not just suction (inches of water lift). A shop vac pulls high static pressure through a small hose, which is good for a handheld sander. A dust collector moves a large volume of air at lower pressure, which is what carries heavy jointer shavings through a 4-inch hose without settling.
| System | Typical Hose | Real Airflow at Tool | Best For Jointer? | Trade-off |
|---|---|---|---|---|
| Shop vac (5-6.5 HP peak) | 2-1/2 inch | 90-150 CFM | Only 6-inch benchtop jointers, short 4-6 ft run | Cheap, clogs on wide cuts, needs frequent bin dumping |
| 1 HP dust collector | 4 inch | 350-500 CFM | 6-inch jointers up to 10 ft run with two elbows | Minimum viable for floor jointers, struggles with long runs |
| 1.5-2 HP dust collector | 4 inch (or 6 inch main) | 600-900 CFM | 6 to 8-inch jointers, 20 ft run plus blast gate | Best balance for a small shop with multiple machines |
If you already own a 1 HP collector and the run to the jointer is under 10 feet with minimal flex hose, it will handle it. If you are buying new and plan to run a jointer plus a planer or table saw on the same trunk, skip the 1 HP class. A 1.5 HP dust collector with a 4-inch inlet holds velocity above 3,500 FPM in a 4-inch hose, which is the threshold to keep jointer chips airborne.
Hoses, Fittings, and Airtight Connections
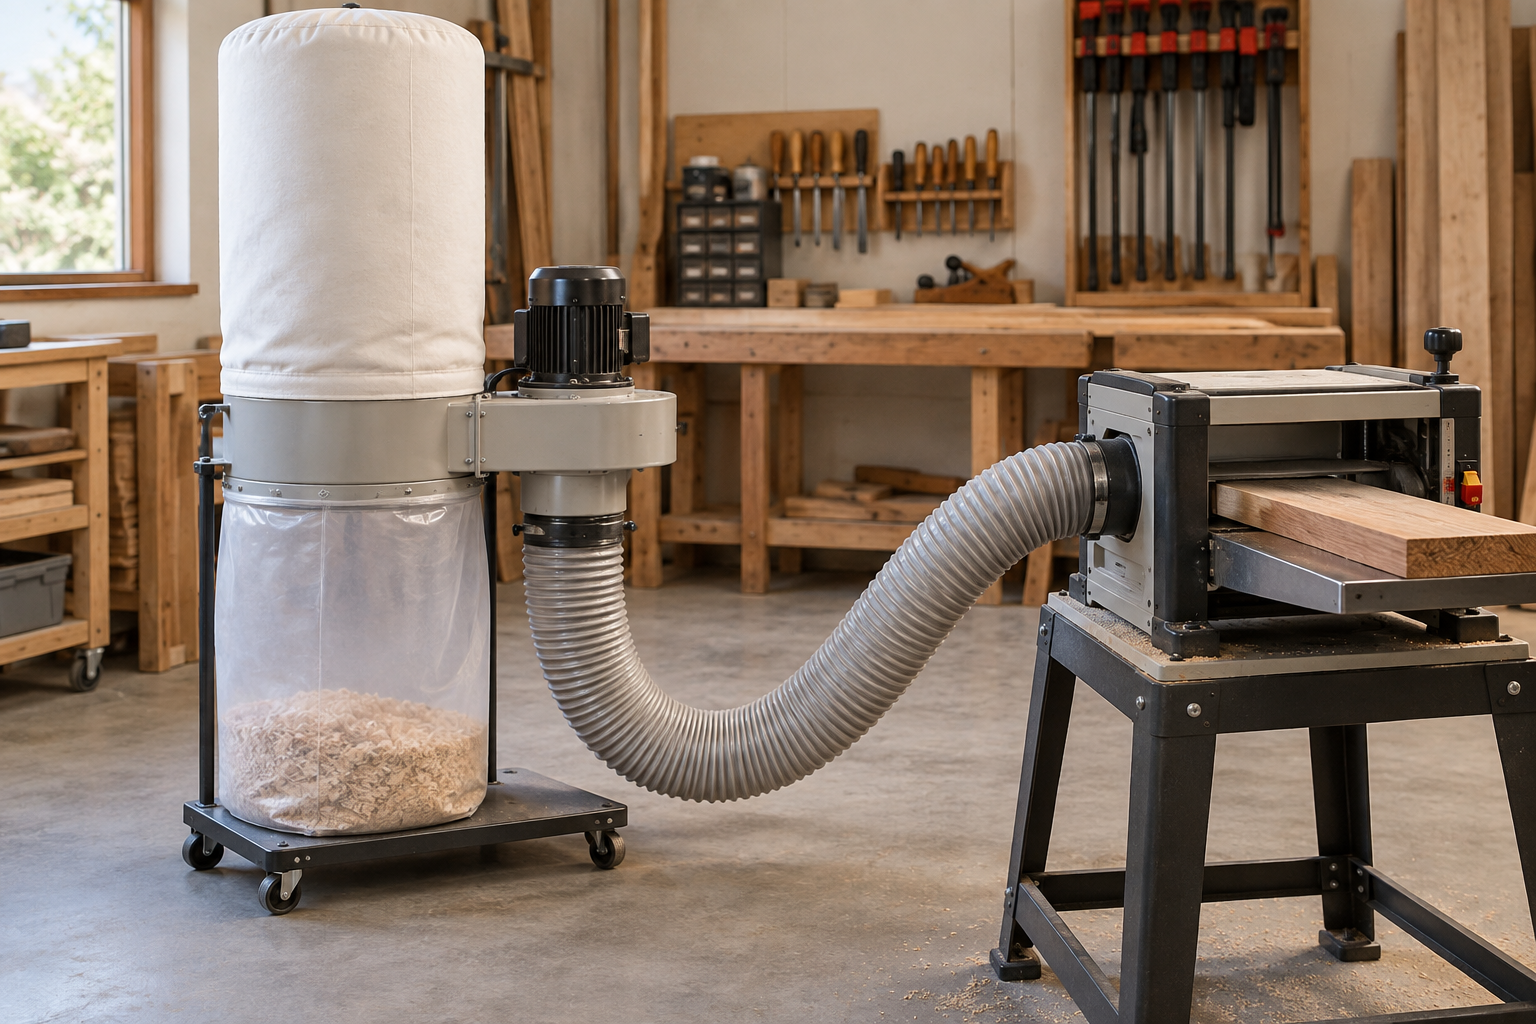
Keep flex hose as short as possible. Every foot of corrugated 4-inch dust collection hose adds roughly 3 to 5 times more resistance than smooth rigid pipe. Ideal setup is rigid metal pipe or PVC for the main run, then a 3 to 5 foot whip of flex hose from the wall drop to the jointer. That whip lets you move the jointer for blade changes without stressing the port.
Use a proper hose clamp at the jointer port, not tape. Tape fails as soon as the hose warms and vibrates. For adapters, use molded ABS or stamped metal adapters with a taper, not 3D-printed thin-wall parts. The vibration under a jointer will crack thin plastic in months. If you must adapt 4-inch to 2-1/2 inch, use a tapered metal reducer at the machine and keep the 2-1/2 inch section under 3 feet.
Add a blast gate at the drop for the jointer. Without it, when you open another gate for the table saw, the jointer becomes an air leak and neither tool gets enough velocity. A self-cleaning aluminum blast gate outlasts plastic gates that warp and leak after a year of shop temperature swings. Mount the gate on the rigid pipe side, not on the flex hose, so the flex does not have to support its weight.
Do not glue joints until you have tested for leaks. Seal seams with aluminum foil tape, not cloth duct tape. Run the collector, feel around each joint, and listen for whistling. Even a 1/16 inch gap at a blast gate drops system CFM by 10 to 15 percent. Tighten clamps, then foil tape.
Step-by-Step Connection
Start with the collector off and unplugged. Position the jointer where the flex whip can make a gentle sweep to the wall, no tight 90-degree kinks. A kinked hose cuts flow by 30 percent or more and creates a permanent chip trap.
Measure and cut your rigid run. Support horizontal pipe every 4 feet with a hanger. Pitch the pipe 1/4 inch per foot back toward the collector if you use PVC so chips do not sit in a belly when the system is off. Connect the rigid pipe to the collector inlet with a short flex coupler to isolate vibration.
Install the blast gate, then drop down to jointer height. Connect your 4-inch flex whip with a worm-drive clamp to the gate on one end and to the jointer port on the other. Leave 6 inches of slack so the jointer can roll or shift without pulling. If your jointer is on a mobile base, leave a full loop of slack, not a taut line.
Grounding is only needed if you use PVC pipe in dry climates. Run a bare copper wire inside the pipe or wrap it helically outside and bond it to the metal jointer frame and the collector frame. Static shocks from PVC are annoying, but the bigger issue is fine dust clinging to the pipe walls and building up. A grounded system sheds less cake inside.
Common Failure Modes and How to Avoid Them
Cabinet clogging under the cutterhead is the most common complaint after hookup. If chips pack against the inside of the port, your hose run is too long, too small, or leaking. Shorten the flex, fix leaks, and open only one blast gate at a time. Do not block the jointer’s makeup air gap. That small slot at the front of the cabinet is intentional; it lets air sweep across the cutterhead. Sealing it for looks kills flow.
Poor fine dust capture at the cutterhead usually means the collector bag or filter is blinded. A single-stage bag collector with a felt bag drops from 800 CFM to under 400 CFM when the bag cakes. Shake or beat pleated filters after every 2 to 3 hours of jointing, and empty the lower bag at 2/3 full, not when it is packed solid. Overfilling forces chips into the filter and permanently raises pressure drop.
Hose collapse happens with thin-wall 4-inch hose on collectors over 1.5 HP. If the hose goes oval when the blast gate is closed, you have too much suction for the hose. Use heavy-wall flex with a rigid helix or add a blast gate with bleed hole at the collector inlet. Never run the collector dead-headed with all gates closed for more than a few seconds; it overheats the motor.
Finally, check the jointer’s internal chute with the machine unplugged. Factory chutes sometimes have sharp sheet metal edges or weld slag that catches stringy shavings from figured wood. File any lip smooth and make sure the port has a straight shot out. That five-minute fix can eliminate chronic clogs even without changing the collector.
What to Buy When You Are Starting From Scratch
If you have a 6-inch benchtop jointer and no collector yet, a shop vac plus a cyclone separator lid on a 5-gallon bucket is acceptable for light use under an hour a week. It keeps the filter clean and you can use the vac elsewhere. Be realistic: you will still sweep chips.
If you own a floor-standing 6 or 8-inch jointer, buy a true dust collector, not a bigger shop vac. A 1.5 HP unit, 10 feet of 4-inch rigid pipe, one aluminum blast gate, and a 5-foot flex whip is a complete system for under 300 dollars in parts if you keep the run short. That setup clears heavy cuts from hard maple without needing to open the cabinet between boards, which is the practical test that it is working.
Do not spend extra on a 6-inch hose for a 4-inch jointer port unless you are plumbing an entire shop with a 2 HP+ collector and a 6-inch main trunk. For a single-machine drop, 4-inch rigid plus 4-inch flex is more velocity where you need it and cheaper than stepping up and back down.