Best Jaw Clamps for Secure, Damage-Free Woodworking
What's inside
- Jaw clamp choices at a glance
- Match the jaw opening to your stock
- Jaw clamp picks by woodworking situation
- Jaw opening is only half the fit
- Pressure, pads, and damage-free clamping
- One-handed operation versus maximum control
- Decision matrix for buying a jaw clamp
- Ownership, maintenance, and common mistakes
- Bottom line
- Jaw clamp choices at a glance
- Match the jaw opening to your stock
- Jaw clamp picks by woodworking situation
- Jaw opening is only half the fit
- Pressure, pads, and damage-free clamping
- One-handed operation versus maximum control
- Decision matrix for buying a jaw clamp
- Ownership, maintenance, and common mistakes
- Bottom line
As an Amazon Associate I earn from qualifying purchases. This post may contain affiliate links at no extra cost to you.
The best jaw clamp for most woodworking is a one-handed quick clamp with a 6- to 12-inch opening, nonmarring pads, and enough throat depth to reach your work; choose a heavier bar or parallel clamp when alignment and pressure matter more than speed.
As an Amazon Associate we earn from qualifying purchases at no extra cost to you.


Contents
- Jaw clamp choices at a glance
- Match the jaw opening to your stock
- Jaw clamp picks by woodworking situation
- Jaw opening is only half the fit
- Pressure, pads, and damage-free clamping
- One-handed operation versus maximum control
- Decision matrix for buying a jaw clamp
- Ownership, maintenance, and common mistakes
- Bottom line
Jaw clamp choices at a glance
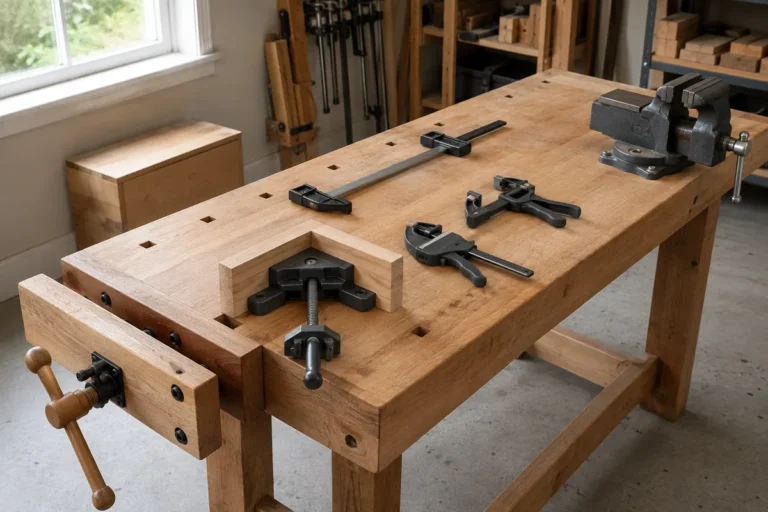
“Jaw clamp” covers several tools that look similar but behave differently. A light quick clamp is convenient for positioning trim and holding small assemblies. A parallel-jaw clamp applies more even pressure across cabinet parts. A pipe clamp provides inexpensive reach for large glue-ups, while a spreader clamp can push parts apart as well as pull them together.
| Clamp type or example | Typical opening | Typical throat depth | Approximate pressure | Best use | One-handed? |
|---|---|---|---|---|---|
| Light-duty quick-grip jaw clamp | 6–12 in | 2–3 in | 100–300 lb | Trim, jigs, small boxes, temporary holding | Yes |
| Heavy-duty quick-grip jaw clamp | 12–24 in | 3–4 in | 300–1,000 lb | General furniture work and thicker stock | Usually |
| Bessey K Body REVO parallel clamp | 12–50 in, depending on model | About 3 3/4 in | Up to about 1,700 lb | Panel glue-ups and cabinet carcasses | No; screw handle |
| Pipe clamp with 3/4-in pipe | Determined by pipe length | About 2 1/2–3 1/2 in | Roughly 700–1,000 lb | Long, inexpensive clamping spans | No; screw handle |
| F-style bar clamp | 4–24 in | 2–4 in | 300–1,200 lb | Versatile assembly and joinery work | Sometimes |
These are useful buying ranges rather than universal ratings. Capacity depends on the specific model, bar length, handle design, and how much force the user can apply. A clamp rated for high pressure can still damage softwood if its pads are small or contaminated with glue.
Match the jaw opening to your stock
Measure the complete clamping stack, not just the thickness of one board. For a face-frame assembly made from two 3/4-inch boards, a 2-inch jaw opening sounds sufficient, but it leaves little room for corner blocks, cauls, or a misaligned joint. A 6-inch jaw opening gives useful working clearance.
A practical sizing rule is:
Required opening = total material thickness + caul thickness + at least 1 inch of working clearance.
For example, a panel made from five 3/4-inch boards is 3 3/4 inches wide at the clamp point. Add two 1/2-inch plywood cauls and 1 inch of clearance:
3 3/4 + 1 + 1 = 5 3/4 inches.
Choose a clamp with at least a 6-inch opening. For repeated panel glue-ups, a 12-inch model is more comfortable because it accommodates thicker cauls and occasional changes in stock size.
Jaw clamp picks by woodworking situation
For small projects and occasional repairs
Choose a 6- or 12-inch light-duty quick clamp. Irwin Quick-Grip clamps are a familiar example of this category, with one-handed trigger operation on many models and removable protective pads. They are fast to position and easy to keep around a small shop, but they are not the best choice for forcing a badly bowed board flat.
Look for a trigger that advances in small increments, a fixed jaw that does not twist under load, and pads broad enough to spread force. A clamp with a spreader function is useful for installing drawer parts or holding a workpiece against a fence.
For cabinet doors, panels, and carcasses
Use a parallel-jaw clamp. The jaws remain broadly parallel instead of pivoting toward each other, so pressure is more predictable and the clamp helps keep panel edges aligned. Bessey K Body REVO clamps are a well-known example. Their large jaw faces and roughly 3 3/4-inch throat depth suit cabinet assemblies, while the screw mechanism provides considerably more pressure than a light quick clamp.
The tradeoff is speed. A parallel clamp takes longer to tighten, costs more, and occupies more storage space. It is worth that inconvenience if you regularly glue panels or need assemblies to stay square while adhesive cures.
For long glue-ups on a budget
A pipe clamp is hard to beat for reach per dollar. Buy clamp heads separately from appropriately sized black or galvanized pipe, then select pipe lengths for the project. This lets you own one set of heads and several inexpensive lengths.
Pipe clamps concentrate force near the jaw, so place them alternately above and below a panel to reduce bowing. Add wooden cauls between the clamp feet and your work. Without cauls, the feet can dent soft pine or leave dark marks, especially when glue makes the surface slippery.
For heavy general-purpose assembly
A sturdy F-style bar clamp is the middle ground. It usually tightens faster than a parallel clamp and reaches farther than a compact quick clamp. Choose one with a forged or reinforced sliding jaw, a comfortable screw handle, and a bar that resists bending. F-style clamps are especially useful for carcass assembly, jigs, doors, and repairs where the jaws do not need to remain perfectly parallel.
Jaw opening is only half the fit
Throat depth determines how far the clamp can reach from an edge. A 12-inch opening with a 2-inch throat may not reach the center of a wide cabinet side, while a shorter clamp with a 4-inch throat may work better for that task.
For edge gluing, throat depth is less important than opening and bar stiffness. For attaching a cleat in the middle of a panel, throat depth becomes decisive. Measure from the panel edge to the point where pressure is needed, then choose a clamp whose throat extends beyond that point without the bar touching the work.
Pressure, pads, and damage-free clamping
More pressure is not automatically better. A joint needs enough force to close the mating surfaces, not enough to squeeze out nearly all the adhesive or crush the wood fibers. Light-duty quick clamps are appropriate for alignment and small joints; screw and parallel clamps are better when a joint has spring-back or a large glue surface.
- Rubber or thermoplastic pads: provide grip and reduce slipping, but may leave impressions under high pressure.
- Soft plastic pads: protect finished surfaces and are easy to replace, though they can deform around sharp edges.
- Wooden cauls: offer the best protection for broad glue-ups. Cover them with packing tape so squeezed-out glue peels away.
- Swivel pads: help a screw clamp seat on angled or uneven surfaces.
Before clamping, check that the pads are clean. A single dried glue chip can create a surprisingly deep dent. On delicate hardwoods, place cauls between every metal or hard-plastic contact point and the finished surface.
One-handed operation versus maximum control
One-handed jaw clamps win when you are positioning a part with the other hand. The trigger or pistol grip makes them excellent for temporary holding, edge-banding support, and work on a ladder or cramped bench. Their limitations are reduced pressure, more jaw deflection, and a greater chance of accidentally over-tightening a soft workpiece.
Screw clamps require both hands more often, but the handle gives fine control over the final pressure. They are preferable for glue-ups that must remain tight for 20 to 60 minutes and for joints where a quick clamp cannot maintain force.
If your projects mix both needs, a practical starter set is four 6- or 12-inch quick clamps plus four 24- to 36-inch screw or parallel clamps. This covers positioning and serious glue-ups without requiring every clamp to do every job.
Decision matrix for buying a jaw clamp
| Your situation | Best choice | What to prioritize | What to avoid |
|---|---|---|---|
| Limited budget, occasional projects | 6–12-in quick clamps | Replaceable pads, reliable trigger, compact storage | Oversized high-pressure clamps you rarely use |
| Beginner assembling boxes and small furniture | 12-in quick clamps plus two F-style clamps | One-handed action and moderate throat depth | Clamps with narrow, unpadded jaws |
| Frequent cabinet or panel work | Parallel-jaw clamps | Jaw parallelism, 3 1/2-in or greater throat, pressure control | Relying only on light trigger clamps |
| Large projects with limited storage | Pipe clamps with interchangeable pipes | Pipe compatibility and removable feet | Buying many fixed-length bar clamps |
| Softwood or finished surfaces | Padded clamp with wooden cauls | Broad contact area and clean pads | Bare metal feet and excessive pressure |
Ownership, maintenance, and common mistakes
The parts that usually wear first are trigger teeth, sliding-jaw locks, rubber pads, and screw threads. Keep bar clamps free of glue and sawdust; wipe them after glue-ups before residue hardens. For screw clamps, brush the threads clean and apply a small amount of manufacturer-approved lubricant when operation becomes gritty. Do not lubricate a sliding bar heavily, because oil can make the jaw slip.
Store clamps with screw handles backed off slightly rather than fully compressed. This reduces unnecessary stress on pads and threads. Replace distorted pads instead of continuing to clamp with exposed hard plastic or metal.
The most common mistake is tightening until the bar bends. Begin with the clamp loose, align the joint, tighten until the seam closes, and then add only enough pressure to keep it closed. Use several moderate-pressure clamps at regular intervals rather than one clamp at maximum force. For a panel, alternating clamp positions above and below the work helps prevent the assembly from curving.
Bottom line
Buy a one-handed 6- or 12-inch jaw clamp for speed and convenience, a parallel-jaw clamp for accurate cabinet and panel glue-ups, an F-style clamp for versatile medium-duty work, or a pipe clamp when long reach matters most. Before comparing brands, confirm the opening, throat depth, pressure range, pad material, and replacement-pad availability against the stock sizes you actually build. That fit-based approach prevents the common mistake of buying a strong clamp that cannot reach the joint—or a convenient clamp that cannot hold it securely.