T-Style vs Biesemeyer-Style Table Saw Fence for Repeatable Cuts
What's inside
As an Amazon Associate I earn from qualifying purchases. This post may contain affiliate links at no extra cost to you.
“T-style” and “Biesemeyer-style” are often used as if they describe two different fence designs. In practice, both usually mean a table saw fence with a tall front rail, a wide steel head that locks at the front, and a fence face that runs parallel to the blade. Biesemeyer is a familiar design name; many current fences borrow its geometry without being made by the original brand.
For repeatable cuts, the name matters less than three things: whether the fence locks squarely without shifting, whether it stays parallel to the blade across its travel, and whether the rails fit your saw. A well-adjusted budget fence can cut accurately. A costly fence cannot compensate for loose mounting, poor alignment, or a blade that wanders.
As an Amazon Associate we earn from qualifying purchases at no extra cost to you.

Contents
What the names mean
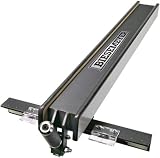
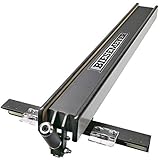
A conventional T-style fence has a head that engages a front rail and locks at the front, typically with a lever or handle. The head’s broad contact with the rail helps it resist twisting. The fence body is often a rectangular steel tube; its face may be steel or an adjustable, replaceable board.
“Biesemeyer-style” commonly refers to this same front-locking arrangement, especially the broad T-shaped head and rectangular rails. It is not a guarantee of a particular tolerance, material, or fit. Some fences sold under that description have different locking hardware, rail dimensions, or fabrication quality. Check the actual fence and installation specifications rather than relying on the label.
Where repeatability comes from
When you set a fence to 3 inches, the important question is whether it remains at 3 inches after you lock it. A fence that shifts 1/32 inch during locking may be acceptable for rough ripping but frustrating when batch-cutting cabinet parts. A fence that locks consistently and can be checked against a ruler or setup block is easier to trust than one with a fine scale but unpredictable movement.
Before buying, inspect how the head clamps the rail, how much adjustment is available, and whether the fence face can be moved or shimmed. A rigid fence should not visibly rock on the rail. Lock it at several positions, including near the far end of the rail, and check that the face stays in line. If the fence toes toward the blade at the back, stock can bind; if it toes away, the cut can vary and a narrow offcut may become trapped.
Fence parallelism is not the only alignment to check. Measure the blade or miter slot against the fence, then verify the fence at both the front and rear of the blade. Many woodworkers set a small amount of clearance at the back—around 0.002 to 0.005 inch—so the fence does not pinch the work against the blade. Follow the saw and fence makers’ instructions, and do not use a setup that causes burning, binding, or kickback.
T-style and Biesemeyer-style compared
| Feature | T-style fence | Biesemeyer-style fence |
|---|---|---|
| Basic layout | Usually front-locking, with a head that engages a rail | Usually the same broad front-locking layout |
| Repeatability | Depends on rail fit, head stiffness, lock action, and setup | Also depends on construction and setup; the label alone proves little |
| Adjustment | May offer adjustable faces and head alignment | Often has similar adjustments, but details vary by maker |
| Main buying risk | Assuming all T-style fences fit or lock equally well | Paying extra for the name without checking dimensions and hardware |
| Best use | Ripping and repeat cuts when the fence holds its setting | The same work; useful when its rail system suits the saw and shop |
Choose for the saw, not the label
Start with the saw’s table width, front and rear mounting points, and the distance you need to rip. A longer rail can increase usable capacity, but it also takes wall space and may need support beyond the table. Confirm whether the package includes rails, mounting brackets, and hardware. Some replacement fences are sold without all the parts needed to install them.
For a contractor or hybrid saw with a light factory fence, a T-square table saw fence system can be a practical upgrade if its rail spacing and mounting scheme match the saw. Measure before ordering, and check whether the maker supports your model. A fence described as universal may still require drilling, shimming, or a custom bracket.
If you want a heavier replacement with a familiar front-locking arrangement, compare Biesemeyer-style fence systems by rail length, head construction, and included hardware. Do not assume a higher price means tighter tolerances. Look for a clear installation drawing and a way to adjust the fence face parallel to the blade.
When the cheaper fence is fine
You do not need a premium fence for every job. If the stock is rough, the cuts are not parts that must match closely, or you mostly crosscut with a sled, a serviceable factory fence may be enough. It is also reasonable to keep a basic fence if it locks without shifting and you can verify its position with a rule, caliper, or setup block.
A budget fence becomes a poor bargain when the head twists as you lock it, the rail flexes under hand pressure, or the fence will not hold parallel after adjustment. Those faults waste material and can make a cut unsafe. Before replacing it, check whether loose mounting bolts or a misaligned rail are the real cause. Tightening and aligning an existing system can solve problems that a new fence would not.
Setup for consistent cuts
Install the rails on a flat, stable surface and follow the supplied spacing measurements. Check that the front rail is level and that mounting bolts are tight. Set the blade parallel to the miter slot first; then align the fence to the slot or blade using the fence maker’s procedure. Lock and unlock the fence several times at different positions, measuring after each lock. If the reading changes, adjust the head or rail before relying on the scale.
For a repeat batch, make a test cut and measure the workpiece rather than trusting the scale alone. Check the first piece, then recheck after moving the fence. Keep hands out of the blade path, use a push stick for narrow stock, and use the blade guard and riving knife where the cut allows. A fence that holds a setting is valuable, but safe feeding and correct alignment still determine whether the cut is repeatable.


