
Best Band Saws for Thin Veneer and Small Parts
What's inside
As an Amazon Associate I earn from qualifying purchases. This post may contain affiliate links at no extra cost to you.
Contents
What Makes Veneer and Small Parts Different
Resawing veneer and cutting small parts puts a band saw under a very specific kind of stress. You are not ripping 8/4 maple or cutting curves in 2-inch bowl blanks. You are trying to hold 1/16″ to 1/42″ thickness over a 6 to 12-inch wide board, or you are cutting parts the size of a domino where any vibration or blade wander ruins the piece. That requires consistency more than raw power.
Two failure modes dominate. First, blade drift and deflection. If the blade twists or bows under feed pressure, your veneer comes out tapered – 0.070″ on one edge, 0.040″ on the other – and you will sand through it trying to flatten it. Second, vibration and poor control. On small parts, a coarse blade with too much set will grab and launch the workpiece, or leave a surface that needs so much cleanup that the part ends up undersized.
As an Amazon Associate we earn from qualifying purchases at no extra cost to you.


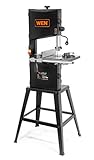
A good veneer saw needs high, even blade tension, a rigid frame that does not flex, precise guides, and a fence that is actually square and adjustable for drift. A good small-parts saw needs a stable table, low vibration at low speed, and the ability to run a narrow blade (1/8″ to 1/4″) with good support.
How Big a Saw Do You Actually Need
Throat depth is often confused with capacity. For veneer, the number that matters is resaw height – the maximum distance between table and upper guides – and the saw’s ability to tension a wide blade.
A 10-inch benchtop saw typically offers 5 to 6 inches of resaw height and can only properly tension a 1/2″ blade if it is a well-built steel-frame model. Most cheap 10-inch saws struggle to tension anything over 3/8″ without frame flex, which shows up as washboard marks and inconsistent thickness. They are fine for small parts and veneer under 5 inches wide, but not for slicing 10-inch wide veneer for panels.
A 14-inch cast-iron frame saw is the sweet spot for most small shops. Standard resaw is around 6 inches, but with a riser block it becomes 12 inches. More importantly, a decent 14-inch saw can tension a 1/2″ or 5/8″ carbon steel or bimetal blade to 15,000+ PSI without deflecting. That is the width you want for veneer. A 17-inch or larger saw does it better, with more power and a heavier table, but you pay for it and you need the floor space.
If you only cut small parts and occasional 4-inch veneer strips for inlay or drawer bottoms, a quality 10-inch saw will save you money and space. If you want to slice your own shop-sawn veneer from 8 to 12-inch wide boards, buy a 14-inch minimum.
Features That Matter for Veneer
Frame rigidity comes first. Look for a steel spine or heavy cast iron, not a stamped sheet-metal box. Push on the upper wheel with the blade tensioned – if you see flex, walk away.
Guides are next. Ball-bearing guides or well-made ceramic blocks both work, but they must adjust close to the blade without touching and stay there. For veneer, you want guides set within 1/32″ above the workpiece and thrust bearings just behind the blade. Cheap guides that slip under vibration will let a 1/2″ blade twist and you will never get a flat cut.
Fence quality is critical. You need a tall, rigid resaw fence that locks parallel and can be micro-adjusted for drift angle. A 6-inch tall fence that leans 0.5 degrees under pressure will give you tapered veneer. Some woodworkers skip the fence and use a single-point resaw guide with a featherboard, which works but requires more skill. For most buyers, a solid band saw resaw fence that stays square is worth paying for.
Power is less important than you think. 3/4 HP is enough for 6-inch resaw in hardwoods if the blade is sharp and the feed rate is slow. 1 HP to 1.5 HP is better for 10 to 12-inch resaw because you can maintain feed without stalling. Variable speed is not needed for wood veneer, but low speed helps when cutting small, delicate parts in dense woods or when using very fine blades.
Dust collection and table flatness also count. A flat cast-iron table with a miter slot lets you use a sled for small parts, which is far safer than pushing tiny pieces by hand against the fence.
Blade Setup Is Half the Battle
The saw is only as good as the blade setup. For veneer, use the widest blade your saw can tension properly – usually 1/2″ on a 14-inch saw. Go with a 2-3 TPI hook tooth, 0.025″ thick carbon steel or bimetal blade with minimal set. Fewer teeth clear sawdust and cut cooler, which reduces wandering in deep cuts. A 3-4 TPI blade will cut smoother but clogs faster in 10-inch cherry or walnut.
For small parts, switch to a 1/8″ to 1/4″ blade with 10-14 TPI. A 1/4″ 6 TPI skip-tooth is a good general small-parts blade. It can still cut gentle curves and does not leave the huge kerf of a resaw blade.
Tension properly. Do not trust the gauge on the saw. Use blade flutter method or a tension gauge if you have one. A 1/2″ blade needs high tension to resist bowing – under-tensioned, it will cut convex veneer that is thick in the middle. Tracking should be centered on the crown of the wheel, and the blade should run without clicking against the thrust bearing when idling.
A sharp 1/2 inch resaw band saw blade 3 TPI will outperform a dull premium saw every time. If your veneer shows heavy tooth marks or requires more than 0.015″ of sanding to clean up, change the blade. Resharpened or cheap blades often have uneven set, which guarantees drift.
Comparison by Saw Size
Here is how the common stationary sizes stack up for these two specific tasks.
| Size Class | Typical Resaw Height | Blade Width It Can Tension Well | Best For Veneer? | Best For Small Parts? | Trade-off |
|---|---|---|---|---|---|
| 10-Inch Benchtop | 5″ – 6″ | 1/4″ – 3/8″ (1/2″ on best models) | Only for veneer under 5″ wide | Excellent – low blade speed, small table is manageable | Low price and footprint, but frame flex limits wide veneer accuracy to +/- 0.020″ or worse |
| 14-Inch Cast Iron | 6″ (12″ with riser) | 1/2″ – 5/8″ | Yes – the practical minimum for 8-12″ veneer | Very good | Best value. Needs tuning out of the box. Riser block adds height but slightly reduces rigidity. |
| 14-Inch Steel Frame (Professional) | 12″ – 14″ | 3/4″ | Excellent | Good, but larger table and higher blade speed can be less delicate | Higher tension and rigidity, holds +/- 0.005″ over 12″ with good blade. Costs 2x a cast 14″. |
| 17-Inch and Larger | 12″ – 16″ | 3/4″ – 1″ | Excellent – most stable for wide, thin slices | Overkill, harder to run 1/8″ blades well | Most accurate, least vibration, but expensive, heavy, and requires 220V. |
What to Buy Based on Your Work
If your budget is tight and you mostly cut small parts, boxes, inlay, and short veneer strips: a well-reviewed 10-inch saw with a cast iron table and bearing guides is fine. Spend the savings on two quality blades – one 1/2″ 3 TPI for resaw and one 1/8″ 14 TPI for detail – and a good aftermarket fence if the stock one is flimsy. Accept that you will not slice full-width 10-inch veneer reliably.
For most furniture makers who want to make their own veneer for panels and doors, a 14-inch saw is the right answer. A standard 14-inch cast model without a riser is more rigid than the same saw with a riser, so if you know you need 10 to 12 inches of height, consider a steel-frame 14-inch that gives it without a riser. Look for at least 1 HP, a 12-inch resaw capacity, and easy guide adjustment. A 14 inch band saw with riser block 1HP is a proven path if you already own a decent 14-inch and need the height later, just re-tune the guides and check coplanarity after install.
Do not chase horsepower or digital features for this work. A 1 HP saw with a perfectly tuned 1/2″ blade, a rigid fence, and slow, even feed pressure will cut flatter 1/16″ veneer than a 2 HP saw with a dull blade and a flexing fence. Test cuts tell you everything: resaw a 6-inch wide piece of soft maple, measure thickness at four corners with calipers. If variation is over 0.010″, adjust tension, guides, and fence drift before blaming the saw.
For small parts safety, add a zero-clearance insert or make one from plywood, use a sled or a small crosscut fixture, and keep the guides low. The cleanest cut does not help if you lose control of a 2-inch piece near the blade.
