How to Dimension Lumber for Cabinet Doors with Stationary Machines
What's inside
As an Amazon Associate I earn from qualifying purchases. This post may contain affiliate links at no extra cost to you.
Contents
What dimensioning means for a cabinet door
Dimensioning is the process of turning rough or oversize stock into straight, flat pieces with consistent thickness and width. For a cabinet door, those pieces are usually rails and stiles for a frame-and-panel door. Accurate, matching parts matter more than hitting an arbitrary finished thickness: a stile that is bowed or a rail that differs in thickness will make assembly and later machining harder.
Start with the door design and hardware. Check the target outside dimensions, joinery, panel groove, and hinge requirements before milling. A common frame might use 3/4-inch-thick stock with rails and stiles 2 to 2 1/2 inches wide, but those are not universal dimensions. Work backward from the drawing, allowing enough extra length and width to remove defects and square the ends later.
Choose and inspect the lumber
Buy stock thicker and wider than the finished parts. For 3/4-inch-thick rails and stiles, 4/4 lumber is often adequate if it is reasonably flat; badly cupped or twisted boards may need thicker stock. Select boards with straight, continuous grain where possible, especially for long stiles. Avoid knots, checks, and grain runout in areas that will be cut into narrow parts.
Let the wood acclimate in the shop before milling. A moisture meter is useful: furniture stock around 6 to 8 percent moisture content is common in heated homes, though local conditions matter. Milling wet lumber to final size invites movement as it dries. If a board changes shape noticeably after a rough cut, leave it to rest before the next pass.
Which machines do you need?
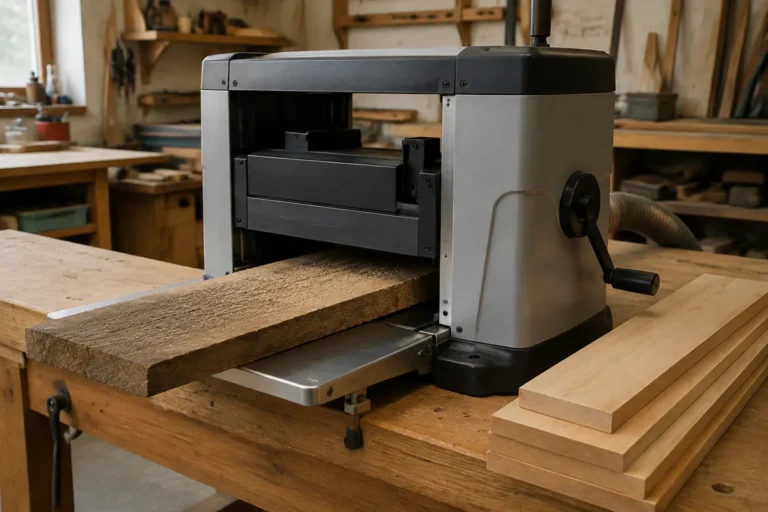
A jointer and thickness planer are the usual combination for preparing solid lumber. The jointer creates one flat face and a square reference edge; the planer makes the opposite face parallel and brings stock to thickness. A table saw then rips parts to width. A band saw can resaw thick stock or remove waste efficiently, but its cut normally needs jointing or planing before it is a reference surface.
| Machine | Useful for | Important limitation |
|---|---|---|
| Jointer | Flattening one face and straightening an edge | Bed length and cutter width limit the size and shape of stock it can handle safely |
| Thickness planer | Making the second face parallel and setting thickness | It will usually reproduce a bow or twist rather than flatten it |
| Table saw | Ripping stiles and rails to consistent width | Needs a straight reference edge; a fence cannot correct a crooked one |
| Band saw | Resawing or rough breakdown | Blade drift and rough surfaces make it a poor final-sizing tool |
If you are buying equipment, a benchtop planer can be a practical choice for small doors, while a long-bed jointer is better for long, warped boards. A planer sled can substitute for a jointer on occasional projects, but it takes more setup and does not establish a straight edge. Compare benchtop thickness planers and woodworking jointers against the longest stock you expect to mill, not just the machine’s advertised capacity.
Mill flat, square, and parallel
Rough-cut each board a few inches longer than the longest part it must yield. If a board is very bowed, first remove some of the curve on the band saw or table saw, leaving enough material for jointing. Do not try to force a badly twisted board flat against the jointer bed; it can spring back and become thinner in the wrong places.
On the jointer, make light cuts—about 1/32 inch is a sensible starting point—and keep the board firmly supported. Joint one face until it is flat, checking with a straightedge. Then place that face against the planer bed and plane the opposite face parallel. Take shallow passes, alternating boards or allowing time between passes if the wood is prone to movement. Bring all parts to a shared thickness, then recheck after a short rest. If the stock moves, flatten again rather than forcing it into assembly.
Joint one edge square to the reference face. Set the table-saw fence for the required width and rip with the jointed edge against the fence. Leave a small margin—often about 1/16 inch—if the design calls for final cleanup, then make the final rip. Use a push stick or push block, keep hands clear of the blade, and use a splitter or riving knife to reduce the risk of the kerf closing and pinching the blade.
Cut parts to final length
After ripping, crosscut rails and stiles to length with a suitable crosscut setup. The table saw can do this with a sled or miter gauge; a band saw is better for rough cuts that will be trimmed afterward. A drill press is not a dimensioning machine, but it can help drill repeatable hardware holes once the door is assembled or accurately laid out. Do not use a fence and miter gauge together on a crosscut unless the offcut can move freely; trapping it can cause kickback.
Make matching parts from the same board section when grain and color matter. Label each piece as you cut it, and measure with a reliable rule or caliper rather than trusting a machine scale for final thickness. Test the first rail and stile against the drawing before making the rest.
Check before assembly
Lay the parts on a flat surface and check for twist, bow, square edges, and consistent thickness. A straightedge should not reveal gaps along a reference face, and a square should sit flush against the jointed edge. Confirm the finished widths at several points; a variation of even 1/32 inch can show at a door joint or alter a groove depth.
Keep a few inches of extra stock until the dimensions are confirmed. That is cheaper than discovering a short stile after the rest of the door is ready. For a one-off door, careful measuring and a planer sled can be adequate; for several matching doors, a jointer, planer, and table saw make repeatable stock preparation faster and easier to verify.