
What's inside
As an Amazon Associate I earn from qualifying purchases. This post may contain affiliate links at no extra cost to you.
The short answer: an accurate table saw fence locks parallel to the blade every time, does not flex under side pressure, glides without binding, and gives you a cursor or scale you can trust after you verify it with a test cut. Most T-square style fences on solid rails meet that standard when they are well built and properly aligned. The most accurate fence in the world is still only as good as its alignment and your technique, so budget time for tuning as well as for the purchase.
Contents
Our Top Picks



Contents
- Why the fence decides your accuracy
- Types of table saw fences
- Rails, tables and mounting
- Features that matter
- How to choose
- Alignment and tuning
- Scales, cursors and calibration
- Safety around the fence
- Maintenance
- Common mistakes
- Who should choose what
- Checklist
- FAQ
- Conclusion
Why the fence decides your accuracy
The blade cuts, but the fence decides where the cut lands. Every rip cut you make depends on the distance between the fence and the blade being the same at the front of the blade as at the back, and on that distance staying put while a board is pushed past. When the fence is a hair off parallel, the cut shows it in different ways. If the rear of the fence points toward the blade, the board is pinched against the teeth, which burns the edge, bogs the motor and raises kickback risk. If the rear angles away, the cut tends to be wider at the back and the board can wander.
A fence also controls repeatability. Furniture and cabinet parts often need a dozen identical widths. If the fence drifts a little each time you lock it, each part will differ a little. A good fence returns to the same place when you lock it, and holds that place under load.
Types of table saw fences
T-square fences
The T-square design clamps to a front rail, usually at one point, with the fence body extending across the table. Locking at the front pulls the fence square to the rail, and a properly adjusted fence ends up parallel to the miter slot. The design is popular because it self-aligns, is quick to move and generally resists deflection when the head is rigid. It is the common choice on higher-end saws and on aftermarket upgrades.
Rear-locking or two-point clamp fences
Some fences lock at both front and rear rails. The rear lock can add stiffness, but it also introduces a second point that must be adjusted correctly. When both ends are properly set, these fences can be very stable, though they may take more effort to move and adjust.
Pipe or tube-style fences
Often found on lighter saws, these fences ride on a tube or rail and lock with a lever or cam. They can be entirely serviceable, but the lighter construction generally allows more flex and more variation in parallelism, and they often need more frequent checking.
Rail-and-sled fence systems for specialized work
Some systems let the fence be set by a micro-adjust knob, or move on linear guides with a measuring scale. Others are built into sliding panel-saw setups. These cost more and offer fine adjustment, which matters when you need very precise repeatable cuts.
| Fence type | Locking method | Stiffness | Ease of adjustment | Typical use |
|---|---|---|---|---|
| T-square | Front clamp, self-squaring | Good to excellent | Quick, smooth | General shop and cabinet work |
| Front and rear lock | Two-point clamp | Very good when set correctly | Slower; more adjustments | Heavy ripping and production work |
| Tube or pipe style | Lever or cam on a rail | Fair; more flex | Simple | Lighter saws and occasional use |
| Micro-adjust or linear-guide system | Clamp plus fine-adjust screw | Very good | Precise, may be slower for large moves | Precision joinery and repeated parts |
| Saw class | Typical rail and table situation | Fence upgrade payoff | Watch for |
|---|---|---|---|
| Portable jobsite saw | Light rails, small table, proprietary mounting | Limited; frame flex sets the ceiling | Compatibility and alignment before each job |
| Contractor-style saw | Tube or angle rails, bolt-on wings | Often large | Wing flatness and rail sag |
| Hybrid or cabinet saw | Heavy front rail, solid table | Moderate; many already have good fences | Rail length for sheet goods |
Rails, tables and mounting
A fence is only as stable as what it clamps to. Front rails must be straight, firmly bolted to the saw and set at the right height so the fence rides just above the table without dragging. A rail that sags, rocks or is poorly mounted makes any fence unreliable. When upgrading, check whether the new fence needs new rails, whether it can use your existing ones and whether the mounting holes match your saw’s cabinet or table.
Rail length decides your maximum rip capacity. Longer rails allow wide panels to be ripped but extend the saw’s footprint and can bump into walls. Think about the widest sheet goods you cut and whether you will break them down with the table saw or with a track saw instead.
Check the table too. The fence rides across the top, and a table with a ridge, burr or gap can cause it to catch. Where a fence crosses extension wings, the wings must be coplanar with the main table, or the fence may rock slightly at certain positions and change the cut.
Features that matter
Rigidity
Press sideways on the end of a locked fence. A rigid fence barely moves, and returns to its original position when released. Lightweight extruded sections can flex more than heavy ones, particularly at the far end.
Locking mechanism
Look for a lock that engages consistently with light effort and does not shift the fence as it tightens. A fence that pulls toward or away from the blade when locked defeats the purpose of fine adjustment.
Glide
The fence should slide smoothly across the full width without catching. Good glide encourages accurate setups and discourages the temptation to leave a fence near its previous position for convenience.
Face material and height
The fence face should be flat, square to the table and smooth. A taller face supports wide stock and makes tall auxiliary faces simpler to mount. Replaceable faces are helpful when they become scratched or damaged.
Adjustability for parallelism
Look for adjustments that let you tweak parallelism to the blade or miter slot, and a way to introduce a tiny offset if you prefer the rear of the fence to sit very slightly away from the blade for rip cuts. Many woodworkers keep the fence exactly parallel; some prefer a barely perceptible toe-out at the rear to reduce binding. Whatever you choose, make the change deliberately and verify it.
How to choose
Start with your saw. Some saws accept a wide range of fences; others use proprietary rails or table configurations. Measure the table, check the rail mounting holes and look at how the saw’s table and cabinet are built. If your saw is a lightweight portable model, a heavy fence may not suit its construction, and the benefit may be limited by a flimsy table or motor mount.
Next, decide how you work. If you rip a lot of long boards, prioritize rigidity and a smooth lock. If you cut many identical parts, think about repeatability and a reliable scale. If you break down sheet goods, think about rail capacity and the support of outfeed tables. If you do precision joinery, a micro-adjust feature may justify its cost.
Then consider your tolerance for tuning. A fence that is well designed and well installed should hold alignment for long periods, but nearly every fence needs checking at first. If you do not enjoy adjusting tools, favor simple designs with well-documented adjustment procedures.
Alignment and tuning
A new fence rarely arrives perfectly set. Alignment is quick once you know the sequence, and it is the single most valuable thing you can do for accuracy.
- Unplug the saw and remove the blade guard if the procedure requires it. Raise the blade to a convenient height and use a blade that is straight and clean.
- Align the blade to the miter slot first. Measure the distance from the slot edge to a tooth at the front and to the same tooth at the back, rotating the blade between measurements. Adjust the trunnions or table per the manual until both readings match. The fence will be aligned to the slot, so the slot must be right first.
- Set the fence rails. Make sure the front rail is level with the table and secure.
- Align the fence to the slot. Lock the fence a short distance from the slot and measure the gap at the front and rear of the fence using a reliable gauge or a combination square. Adjust the fence head or rail until the readings match, or until the rear opens a tiny amount if you choose to use a slight toe-out.
- Check the lock. Tighten the lock and measure again. The fence must not shift when locked.
- Check at several positions. Move the fence closer and farther and verify that parallelism holds across the range.
- Make a test cut. Rip a scrap, measure the width at both ends with calipers, and compare it with the scale. Adjust as needed.
Scales, cursors and calibration
Do not trust a scale by itself. Even good tapes and cursors can be misplaced by a fraction of a millimeter. Calibrate by ripping a test piece, measuring it and setting the cursor to match. Repeat at a couple of widths because the scale may be slightly off at certain positions if rails are not perfectly parallel to the blade.
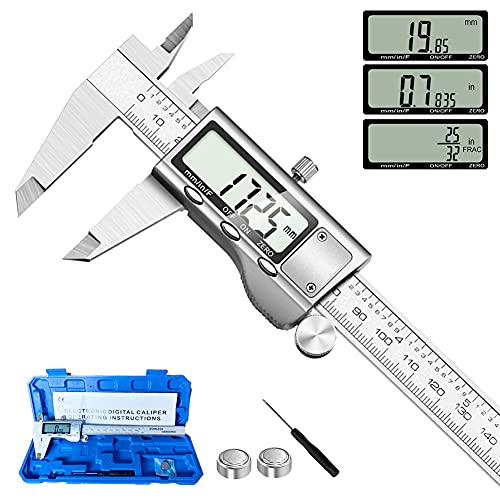
For critical parts, cut a sample, measure with calipers and set stop blocks or spacers from the measured result, not the displayed number.
Safety around the fence
Most severe table saw injuries involve kickback or contact with the blade. The fence is central to both.
- Wear eye and hearing protection, and a dust mask or respirator, especially when cutting sheet goods that produce fine dust.
- Keep the fence parallel to the blade, or with at most the tiny deliberate rear clearance. A fence angled toward the blade traps the board and is a leading cause of kickback.
- Use the riving knife or splitter and blade guard whenever the cut allows. The riving knife keeps the kerf from closing on the back of the blade.
- Use push sticks or push blocks. Keep hands out of the area between the fence and the blade, particularly on narrow rips.
- Never use the fence as a stop for crosscutting a board against the blade. Trapping a cut-off piece between the fence and a spinning blade throws it. Use a miter gauge or sled with a stop block set well away from the blade.
- Stand slightly to the side of the blade, not directly behind the line of the cut.
- Support long boards with outfeed support so they do not tip.
- Only rip stock with one straight, flat edge against the fence and one flat face on the table. Do not rip warped boards freehand.
- Know the electrical requirements of your saw. Many saws need a dedicated circuit, and some need 240 volts; consult a licensed electrician if you are unsure.
Maintenance
Keep the fence body, face and rails clean. Pitch and dust build up on rails, increasing friction and causing the lock to hold unevenly. Wipe the rails with an appropriate cleaner, and apply a dry lubricant or paste wax where the manual allows. Avoid oily lubricants that attract dust. Inspect the lock mechanism and replacement pads, and replace worn plastic wear strips, which affect glide and alignment. Check that rail bolts stay tight and recheck parallelism periodically, especially after moving the saw or after heavy use. Protect the fence face from impacts, and replace it if it becomes scarred enough to catch boards.
Common mistakes
- Aligning the fence before the blade. If the blade is not parallel to the miter slot, a fence aligned to the slot will still be off the blade.
- Trusting the scale without a test cut. Verify with calipers.
- Locking with one hand while the fence is pushed to one side. This shifts the fence. Let the lock pull it into place without pressure.
- Ignoring rail sag or looseness. The fence cannot compensate for unstable rails.
- Using the fence to guide a twisted board. The board rocks, binds and may kick back.
- Neglecting cleaning. Build-up changes the glide and the lock’s consistency.
Who should choose what
The beginner on a basic saw
Start by aligning and tuning the fence you have. If it flexes or will not hold alignment, a quality T-square fence is the most practical upgrade, as long as it fits your saw.
The cabinet and furniture maker
Choose a rigid T-square or micro-adjust fence with solid rails and a dependable scale, and pair it with a sled or digital stop for repeated parts.
The sheet-goods user
Prioritize rail length, outfeed support and a fence that stays rigid at wide settings. Consider a track saw to break down large sheets safely.
The production woodworker
A heavy two-point or high-end system with quick, repeatable locking will pay for itself in time saved.
When you are ready to look at current options, browse aftermarket table saw fences and confirm compatibility with your saw’s rails. Helpful accessories include a dial indicator with a magnetic base, digital calipers and table saw push sticks and push blocks.
Checklist
- Check that your blade is parallel to the miter slot before touching the fence.
- Confirm rails are straight, tight and at the correct height.
- Press sideways on the locked fence to test rigidity.
- Measure the gap between the fence and the slot at the front and rear.
- Verify the fence does not shift when the lock is tightened.
- Check parallelism at several fence positions.
- Make a test cut and measure with calipers.
- Set the cursor to the measured result.
- Clean rails and lubricate according to the manual.
- Install the riving knife and guard when the cut allows.
- Keep push sticks within reach before powering the saw.
- Confirm the saw’s electrical requirements and circuit.
Frequently asked questions
Does a better fence make a table saw more accurate?
Often, yes. A rigid, well-locking fence improves repeatability. It will not fix a misaligned blade or a wobbly arbor, so check those too.
Should the fence be perfectly parallel to the blade?
Parallel to the blade is the standard goal. Some woodworkers add a tiny rear clearance to reduce binding, but never let the rear angle toward the blade.
How do I check fence alignment?
Measure from the miter slot or a blade tooth to the fence at the front and rear, and compare the readings. A dial indicator gives the best repeatability.
Why does my fence shift when I lock it?
Typically the lock is worn, the rails are dirty, or the fence is being pushed as it is tightened. Clean the rails, check wear pads and release hand pressure while locking.
Can I use my old rails with a new fence?
Sometimes. Check the manufacturer’s compatibility information and the rail profile and mounting.
Is a digital readout worth it?
It can improve convenience and readability, but it still needs calibration and test cuts.
Why does the board burn along the fence?
Possible causes include a fence angled toward the blade, a dull or dirty blade, a feed speed that is too slow or resin buildup on the blade.
Can I use the fence for crosscuts?
No, not by itself. Use a miter gauge or crosscut sled. Trapping a cutoff between the blade and fence can launch it.
Conclusion
An accurate fence is rigid, locks parallel and returns to the same place every time. Most of the accuracy you will gain comes from choosing a sound design, mounting it on stable rails and aligning it carefully to a blade that is already parallel to the miter slot. Verify your scale with test cuts, keep the rails clean and use the safe-cutting habits that make kickback unlikely. Do that, and your table saw will cut straighter, more consistently and more safely.
Disclosure: As an Amazon Associate, fdwoodworking.com earns from qualifying purchases. Links marked as sponsored may earn a commission at no extra cost to you.
Related guides
More from Amazon
Programs that pair well with the guide above. Offers and eligibility are set by Amazon and may change.
A free business account with business pricing and bulk-buying tools for work, shop or home office.
Create a business accountFree shipping on eligible items, Prime Video and more. Eligible new members can start with a free trial.
Start a Prime free trialAudiobooks and podcasts to listen to on the go. Eligible new members can start with a free trial.
Try Audible freeAd-free music streaming. Eligible new subscribers can start with a free trial.
Try Music Unlimited freeAs an Amazon Associate we earn from qualifying purchases.

Write Your Review
No reviews yet. Be the first to share your experience!