
What's inside
As an Amazon Associate I earn from qualifying purchases. This post may contain affiliate links at no extra cost to you.
Contents
Our Top Picks
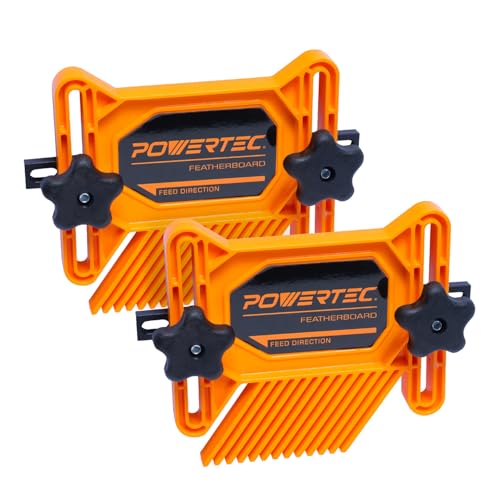 POWERTEC Universal Tandem Featherboards for Table SawFeatherboards (2PCs)10.63 x 7.5 x 2.5 inchesCheck on Amazon


The Short Answer
The best router table is the one with a flat, rigid top, a straight fence that locks square, a secure router mount with easy height adjustment, and effective dust collection, all in a footprint your shop can accommodate. For most hobbyists that means a well-built benchtop table or an open-stand floor table. Frequent door and cabinet makers usually do better with a heavy cabinet table and a router lift. Shop-built tables can beat both if the top is truly flat.
This guide deliberately avoids brand and model names. Products change often, and the decision really turns on type and features. Use the sections below to narrow the field, then read each manufacturer’s own specifications and instructions before you buy.
Table of Contents
- Types of Router Tables
- How to Choose
- Key Features That Matter
- Size, Power and Space Explained
- Common Use Cases
- Setup and Technique
- Safety
- Maintenance
- Common Mistakes
- Who Should Choose What
- Buying Checklist
- FAQ
- Conclusion
Types of Router Tables
Most buying mistakes come from choosing the wrong category rather than the wrong product, so start with the main designs.
Benchtop tables are compact tops that sit on or clamp to a workbench. They suit garages and shared spaces and can be stored on a shelf. Their light weight means more vibration and a tendency to creep unless clamped well, but they handle edge profiles and small joinery fine.
Open-stand floor tables use a full-height frame. They are steadier than benchtop designs and put the top at a comfortable height, but offer little storage and often weaker dust capture unless a shroud is included.
Cabinet tables enclose the router in a box. The enclosure adds mass and allows a dust port near the cutter, and drawers hold bits and wrenches. The cost is floor space and weight, and you should confirm your router has adequate airflow inside the enclosure.
Table saw wings mount a router in the saw’s extension so the saw fence doubles as the router fence. This saves floor space, but access is awkward, the fence is not designed around bit clearance and dust collection is usually compromised.
Shop-built tables are made from sheet goods, a laminated top and a purchased insert plate. They can be sized exactly to your needs, but only work well if the top is flat and the frame is rigid.
| Type | Footprint | Stability | Dust capture | Best for |
|---|---|---|---|---|
| Benchtop | Small, portable | Moderate if clamped well | Usually fence port only | Small shops, light work |
| Open-stand floor | Medium | Good | Fence port, sometimes shroud | Permanent station on a budget |
| Cabinet | Large, fixed | Very good | Fence plus enclosure port | Frequent use and heavy cuts |
| Saw wing | Uses saw space | Depends on saw | Often weak | Tight shops with a large saw |
| Shop-built | Your design | Excellent if built well | Your design | Custom needs, makers |
How to Choose
Start with your shop, not a shopping list. Measure the space and the clear area around it. Work moving along the fence needs room on both sides, so a table that fits against a wall may still be unusable if you cannot feed a long board past it.
Next, decide which router you will mount. Large fixed-base routers with accessible height adjustment and variable speed are the usual choice. Check whether your router base fits the plate or lift directly or needs an adapter, using the manufacturers’ compatibility information.
Then consider how often and how hard you will work. Occasional edge profiling is well served by a good benchtop top. Weekly raised-panel door production justifies a rigid cabinet and a quality lift.
Finally, budget for accessories people forget: a plate or lift, featherboards, push blocks, a dust hose and a proper switch. A cheap table can become expensive once it is safe and pleasant to use.
Key Features That Matter
Top and insert plate
The top should be flat, stiff and slick. Laminated MDF is affordable and flat when new but can sag if unsupported or exposed to moisture. Denser or metal tops are heavier and more stable. The insert plate should sit flush, have leveling screws and offer removable rings, since a smaller opening supports narrow stock better.
Fence
A good fence is straight, rigid and locks parallel to the miter slot. Split faces that adjust close to the bit support the work and reduce tear-out, and a rear dust port captures chips at the cut. If the fence wobbles in your hand, it will wobble in the cut.
Router lift
A lift raises and lowers the bit from above the table, making fine height changes easy. It is not essential, but if you adjust depth often it is the upgrade you will value most. Confirm that it accepts your router motor size according to the manufacturer.
Switch, guard and slots
A large paddle switch within reach is a genuine safety feature. Check its rating against the router’s nameplate current. An overhead guard keeps hands from the cutter and contains chips. A miter slot and T-tracks make sleds, stops and featherboards easier to use.
Size, Power and Space Explained
A larger top supports big panels and gives featherboards room, but takes more of your shop. Choose a top large enough for the biggest panels you commonly run, and add outfeed support for long boards instead of buying a giant top.
Router power is quoted in horsepower or amps, which are not directly comparable between makers. Smaller routers suit roundovers and small profiles. Large bits, such as raised-panel cutters, call for a stronger motor and variable speed, because big-diameter bits must run slower than the router’s maximum, as the bit maker recommends.
Larger-shank bits are stiffer and vibrate less, so use them whenever your collet allows. Space also means hose routing, cord reach and standing room. If the table must go against a wall, orient it so the feed runs along the wall and gives you length. A table on casters is a fair compromise in a shared shop, provided the wheels lock firmly and the table does not rock under fence pressure.
| Work you do | Router size, generally | Top size, generally | Notes |
|---|---|---|---|
| Edge roundovers and chamfers | Smaller is fine | Small to medium | Single light passes |
| Cope-and-stick door frames | Mid to large | Medium to large | Fence stability matters most |
| Raised panels | Large with variable speed | Large with outfeed support | Run slowly, in stages |
| Small parts and trim | Any suitable router | Small | Use sleds and jigs |
Common Use Cases
Edge profiles. It is far easier to keep a part flat and tight to the fence than to hand-guide a router around a tabletop, so roundovers and ogees come out consistent.
Doors and frames. Matched cope-and-stick sets cut the joint and panel groove. Rout end grain first and long grain last so the second pass removes small blowout.
Joinery. Grooves, rabbets, tongue-and-groove and box joints are repeatable when the work is held against a reference.
Small parts and molding. Rout wide stock and rip the molding free instead of profiling a thin strip. Use a sled or push jig for short pieces.
Template work. A bearing-guided bit follows a template to duplicate curved parts. A start pin lets you ease the part into the cut safely.
Setup and Technique
Position the table so you stand square to it with good light. Check the top with a straightedge and adjust the plate until it is flush all round, because a proud plate catches the stock and a recessed one lets it dip.
Unplug the router before changing bits. Seat the shank fully in the collet, back it out a small distance so it does not bottom out, and tighten with the correct wrenches. Spin the bit by hand to check clearance. Use sharp, clean bits, since dull cutters burn, tear and demand force.
Set height with the router unplugged. Start shallow and make large profiles in several passes. Lock the fence at both ends and recheck it, because a creeping fence ruins the cut.
Feed direction is the key technique rule. Feed the work against the bit’s rotation. For a router mounted under a standard table, with the bit turning counterclockwise from above, that means feeding right to left as you face the fence. Feeding with the rotation is a climb cut, which can pull the work from your hands. Confirm rotation in your router manual.
Use featherboards ahead of the bit, never beside it, so they cannot trap the stock. Use push blocks and a backer board at the exit of end-grain cuts. Let the router work at a steady feed; if it bogs or scorches, slow down, check the bit, or reduce depth.
Safety
- Wear safety glasses and hearing protection every time.
- Use dust collection at the fence and enclosure, and wear a respirator suited to fine dust. MDF and some hardwoods are especially unpleasant, and certain species can cause sensitization.
- Unplug the router before changing bits or adjusting by hand.
- Feed against the rotation to avoid climb cuts and kickback.
- Kickback usually follows a dull bit, wrong feed direction, an overly heavy cut, a loose fence or lifting the stock. Stay out of the likely throw path.
- Use push blocks, sleds and featherboards. Never hold small pieces against the bit with bare fingers.
- Keep the guard in place whenever the operation allows it.
- Tie back hair, remove jewelry and avoid gloves near rotating parts.
- Run large bits only at the speed the bit maker recommends.
- Keep the cord clear and a switch within easy reach.
Maintenance
Keep the top clean, since pitch makes stock drag. Use a resin cleaner according to its label. Avoid silicone products if you finish furniture in the same shop, because they can cause finish defects; paste wax, buffed well, is a common alternative.
Clean bits with a bit cleaner and a soft brush, never a metal tool that can nick carbide, and replace any bit with chipped carbide or a bent shank. Clean the collet per the router manual and replace it if worn.
Check the top for flatness now and then and support it so it cannot sag. Tighten stand and fence fasteners, empty the dust collector and keep hoses clear. Chips accumulating inside a cabinet restrict motor airflow and add fire risk, so clear them regularly.
Common Mistakes
- Buying on top size alone while ignoring stand rigidity.
- Accepting a fence that flexes or will not lock square.
- Skipping dust collection.
- Taking a full-depth cut in one pass.
- Feeding the wrong direction.
- Running big bits at full speed.
- Leaving the opening larger than the bit needs, so narrow stock dips.
- Routing tiny parts by hand instead of using a jig or larger blank.
- Leaving the plate slightly proud or recessed.
- Switching the router off but leaving it plugged in during bit changes.
Who Should Choose What
| If you are… | Consider | Watch out for |
|---|---|---|
| A beginner with limited space | Benchtop table, clamped securely | Vibration; keep cuts light |
| A hobbyist with a dedicated corner | Open-stand floor table | Add a dust shroud or hose |
| A frequent door maker | Cabinet table with a lift | Floor space, router compatibility |
| Short on space with a large saw | Saw wing | Awkward access, weak dust control |
| A maker who enjoys jigs | Shop-built table | Top flatness, plate quality |
If undecided, spend first on a rigid, flat top, a reliable fence and dust collection. A lift or bigger router can be added later; a poor foundation cannot be fixed. To compare current options, you can browse router tables, check router lifts and insert plates, and add featherboards and push blocks.
Buying Checklist
- Measure floor or bench space, including infeed and outfeed room.
- Confirm your router fits the plate or lift per the manufacturers.
- Check the top for flatness with a straightedge on arrival.
- Test that the fence locks square and resists hand pressure.
- Look for split fence faces and a fence dust port.
- Choose a plate with leveling screws and interchangeable rings.
- Plan dust collection for the fence and enclosure.
- Add a switch with a large off paddle, rated for your router.
- Budget for featherboards, push blocks and a guard.
- Read the warranty, return policy and safety instructions.
FAQ
Do I need a router lift?
No, but it helps. If you adjust bit height often, a lift saves time and improves accuracy. For occasional use a good plate and an easily adjusted router can be enough.
Can any router go in a table?
No. Choose one the manufacturer says is suitable for table mounting, with reachable height adjustment, a strong collet and ideally variable speed.
Is a benchtop table good enough?
For edge work, small joinery and trim, yes. It becomes limiting with large bits, big panels or all-day use. Clamp it well and take light passes.
What size top do I need?
One that supports your largest common workpiece and leaves room for the fence and featherboards. Add outfeed support for long boards.
How do I reduce tear-out?
Use sharp bits, light passes and a steady feed, back up the exit with a scrap, rout end grain first, and keep fence faces close to the bit.
Which way do I feed the wood?
Against the bit’s rotation. For a typical underside-mounted router that is right to left facing the fence. Verify in your manual.
How should I collect dust?
Connect hoses to the fence port and the enclosure or base. Use a collector or shop vacuum with a suitable filter, and still wear a respirator, since some dust always escapes.
Should I build my own table?
If you enjoy shop projects and have flat sheet material, yes, you can get excellent results. The critical parts are a flat top, rigid frame, quality plate and fence. Otherwise buying complete is simpler.
Conclusion
The best router table is defined by fit, not brand. Look for a flat top, a rigid lockable fence, a secure router mount and dust collection, then pick the type your space and budget allow. Develop good habits: feed against rotation, take light passes, keep hands clear and use hold-downs.
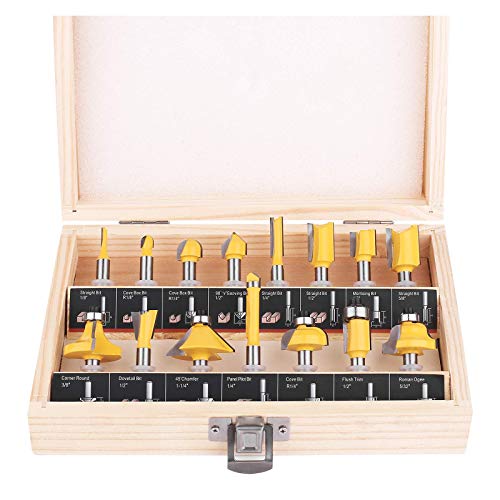
When you are ready to equip the table, see router bit sets that match your collet size.
Disclosure: As an Amazon Associate, we earn from qualifying purchases. If you click an affiliate link and buy, we may earn a small commission at no extra cost to you.
Related guides
More from Amazon
Programs that pair well with the guide above. Offers and eligibility are set by Amazon and may change.
A free business account with business pricing and bulk-buying tools for work, shop or home office.
Create a business accountFree shipping on eligible items, Prime Video and more. Eligible new members can start with a free trial.
Start a Prime free trialAudiobooks and podcasts to listen to on the go. Eligible new members can start with a free trial.
Try Audible freeAd-free music streaming. Eligible new subscribers can start with a free trial.
Try Music Unlimited freeAs an Amazon Associate we earn from qualifying purchases.

Write Your Review
No reviews yet. Be the first to share your experience!