
What's inside
As an Amazon Associate I earn from qualifying purchases. This post may contain affiliate links at no extra cost to you.
Contents
Our Top Picks


The Short Answer
A drum sander is a thickness-sanding machine: it feeds boards under a rotating abrasive drum and removes a small amount of wood per pass. The best one for you is the one with enough width capacity for your panels, a stiff frame, a smooth conveyor feed, a strong dust port and a motor that does not bog down at the cuts you actually take. Hobbyists who flatten glued-up tabletops and doors are usually well served by a benchtop model. Small professional shops that sand wide panels, veneer and cabinet doors every week move toward open-end or heavier stand-mounted machines.
This guide avoids brand names and quoted specifications on purpose. Models change, and the decision depends on type, capacity and features. Always confirm figures such as maximum width, thickness range and motor rating in the manufacturer’s own documentation.
Table of Contents
- What a Drum Sander Does
- Types of Drum Sanders
- How to Choose
- Key Features That Matter
- Capacity, Power and Space Explained
- Use Cases
- Setup and Technique
- Safety
- Maintenance
- Common Mistakes
- Who Should Choose What
- Buying Checklist
- FAQ
- Conclusion
What a Drum Sander Does
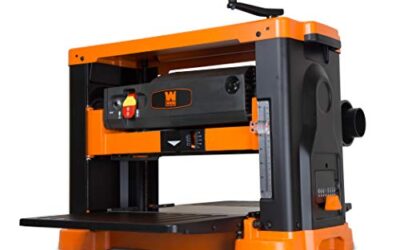
A drum sander has a horizontal cylinder wrapped in an abrasive strip. A conveyor belt or feed rollers pull the workpiece beneath the cylinder, which sits at an adjustable height above the belt. Each pass removes a thin layer, and the result is a surface that is flat and uniform in thickness. That is different from a planer, which uses knives and can tear figured grain, and different from a belt sander, which is a handheld or edge tool.
Where the machine shines is in work that a planer handles poorly: glued-up panels with uneven joints, curly or figured wood that tears out under knives, thin stock, veneered parts, and pieces with mixed grain directions. It is also useful for taking a panel to a final thickness before finishing. It is slower than a planer at removing large amounts of material, so most shops plane first and sand second.
Types of Drum Sanders
Benchtop drum sanders are compact machines with a single drum that is supported at both ends. They are affordable and fit a bench or a stand. Capacity is limited, and they take lighter cuts, but they are well suited to flattening small to medium panels, boxes and door parts.
Closed-stand drum sanders are a heavier version, often with a motor mounted beneath the machine and a stand with storage. They offer stronger frames, more power and often a larger width capacity. They take floor space but run more smoothly.
Open-end drum sanders support the drum at one end only. This lets you sand panels wider than the drum by running the panel through once, flipping it end to end and running it again, with a small overlap. Open-end designs are popular among cabinetmakers and tabletop builders. The cost is a more complicated frame and a need for careful alignment, since the unsupported end must stay level.
Dual-drum and combination machines use two drums, usually a coarse one followed by a finer one, or a drum followed by a platen. This reduces the number of passes and the number of grit changes, and gives a smoother finish. They are larger, heavier and more expensive.
Wide-belt machines are industrial equipment with a belt rather than a wrapped drum. They are outside the typical hobby budget and space, but they are the reference for production shops.
| Type | Width capacity | Footprint | Cut depth, generally | Best for |
|---|---|---|---|---|
| Benchtop single drum | Small to medium | Compact | Light | Small panels, hobby work |
| Closed-stand single drum | Medium | Medium, fixed | Light to moderate | Regular panel and door work |
| Open-end single drum | Large when run in two passes | Medium to large | Moderate | Wide tabletops, cabinet shops |
| Dual drum or drum and platen | Medium to large | Large | Moderate with fine finish | Production, fewer grit changes |
| Wide belt | Very large | Very large | Heavy | Industrial shops |
How to Choose
Begin with the widest panel you realistically build. If your tabletops rarely exceed the width of a benchtop machine, there is no reason to buy more. If you build wide dining tops, an open-end machine can save you from hand-flattening large glue-ups. Think about thickness too, since the machine has a limited range between its minimum and maximum stock thickness, and thin parts may need a carrier board.
Consider the type of wood you use. Hard, dense species and resinous woods load abrasives quickly, so you will want a machine that takes light passes cleanly and offers good dust extraction. Soft woods clog sleeves with fuzz and pitch.
Think about frequency. A weekend woodworker can accept slower, lighter cuts. A shop that sands panels daily should invest in more mass, a stronger motor and a reliable feed system.
Finally, factor in the whole system. A drum sander needs dust collection with real airflow, a place for infeed and outfeed support, a power supply that matches the machine, and a supply of sandpaper strips in several grits. These running costs matter as much as the purchase price.
Key Features That Matter
Frame rigidity and drum alignment
A sander is only as accurate as its frame. The drum must stay parallel to the conveyor bed across its width, or the board will come out tapered. Look for a sturdy frame and a clear way to adjust and check parallelism. Cheaper machines may need more frequent checking.
Conveyor feed
A rubber conveyor belt carries the work. A variable feed speed lets you move slowly for aggressive cuts and faster for finishing passes. The belt should track straight and grip the board without slipping. A belt that wanders or slips leads to burn marks and uneven results.
Height adjustment
Smooth, precise height control lets you take small, repeatable cuts. A crank with a clear scale is common, though digital readouts exist on some machines. Do not trust the scale for final thickness. Measure the board.
Abrasive attachment
Most machines use a strip wound in a spiral around the drum, held by clips or tension. A system that holds the strip firmly and is quick to change saves time and prevents tears. Ask how replacement strips are sold, and in what grits, since you will be buying them often.
Dust port
Drum sanders produce huge quantities of fine dust. A large port, ideally with more than one connection, together with a hood that directs air along the drum, makes a big difference to both visibility and cleanliness.
Motor and overload protection
The motor drives the drum, and often a second motor or a gearing system drives the conveyor. Overload protection, such as a thermal breaker, protects the motor if you take too heavy a cut. Check the electrical requirements before purchase, since some machines need a dedicated circuit.
Infeed and outfeed support
Long boards need support. Extension tables or roller stands help prevent the board from tipping and preventing snipe, a slight dip at the ends of boards.
Capacity, Power and Space Explained
Capacity has three dimensions. Width capacity is the widest board that fits under the drum, or for open-end machines, the width of two passes. Thickness capacity is the range of board thicknesses the machine can accept. Length is mostly limited by your support, not by the machine, but extremely short pieces are dangerous and should be avoided or run in a carrier.
Power affects how deep a cut you can take. A modest motor works well with shallow passes and fine grits. A larger motor handles deeper cuts in wide hardwood panels without stalling. In practice, deeper cuts are not necessarily better. Light passes produce a flatter result, load the abrasive less and are easier on the machine. If you are tempted to take heavy cuts regularly, a planer is the better tool for stock removal, and the drum sander is for refinement.
Space needs include the machine itself plus clear room for the full length of the stock on both sides. A benchtop sander on a bench is easy to place against a wall, but you still need room for long boards to pass through. Floor machines require a dedicated spot and consideration of power, dust hoses and lighting.
| Your priority | Look for | Trade-off |
|---|---|---|
| Wide tabletops | Open-end design | Careful alignment, more cost |
| Small shop footprint | Benchtop single drum | Lighter cuts, narrower capacity |
| Smooth finish with few steps | Dual drum or drum and platen | Size, weight, price |
| Thin stock and veneer | Good feed control and fine grits | Carrier boards may be needed |
Use Cases
Flattening glue-ups. This is the classic job. After gluing boards edge to edge, joints often have small height differences. A drum sander levels them without tearing grain.
Cabinet doors. Rail-and-stile doors have cross-grain joints at the corners, which are hard to sand by hand without leaving dips. A drum sander levels the joints evenly.
Figured and difficult grain. Curly or highly figured wood tends to tear when planed. Sanding avoids that.
Thin stock. Boxes, inlays and resawn pieces can be sanded to a precise thickness, with care and, where necessary, a carrier board.
Veneer and veneered panels. Light passes with fine grits can smooth veneered panels, but veneer is thin and easily sanded through. Take extremely light cuts and check often.
Matching thickness of parts. Small parts for boxes, drawers or inlays can be brought to a matching thickness for tight joints.
Setup and Technique
Level and secure the machine. Check the drum is parallel to the conveyor following the manufacturer’s procedure, and check it again occasionally. Connect dust collection and confirm good airflow before starting.
Wrap the abrasive strip carefully, following the instructions. Begin with a grit appropriate for the job. A coarse to medium grit levels glue-ups and removes planer marks. Finer grits refine the surface. Do not skip too many grits in a row, as deeper scratches from a coarse step may remain.
Inspect the wood. Remove any metal, such as staples or nails, that could tear the abrasive. Make sure the board is reasonably flat and free of loose knots. For boards that are cupped or twisted, flatten one face first, or use a carrier board with shims, since the conveyor will otherwise flatten the board by pressure and it will spring back.
Take shallow cuts. Raise the drum slightly above the thickest point and lower in small steps. Feed the board straight and square to the drum. For glued panels, it often helps to sand diagonally to the grain on the first passes to level joints, then finish with passes along the grain. Alternate the panel end to end to even out the cut and avoid taper.
Feed at a consistent speed. Stopping a board under the drum burns a groove. If the machine slows or the board burns, back off the cut, check the abrasive and clean it. Do not run extremely narrow boards alone. Group several pieces of the same thickness side by side so the abrasive wears evenly, or use a wider board as a spacer.
Always sand in the direction of the grain for final passes, then check the surface by hand and with raking light.
Safety
- Wear safety glasses, hearing protection and a respirator rated for fine dust. Drum sanders generate large amounts of very fine dust.
- Use effective dust collection, and empty the dust bin or bag before it becomes full. Fine wood dust can ignite, so keep it away from sparks and hot surfaces.
- Do not sand wood that may contain metal. Staples and nails can damage the abrasive, create sparks and throw debris.
- Stand to the side of the board while feeding, because boards can occasionally be thrown back by the drum, especially if too thin, short or heavily cut.
- Never stand directly in front of the infeed or outfeed during a pass.
- Keep fingers away from the infeed and the drum. Do not reach under the hood while the machine is running.
- Unplug the machine before changing the abrasive, clearing jams or adjusting internal parts.
- Avoid sanding pieces that are shorter than the machine’s recommended minimum length, as given in the manual.
- Avoid loose clothing, jewelry and gloves near moving parts, and tie back long hair.
- Keep the area around the machine clean, since fine dust on the floor can be a slip hazard.
Maintenance
Clean the abrasive often with a rubber cleaning stick, which removes pitch and dust from the strip, and replace it when it stops cutting. A worn strip burns wood and produces uneven surfaces.
Check the conveyor belt for wear, glazing and tracking. Clean it with a dry cloth or a cleaner recommended by the manufacturer. Keep it free of pitch, which can reduce grip.
Verify drum parallelism every so often, and especially after moving the machine. Inspect bearings and belts according to the manual. Lubricate only the points that the manufacturer specifies, and avoid getting oil on the belt or drum. Empty dust containers and clean filters so airflow remains strong. Keep abrasive strips stored flat or rolled loosely, away from damp areas.
Common Mistakes
- Taking cuts that are too deep. Light passes are faster in the end.
- Treating the sander like a planer for stock removal.
- Feeding boards that still have metal or loose knots.
- Stopping a board under the drum and burning a groove.
- Failing to alternate the board end for end, causing taper.
- Skipping grits and leaving deep scratches.
- Using a clogged strip that burns the wood.
- Ignoring dust collection.
- Sanding through veneer by taking too heavy a cut.
- Forgetting that cupped boards will be flattened by pressure and spring back.
Who Should Choose What
| If you are… | Consider | Watch out for |
|---|---|---|
| A hobbyist flattening small panels | Benchtop single drum | Light cuts, limited width |
| A builder of dining tops | Open-end machine | Alignment, dust collection needs |
| A small cabinet shop | Closed-stand or open-end with variable feed | Power supply and floor space |
| A shop with high volume | Dual drum or wide-belt equipment | Cost and size |
| Someone who only occasionally levels a panel | Hand planing, a router sled or a hand-held sander | Time and skill needed |
To compare current options, you can browse drum sanders, stock up on drum sander abrasive strips, and pick up a dust collector that can keep up.
Buying Checklist
- Measure your widest panel and your typical thickness range.
- Decide whether you need an open-end design for wide tops.
- Check the manufacturer’s stated minimum board length.
- Confirm voltage and circuit requirements for your shop.
- Look for variable feed speed and smooth height adjustment.
- Verify that the abrasive attachment system is quick to use.
- Confirm strips are available in several grits.
- Plan dust collection with strong airflow.
- Plan infeed and outfeed support for long boards.
- Read warranty terms and safety instructions.
FAQ
Is a drum sander the same as a planer?
No. A planer uses knives and removes material quickly. A drum sander removes small amounts with abrasive, and is gentler on figured grain.
Do I need a drum sander if I have a planer?
Not always. A drum sander is most helpful for glued panels, figured wood and thin stock. Many shops use both.
What grit should I begin with?
Match the grit to the job. Use a coarser grit for leveling and a finer one to finish. Follow the manufacturer’s advice on grit ranges for your machine.
Why do my boards come out tapered?
Usually the drum is not parallel to the conveyor. Recheck alignment and alternate board orientation.
Why does the wood burn?
Common causes are a clogged or worn strip, too deep a cut or feeding too slowly. Clean or replace the abrasive and reduce depth.
Can I sand very thin stock?
Often yes, with light passes and good support, and sometimes a carrier board. Follow the machine’s stated minimum thickness.
Can I sand veneer?
You can, but with caution. Veneer is thin and can be sanded through quickly. Use fine grit, extremely light cuts and check the surface often.
How much dust collection do I need?
Plenty. Use the largest ports on the machine and a collector with strong airflow and good filtration, and still wear a respirator.
Conclusion
The best drum sander is the one that fits your panels, your wood and your space. Choose a type based on width capacity and frequency of use, insist on a rigid frame, a steady feed and strong dust collection, and plan to use it with light cuts and fresh abrasive.
When you are ready to get started, you can find abrasive rolls and sanding supplies that match your machine.
Disclosure: As an Amazon Associate, we earn from qualifying purchases. If you click an affiliate link and buy, we may earn a small commission at no extra cost to you.
Related guides
More from Amazon
Programs that pair well with the guide above. Offers and eligibility are set by Amazon and may change.
A free business account with business pricing and bulk-buying tools for work, shop or home office.
Create a business accountFree shipping on eligible items, Prime Video and more. Eligible new members can start with a free trial.
Start a Prime free trialAudiobooks and podcasts to listen to on the go. Eligible new members can start with a free trial.
Try Audible freeAd-free music streaming. Eligible new subscribers can start with a free trial.
Try Music Unlimited freeAs an Amazon Associate we earn from qualifying purchases.


Write Your Review
No reviews yet. Be the first to share your experience!