Best Baby Monitors With Two Cameras
What's inside
As an Amazon Associate I earn from qualifying purchases. This post may contain affiliate links at no extra cost to you.
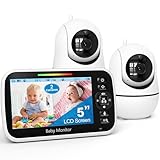
The best baby monitors with two cameras for most families are a split-screen, local-video system if you want to watch two rooms without relying on Wi-Fi; choose a pan-and-tilt model when one camera needs to cover a larger room, or a connected system when checking in from outside the home matters more than keeping video off the cloud.
The key trade-off is how you want to see both feeds. A dedicated parent unit can show two cameras at once, while many phone-based systems make you switch between camera views or offer split-screen only on certain plans or app versions. Before buying, confirm that the exact model supports simultaneous viewing—not merely pairing two cameras.
As an Amazon Associate we earn from qualifying purchases at no extra cost to you.


Contents
Quick picks by household
- Two rooms, no dependable Wi-Fi: Choose a dedicated-monitor system with a parent unit and confirmed split-screen support. It keeps routine viewing local and does not depend on your home internet connection.
- One large or awkwardly shaped room: Prioritize remote pan and tilt. A fixed second camera may be more useful than paying extra for two cameras that cannot cover the crib and play area from one position.
- Check-ins while away from home: Choose a Wi-Fi system with secure account access and clear policies for video storage. Check whether remote viewing requires a subscription.
- Small budget: Consider a basic two-camera kit with a fixed view and local parent unit. Spend first on reliable simultaneous viewing and night vision, not decorative features.
Two-camera monitor types compared
Exact specifications vary by kit, region, and hardware revision. The figures below describe common configurations rather than guarantees for every bundle; check the product’s current manual before purchase, especially for screen size, battery life, and camera compatibility.
| System type | Typical display and viewing | Camera movement | Connection and storage | Best fit |
|---|---|---|---|---|
| Dedicated parent-unit kit, such as a VTech VM924-2 | About 5-inch parent screen; check whether the bundle shows both feeds simultaneously | Remote pan/tilt on supported camera models | Direct camera-to-monitor link; typically local viewing without cloud video storage | Families who want a separate screen and straightforward two-room monitoring |
| Dedicated split-screen kit, such as a Babysense Max View bundle | About 5-inch parent screen; designed for viewing multiple cameras on one display | Depends on camera included in the bundle | Local parent-unit viewing; verify the included cameras and maximum supported count | Caregivers who want both rooms visible without tapping between feeds |
| Wi-Fi camera system, such as Nanit Pro with a second camera | Phone or tablet screen; app features can change and may vary by plan | Typically fixed-view camera; confirm the current model’s movement features | Home Wi-Fi and account access; cloud features or history may require a subscription | Families who value app access and are comfortable managing connected devices |
| Indoor Wi-Fi cameras, such as two compatible TP-Link Tapo pan/tilt cameras | Phone app; simultaneous view options depend on the current app and camera models | Remote pan/tilt on supported models | Wi-Fi; local microSD recording is available on some models, with cloud services optional | Budget-conscious households already comfortable with app-based cameras |
Brand examples are starting points, not interchangeable kits: a two-camera bundle may include different camera models or omit a feature found in a single-camera package. Confirm that the parent unit, cameras, and any accessories are all included.
What matters most when comparing two cameras
Split-screen versus scan mode
Split-screen displays both camera feeds at the same time. Scan mode cycles between cameras, so each is visible only briefly. If you need to monitor two sleeping spaces at once, look for explicit “split-screen” or simultaneous-view language in the manual. Also check whether split-screen works with audio from both cameras, one selected camera, or neither; many systems show both pictures but play sound from only one feed.
Pan and tilt: useful, but not a substitute for placement
Remote pan and tilt let you reposition a camera from the parent unit or app. That helps in a wide room or when a fixed camera misses part of the intended viewing area. It can also create a blind spot when the camera turns away. If you need continuous views of two separate rooms, two fixed cameras are usually more predictable than one movable camera. Mount cameras securely and follow the manufacturer’s placement and cord-safety instructions; keep cords well away from a child’s reach.
Night vision, range, and connection
Infrared night vision is common on both dedicated and Wi-Fi monitors. Look for a clear night image and a way to disable status lights if they are distracting. Range claims are usually measured under favorable conditions; walls, floors, metal framing, and nearby wireless equipment can reduce practical range. A dedicated monitor avoids dependence on the home internet connection, but still has a limited radio range. Wi-Fi cameras can be viewed remotely, but depend on a working network for that access.
Temperature alerts are a prompt to check, not a room-control system
Some cameras report room temperature or alert when a reading passes a set threshold. Treat this as a rough room reading: placement near a window, heating vent, exterior wall, or electronics can affect it. Compare the reading with a separate room thermometer if it seems unexpected. A monitor’s alert does not regulate temperature or replace your usual judgment about a comfortable sleep environment.
Local recording versus cloud storage
Local-only systems commonly send live video to a paired parent unit without saving a cloud video history. That can mean fewer account and subscription decisions, but it also means there may be no playback if you miss an event. Wi-Fi cameras may offer microSD recording, paid cloud history, or both; these are not the same thing as live viewing. Check what happens during an internet outage, whether recordings are encrypted, who can access the account, and whether cloud features stop when a trial or subscription ends.
Choose by your actual setup
| Your situation | Prioritize | Likely compromise |
|---|---|---|
| Two rooms and frequent simultaneous checks | True split-screen, clear audio controls, two included cameras | Smaller images on a divided screen |
| One large room with changing viewing needs | Pan/tilt, a wide field of view, stable mounting | Camera movement temporarily changes what is in view |
| Unreliable internet or preference for fewer accounts | Dedicated parent unit and local transmission | No convenient remote check-in or cloud playback |
| Caregivers who need access away from home | Wi-Fi access, account security, clear storage terms | Dependence on internet, app support, and potentially a subscription |
| Lowest overall cost | Two-camera bundle with required functions included | May have fixed cameras, a smaller screen, or fewer recording options |
Check the true cost before ordering
Compare the complete setup, not just the advertised starter kit. A useful calculation is:
Total first-year cost = monitor kit + any extra camera + required memory card or mount + subscription fees.
For example, if a Wi-Fi camera bundle costs $150, an added camera costs $70, and a cloud plan costs $5 per month, the first-year total is $280 before tax: $150 + $70 + (12 × $5). A local parent-unit kit priced at $220 with no required subscription would cost less over that year, even if its initial price is higher than the starter bundle. These are illustrative figures; actual prices vary, and some systems do not require paid plans.
Setup details that prevent common frustrations
- Test both feeds in their final locations. Check split-screen, sound selection, and signal stability before relying on the monitor overnight.
- Check the second-camera cost and compatibility. Matching brand names do not guarantee that a camera works with every parent unit or generation.
- Place temperature sensors thoughtfully. Avoid vents, direct sun, and warm electronics so readings are less affected by local heat.
- For Wi-Fi models, secure the account. Use a unique password, enable two-factor authentication if offered, update firmware, and review who has shared access.
- Plan for battery wear. Parent-unit batteries are consumables; runtime can decline with age, a bright screen, and continuous video. Check whether the unit can operate while plugged in and whether replacement batteries are available.
Bottom line
For two rooms and dependable viewing at home, start with a dedicated parent-unit kit that confirms true split-screen support and includes both cameras. Choose pan/tilt when a single room’s layout calls for repositioning, and choose Wi-Fi when remote access or recording matters enough to accept app, network, and privacy trade-offs. The best choice is the one whose exact bundle, display behavior, and storage policy fit the way you will use it—not simply the one with the longest feature list.