Best Pocket Hole Joinery Tools for Strong, Accurate Assembly
What's inside
As an Amazon Associate I earn from qualifying purchases. This post may contain affiliate links at no extra cost to you.
The best pocket hole joinery tools for most woodworkers are the Kreg 720PRO for frequent, repeatable work, the Kreg 520PRO for compact versatility, the Milescraft PocketJig200 for budget projects, and a basic drill-and-clamp setup for occasional repairs.
Your choice should depend less on brand and more on four practical factors: whether you work with plywood, solid wood, or composite board; how accurately the jig controls hole depth; how quickly it can be adjusted; and whether it supports the board thicknesses you use most often.
As an Amazon Associate we earn from qualifying purchases at no extra cost to you.



Contents
Best pocket hole joinery tools at a glance
| Tool or system | Best for | Supported material thickness | Typical hole size | Setup characteristics | General market range |
|---|---|---|---|---|---|
| Kreg 720PRO | Frequent cabinet and furniture assembly | 1/2 to 1 1/2 inches with adjustment | 3/8-inch pocket hole with stepped bit | Fast positioning, integrated clamping | $150–$220 |
| Kreg 520PRO | Portable work and mixed project sizes | 1/2 to 1 1/2 inches | 3/8-inch pocket hole | Folding body, manual clamp | $70–$110 |
| Kreg K4 or K5 | Benchtop batch production | 1/2 to 1 1/2 inches | 3/8-inch pocket hole | Dedicated base, repeatable stops | $100–$180 |
| Milescraft PocketJig200 | Budget-conscious occasional users | 1/2, 3/4, and 1 1/2 inches using marked settings | 3/8-inch pocket hole | Manual positioning and clamping | $35–$60 |
| Basic single-hole jig | Repairs and very small projects | Usually 1/2 to 1 1/2 inches | Often 3/8-inch pocket hole | Slowest; requires separate clamp and stops | $15–$35 |
These are practical ranges rather than universal limits. Always match the jig’s thickness markings, drill-bit collar, and screw chart to the exact model. A pocket-hole system is only accurate when all three are correctly set.
Head-to-head: which jig fits your situation?
Best for speed and repeatability: Kreg 720PRO
The Kreg 720PRO is the strongest choice when you assemble cabinets, face frames, drawers, or furniture regularly. Its integrated clamping mechanism holds the workpiece while drilling, which reduces the time spent positioning a separate clamp. The movable drill guide also makes it easier to place holes near the center of narrow or wide boards.
Its main advantage is not simply a larger capacity; it is reduced setup variation. When making twenty identical frame joints, consistent board placement matters more than saving a few dollars on the jig. The trade-off is size, price, and a larger footprint than a compact portable jig.
Best portable all-rounder: Kreg 520PRO
The Kreg 520PRO suits woodworkers who move between a workbench, job site, and temporary assembly table. It supports common material thicknesses from 1/2 to 1 1/2 inches and folds for storage. The manual clamping action takes slightly longer than the 720PRO, but it gives good control over small and irregular parts.
Choose it when you need one capable jig but do not make hundreds of identical joints each month. It is also a practical option for repairing existing furniture because it is easier to position than a large benchtop unit.
Best for a fixed workshop: Kreg K4 or K5
The K4 and K5 are designed around a dedicated benchtop workflow. Their bases and material supports help keep long boards level, while the adjustable stop system makes repeated joints predictable. They are particularly useful for face frames and cabinet components where the same thickness and hole spacing recur throughout a project.
The K5 generally offers more convenient positioning and material support, while the K4 can be attractive when purchased at a lower general market price. Neither is the most space-efficient choice if you work in a small apartment or pack your tools away after every use.
Best lower-cost option: Milescraft PocketJig200
The Milescraft PocketJig200 is a sensible entry point for occasional pocket hole joinery. Its marked thickness settings simplify basic work with 1/2-, 3/4-, and 1 1/2-inch stock. It typically includes a clamp and accessories, making the initial system cost lower than buying a jig, clamp, stepped bit, and driver bit separately.
It is slower for batch production because positioning and clamping are more manual. For a bookshelf, garden project, or a few cabinet repairs, that limitation is usually acceptable. For repeated production, the time saved by an integrated or benchtop system can outweigh the initial price difference.
Material compatibility matters more than the label
Pocket hole joinery works especially well in plywood, kiln-dried softwood, hardwood, and medium-density fiberboard when the screw length and driving force are controlled. The joint depends on the screw pulling one board tightly against another, so the material must hold threads adequately.
- Softwood: Use the standard coarse-thread pocket screw. Avoid excessive driver torque, which can strip the hole.
- Hardwood: Use fine-thread screws and drill at the recommended speed. A pilot effect from the stepped bit reduces splitting, but pre-clamping remains important.
- Plywood: Pocket holes work well, but keep the hole away from a thin edge or a weak veneer layer.
- MDF and particleboard: Use conservative torque and avoid repeatedly removing and reinstalling screws in the same hole. These materials have weaker thread retention.
- Thin stock: A 1/2-inch board requires the correct jig setting and usually a shorter screw. A standard 1 1/4-inch screw can break through the face if the thickness setting is wrong.
For painted or visible work, plan hole locations before drilling. Pocket holes are normally placed on hidden faces, inside cabinets, or on the underside of a tabletop. Plugs and adhesive-backed covers can conceal them, but they rarely disappear completely on clear-finished wood.
How to do pocket hole joinery accurately
- Measure the actual board thickness. Do not rely only on the nominal label. A board sold as 3/4 inch may measure about 11/16 inch after surfacing.
- Set the jig and drill-bit collar to that thickness. The guide position and collar must agree. If the collar is too far from the bit, the screw may emerge through the face.
- Select the screw by material and thickness. Match coarse or fine threads to the material, then use the manufacturer’s length chart.
- Clamp the work firmly. Clamping prevents the board from lifting and keeps the pocket-hole exit point consistent.
- Drill until the collar contacts the guide. Do not force the bit after it stops. Let the bit clear chips periodically when drilling several holes.
- Dry-fit the joint. Check that edges align and that the screw will not collide with another fastener, shelf pin, or opposing pocket hole.
- Drive the screw with controlled torque. A variable-speed drill or impact driver on a low setting is safer than full power. Use a square-drive bit that fully engages the screw head.
For long boards, use a face clamp or bar clamp across the joint before driving the screw. This prevents the common “walking” error, where the screw pulls one board sideways and leaves an uneven seam. A small amount of wood glue can strengthen the assembly, but glue should supplement—not replace—accurate clamping and screw placement.
Drills, clamps, and screw systems to budget for
A jig alone does not make a complete pocket hole system. You will normally need a stepped drill bit, depth collar, square-drive bit, a clamp, and screws. Many kits include the first three items, but replacement bits and screw assortments become recurring ownership costs.
| Accessory | Useful specification | Why it matters |
|---|---|---|
| Stepped drill bit | 3/8-inch pocket-hole profile | Creates the clearance and pilot sections in one operation |
| Square-drive bit | 2-inch or longer extension | Reaches recessed screws without chuck interference |
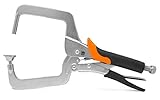
| Face clamp | 2 to 3 inches of practical jaw capacity | Stops joint surfaces from shifting during driving |
| Drill | Variable speed, low-torque control | Reduces stripped holes and overdriven screws |
| Pocket screws | 1, 1 1/4, 1 1/2, and 2 1/2 inches are common sizes | Covers thin panels through thick framing stock |
As a rough budgeting example, an occasional user buying a $45 jig kit, a $15 replacement bit, and a $12 assortment of screws spends about $72 initially. If that setup makes 120 joints over several projects, the jig-and-consumable cost is about $0.60 per joint, excluding the drill and wood. A high-end system becomes more economical when its faster positioning saves substantial labor across hundreds of joints.
Durability and maintenance realities
The first parts to wear are usually the stepped drill bit, driver bit, clamp pad, and plastic guide surfaces. A dull drill bit creates heat and rough holes; a worn driver bit damages screw heads and encourages cam-out. Replace bits when drilling becomes noticeably slower or the pocket opening becomes ragged.
- Brush or vacuum chips from the guide after each batch.
- Check that the depth collar has not moved before changing board thickness.
- Keep clamp faces clean so they do not mark finished boards.
- Do not use a pocket-hole bit as a general-purpose drill bit.
- Store screws by thread type and length to prevent accidental substitutions.
For most home workshops, the best buying decision is simple: choose an integrated benchtop jig for frequent repetitive work, a folding jig for portability, and a basic kit for occasional assembly. Spend the remaining budget on accurate replacement bits, a reliable face clamp, and the correct screw assortment; those accessories have as much effect on joint quality as the jig itself.
Frequently asked questions
Can pocket hole joinery replace traditional mortise-and-tenon joints?
Not in every application. Pocket holes are fast and effective for many cabinet, face-frame, and furniture assemblies, but exposed structural or highly decorative joints may call for mortise-and-tenon, dowel, biscuit, or splined construction.
Why did the screw break through the front face?
The jig or bit collar was probably set for a thicker board, the screw was too long, or the hole was placed too close to the edge. Re-measure the stock, reset the collar, and use the manufacturer’s screw chart.
Should I use glue with pocket screws?
Glue is useful when the mating surfaces are clean and accurately aligned. It should not be used to compensate for loose joints, incorrect screw length, or movement during assembly.