Table Saw vs Planer for Dimensioning Narrow Hardwood Strips
What's inside
As an Amazon Associate I earn from qualifying purchases. This post may contain affiliate links at no extra cost to you.
Dimensioning a narrow hardwood strip usually means getting two things right: a consistent width and a consistent thickness. A table saw and a planer can both remove material, but they solve different parts of the job. For most narrow strips, the table saw is the better buying choice for width, while the planer is the better finishing machine for thickness.
As an Amazon Associate we earn from qualifying purchases at no extra cost to you.


Contents
What each machine actually does
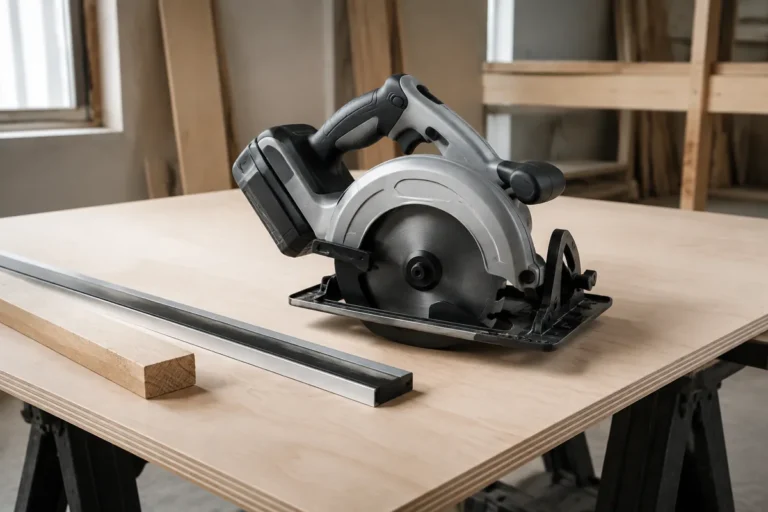
A table saw cuts along the length of the workpiece. With a reliable fence, it can turn a rough board into strips with repeatable widths, such as 1/2 inch, 3/4 inch, or 1 inch. It can also rip a board close to final width before another machine removes the remaining unevenness.
A planer cuts across the face of the board as the board passes beneath a rotating cutterhead. It makes the top surface parallel to the bottom surface and brings the board to a consistent thickness. It does not reliably make a narrow strip a precise width. Feeding a thin strip on its edge is unsafe and generally outside the intended use of the machine.
That distinction matters. If your project calls for 3/4-by-1/2-inch hardwood edging, the table saw establishes the 3/4-inch width. The planer can establish the 1/2-inch thickness, but only after the strip has enough width and support to pass through safely.
Table saw versus planer for narrow strips
| Task or concern | Table saw | Planer |
|---|---|---|
| Set a repeatable width | Excellent with a stable fence | Not its job |
| Set consistent thickness | Possible, but slow and less refined | Excellent |
| Process rough boards | Limited by flatness and safe support | Good after one face is flattened |
| Very narrow stock | Requires a push block, featherboard, or auxiliary fence | Usually unsuitable below the manufacturer’s minimum dimensions |
| Typical waste | Kerf waste, often about 1/8 inch per cut | Shavings, with possible extra passes for snipe |
| Main failure mode | Burning, drift, kickback, or a tapered strip | Snipe, tear-out, or feeding problems |
When a table saw is the better purchase
Buy a table saw first if your main work involves ripping boards into narrow strips. A decent contractor-style or jobsite saw can hold a fence setting within a small fraction of 1/16 inch when the fence locks parallel to the blade and the stock has a straight reference edge.
For strips under about 1 inch wide, do not rely on your hand alone to keep the work against the fence. Use a push block, push stick, and a featherboard positioned before the blade. A tall auxiliary fence is useful for thin stock because it gives the workpiece more bearing surface. Keep your hands well away from the blade and never retrieve a strip while the blade is spinning.
Very narrow ripping has a practical limit. A 1/8-inch strip may be possible, but the risk of burning, drift, and kickback rises sharply, especially in dense maple, cherry, or exotic hardwood. A table saw thin-rip guide or a dedicated thin-strip jig can keep the narrow piece on the safe side of the blade, rather than trapping it between the blade and fence.
Expect the saw to leave a surface that may need light sanding or a finishing pass. A sharp, appropriate blade makes a large difference. For general hardwood ripping, a 24-tooth or 30-tooth ripping blade removes stock quickly; a combination or finer blade leaves a cleaner edge but feeds more slowly.
When a planer earns its place
A planer is the better purchase if you already have a way to create one flat face and your problem is thickness. It is especially useful when making many identical strips. Once the cutterhead is set, a planer can bring ten or twenty pieces to nearly the same thickness far faster than repeated table-saw adjustments.
Do not put a bowed, twisted, or badly cupped board straight into the planer and expect a flat result. The planer copies the shape of the bottom face as it cuts the top. Flatten one face first with a jointer, router sled, or carefully made planer sled. A benchtop thickness planer is adequate for small-shop strip work, but check its published minimum thickness and width before buying.
Common minimum thickness limits are around 1/4 inch, but the exact number varies. Narrow, thin strips can lift, twist, or stall under the cutterhead. Never feed a strip on edge to make it narrower. If the material is too narrow for the planer’s bed and feed rollers, laminate several strips into a wider carrier board, plane the assembly, then separate them. The carrier must be flat, and the strips must not be able to shift into the cutterhead.
A safer workflow for narrow hardwood
Start with a board wide enough to handle safely. Flatten one face and joint one edge if the board is rough. Rip strips slightly oversize on the table saw—about 1/32 inch wider than the final dimension is usually enough. This leaves room to remove saw marks without wasting excessive stock.
If thickness must be reduced, plane the wide board before ripping whenever possible. This is safer and more stable than trying to plane individual narrow pieces. Bring the board close to final thickness, then rip the strips to width. If the strips need identical final thickness after ripping, use a carrier or follow the planer’s minimum-size requirements.
For final sizing, use a sharp blade and take light passes. Hardwood strips can spring slightly after ripping as internal stress is released. Cut a test strip first, measure it at several points, and adjust the fence rather than assuming the board stayed straight. A digital caliper is more useful here than a tape measure; a difference of 0.010 inch can show clearly in a glued-up panel or inlay.
The practical buying decision
If you can buy only one machine, choose a table saw for making narrow strips. It directly controls width, handles long stock better, and is useful for far more operations. A planer becomes the better first purchase only when you regularly process rough lumber and need uniform thickness across boards or batches of strips.
If you already own a table saw, adding a planer is worthwhile when hand-planing or sanding thickness is consuming hours. If you already own a planer but lack a safe ripping setup, buy a proper table saw push block and featherboard kit before attempting very narrow cuts. The cheaper option is fine when your strips are wider than about 1 inch and only a few pieces are needed; careful layout, a sharp blade, and sanding may do the job without another stationary machine.