
What's inside
- Contents
- What a jointer planer combo actually is
- The main types of combo machines
- How to choose: start with your lumber and space
- Key features that matter
- Size, power and electrical requirements
- Setup and tuning
- Safety on a combination machine
- Maintenance
- Common mistakes
- Who should choose what
- Buying checklist
- Frequently asked questions
- Conclusion
- Contents
- What a jointer planer combo actually is
- The main types of combo machines
- How to choose: start with your lumber and space
- Key features that matter
- Size, power and electrical requirements
- Setup and tuning
- Safety on a combination machine
- Maintenance
- Common mistakes
- Who should choose what
- Buying checklist
- Frequently asked questions
- Conclusion
As an Amazon Associate I earn from qualifying purchases. This post may contain affiliate links at no extra cost to you.
The short answer: the best jointer planer combo for a home woodworker is the one that fits your floor space, your electrical supply and the width of the boards you actually mill. A combination machine saves a great deal of room because one cutterhead and one motor do two jobs, but it asks you to accept a changeover every time you switch from flattening a face to thicknessing. If you mill rough lumber a few times a month and cannot spare the footprint of two machines, a combo is a sensible purchase. If you mill large volumes or wide slabs every week, two dedicated machines usually serve you better.
Contents
- Contents
- What a jointer planer combo actually is
- The main types of combo machines
- How to choose: start with your lumber and space
- Key features that matter
- Size, power and electrical requirements
- Setup and tuning
- Safety on a combination machine
- Maintenance
- Common mistakes
- Who should choose what
- Buying checklist
- Frequently asked questions
- Conclusion
Our Top Picks
 Hoteche 10-Inch Benchtop Planer and Jointer Combo with36.22" x 13.38" x 16.14"36.22 x 13.38 x 16.14 inchesCheck on Amazon

Contents
- What a jointer planer combo actually is
- The main types of combo machines
- How to choose: start with your lumber and space
- Key features that matter
- Size, power and electrical requirements
- Setup and tuning
- Safety on a combination machine
- Maintenance
- Common mistakes
- Who should choose what
- Buying checklist
- FAQ
- Conclusion
What a jointer planer combo actually is
A jointer and a thickness planer solve different problems. The jointer creates one flat face and then one square edge, giving you a reference surface. The planer uses that reference face to cut the opposite face parallel to it. Neither machine does the other’s job well. A planer on its own will copy a twisted or cupped board into a thinner twisted or cupped board, because the feed rollers press the stock flat while cutting and the board springs back afterward.
A combination machine puts both operations in one cabinet. In the common European-style design, a single cutterhead sits between two tables. With the infeed and outfeed tables in place, the machine joints; lift or swing those tables away, and a thicknessing bed positions the board under the same cutterhead for planing. You get one motor, one set of knives, one dust port and a much smaller footprint than two stand-alone machines.
The trade-off is the changeover. Depending on the design, switching modes can take under a minute or involve several steps, such as raising tables, moving a fence and relocating a dust hood. If you flip between modes constantly, a clumsy changeover becomes a daily irritation. If you joint a batch of boards, switch once and plane the whole batch, it barely matters.
The main types of combo machines
Under-and-over combination machines
These use a single cutterhead with the jointer bed on top and the thicknessing bed below. Switching modes means moving or tilting the tables, and often changing where the dust is extracted. They are the most space-efficient design. Because the cutterhead is shared, a nick in one knife shows up in both jointed and planed surfaces.
Flip-over or sliding table designs
Some combos flip or slide the tables aside instead of lifting them. Check that they return to exactly the same position each time.
Full cabinet-style combo machines
At the larger end are heavy floor-standing machines with long cast-iron tables, wider capacity and bigger motors. They approach dedicated-machine performance and suit serious hobbyists, but they need a dedicated spot, often a stronger electrical supply and a plan for moving something heavy into the shop.
| Type | Footprint | Capacity | Changeover | Best suited to |
|---|---|---|---|---|
| Under-and-over combination | Small to moderate | Medium widths | Moderate; tables and dust hood move | Garage or basement shops milling rough lumber regularly |
| Flip or slide table | Small to moderate | Medium widths | Low to moderate | Woodworkers who alternate modes in a session |
| Benchtop-scale | Very small | Narrow boards, short tables | Usually simple | Tiny spaces, occasional milling of narrow stock |
| Full cabinet-style | Largest | Wide boards, long tables | Moderate | Serious hobbyists with a dedicated corner and stronger power |
How to choose: start with your lumber and space
Begin with a short written description of what you mill. How wide is the widest board you expect to flatten? How long is the longest? Do you buy rough lumber by the board or in bulk? Do you use mostly softwoods and poplar, or dense hardwoods?
Width is the first filter. A jointer can flatten a board only up to its cutting width. Many woodworkers glue up narrower boards for wide panels, so a moderate cutting width is plenty for them. If you regularly want to flatten one wide board for a tabletop, a narrow machine will force you to rip it first or flatten it by hand.
Length is the second filter, and table length matters more than most buyers realize. Long tables support a long board across its full length, so the cutter removes high spots progressively and leaves a straight surface. Short tables tend to follow the curve of a bowed board. If you mill boards longer than the tables, plan on infeed and outfeed support such as roller stands set to table height.
Space is the third. Measure the room not only for the machine but for the boards passing through it. A jointer needs clearance at both ends roughly equal to the longest board you will feed. Many people buy a machine that physically fits but can only be used with the garage door open. Sketch the footprint, then add feed clearance and working room beside it.
Key features that matter
Table flatness and rigidity
Cast iron tables are valued for mass and stability, while lighter machines use aluminum or fabricated tables that can work well but may be more sensitive to handling. Check with a reliable straightedge that the tables are coplanar once adjusted, and look for adjusters that lock firmly instead of drifting under pressure.
Cutterhead type
Straight knives are inexpensive and can be sharpened, but they are fussy to set and nick easily. Indexable carbide inserts can be rotated to a fresh edge when one gets damaged. Helical-style heads shear the wood at an angle, which typically gives a smoother surface on figured grain and is generally quieter, though they cost more up front. The right choice depends on how much figured wood you work and how much you value low-fuss maintenance.
Changeover design
Does conversion require tools? Can it be done with one hand? Are there interlocks that prevent the motor from starting while a guard is out of position? A well-designed changeover returns the tables to the same position every time.
Dust and chip handling
Jointing and planing produce far more shavings than sanding or routing. A combo should have a dust port sized for a dust collector hose and ideally a way to redirect chip flow when switching modes. Good evacuation prevents clogging, which prevents snipe, scoring and burned wood.
Size, power and electrical requirements
Motor power affects how deep you can cut in one pass and how well the machine handles dense hardwoods. A modest motor can take light passes through hardwood if you are patient. A stronger motor bogs down less, although a heavy cut is rarely what produces the best surface anyway.
Electrical requirements deserve real attention. Many smaller machines run on a standard 120-volt household circuit, but they can draw substantial current at startup and under load, and a breaker may trip if the machine shares a circuit with lighting or a dust collector. Larger combos commonly require 240 volts. Check the machine’s nameplate for voltage and amperage, compare it with the circuit’s breaker rating, and consult a licensed electrician if you need a new circuit or are unsure about wire gauge, outlet type or breaker size. A dedicated circuit is the better long-term answer than an extension cord.
| Shop situation | Suggested approach | Main advantage | Main limitation |
|---|---|---|---|
| Very small shop, occasional milling | Compact combination machine | Saves space and cost | Narrower boards, shorter tables |
| Garage shop, regular furniture projects | Full-size combo on a mobile base | Real jointing capacity in one footprint | Changeover time and weight |
| Dedicated shop, weekly heavy milling | Separate jointer and planer | No changeover; each tuned to one task | Twice the room and outlets |
| Mostly buys surfaced lumber | Planer alone, or hand tools for occasional flattening | Lowest cost and footprint | Cannot reliably flatten warped stock |
Setup and tuning
A new machine is a starting point. Shipping can disturb alignment, so budget an hour or two before cutting anything you care about.
- Level the machine and clean the coating. Shim the feet so it does not rock, and remove shipping grease with a solvent the maker recommends.
- Check table coplanarity. Lay a straightedge across the tables and confirm the outfeed table height matches the top of the knife arc. This is the most important jointer adjustment. An outfeed table that is too low cuts a taper at the end of the board; one that is too high leaves a step at the start.
- Set knives or inserts following the manufacturer’s procedure and torque guidance. Uneven knife height shows up as ridges.
- Square the fence to the table with a reliable square, then adjust the stop so you can return to that setting.
- Calibrate the thickness scale. Plane a test board, measure it with calipers at several points and adjust the scale to match.
- Test on scrap in each mode before committing real lumber.
A reliable milling sequence helps. Place the cupped face down so the board does not rock, joint one face flat from end to end, then joint one edge square to it. Switch modes, plane the opposite face to thickness, and finally rip the remaining edge parallel on a table saw. Feed so the cutter rises with the grain, and take light final passes to limit tearout.
Safety on a combination machine
Jointers and planers are among the more hazardous machines in a shop, and a combo concentrates both hazards in one cabinet.
- Wear eye and hearing protection every time. Chips are thrown at speed and these machines are loud. A respirator or dust mask is strongly advisable, since fine wood dust irritates the lungs and some species are sensitizers.
- Use push blocks and push pads on the jointer. Never pass your hand directly over the cutterhead, and move pressure to the outfeed table once the board is supported there.
- Keep guards in place and put them back after each conversion. Do not defeat an interlock.
- Do not joint or plane stock that is too short or too thin. It can be pulled into the cutterhead or thrown. Check the manual for minimum dimensions.
- Inspect lumber for nails, screws and grit. Reclaimed boards in particular can damage cutters and eject debris.
- Unplug the machine before changing knives, clearing a jam or adjusting internal parts.
- Control dust. Use collection suited to the chip volume. Fine dust is a health hazard and, in high concentrations, a fire risk.
- Avoid loose clothing, gloves and jewelry, and tie back long hair.
Kickback can occur on a planer if a board binds, and on a jointer if stock is lifted or fed incorrectly. Stand to the side of the feed path rather than directly behind a board being planed, and never reach into the machine while the cutterhead is spinning.
Maintenance
Because one cutterhead does two jobs, its condition affects everything the machine produces. Clean resin and pitch from tables, rollers and the cutterhead with a cleaner made for the purpose; buildup causes boards to drag and burn. Wipe cast surfaces and apply paste wax, which also helps prevent rust in humid shops.
Inspect knives or inserts often; a small nick leaves a thin ridge on every surface. Rotate or replace damaged inserts and knives, lubricate threads and slides as the manual directs, and check belts, cord and switch for wear. Recheck table and fence alignment after moving the machine, and empty the chip bin before it packs.
Common mistakes
- Buying on width alone. A wide machine with short tables may flatten less accurately than a narrower one with long tables.
- Ignoring the changeover. A slow, multi-tool conversion means the machine gets used less than you planned.
- Skipping dust collection. A combo can fill a shop vacuum in minutes.
- Planing without jointing first. A planer does not flatten a twisted board.
- Feeding wet or very knotty lumber. Wet stock gums cutters, and loose knots can be ejected.
Who should choose what
Apartment, basement or tight garage
A compact combination machine is likely right, provided your boards are narrow enough. Choose a straightforward changeover and a good dust port, and glue up narrow boards for wide panels.
Weekend furniture maker
A full-size combination machine with long tables is often the sweet spot: respectable capacity for tabletops and casework in a single footprint. Plan a proper electrical supply and a dust collector.
High-volume hobbyist
Two separate machines save time because there is no changeover and each is tuned for its task.
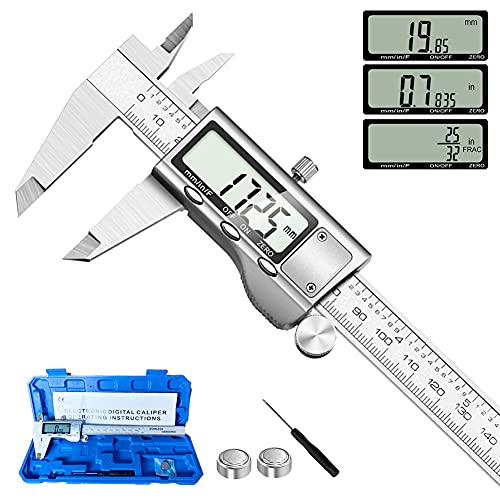
When you are ready to compare options, browse jointer planer combination machines and read the specifications for table length, cutting width and electrical needs. Useful extras include jointer push blocks and push pads, digital calipers for calibrating thickness, and a dust collector sized for planer chips.
Buying checklist
- Measure the widest and longest boards you plan to mill and compare them with cutting width and table length.
- Measure floor space, including feed clearance at both ends.
- Check voltage and amperage against your circuit and arrange a dedicated circuit if needed.
- Confirm how the machine converts between modes.
- Compare cutterhead types and replacement costs.
- Inspect the fence for rigidity, locking and adjustable stops.
- Verify a dust port and chip plan for both modes.
- Confirm guards and interlocks come standard.
- Read the warranty and check parts availability.
- Plan outfeed support for long boards.
- Buy push blocks, eye and hearing protection and a respirator before the first cut.
- Set aside time to align and test on scrap.
Frequently asked questions
Is a jointer planer combo as good as two separate machines?
For most home woodworkers a good combo is entirely adequate. Separate machines win on convenience for heavy use, but a combo delivers the same result, a flat reference face and consistent thickness, in much less space.
What size combo do I need?
It depends on the widest board you plan to flatten. If you glue up panels from narrower boards, moderate width is fine. For wide single boards, choose greater capacity and long tables.
Can a combo flatten a warped board?
Yes, if you joint one face first. Badly twisted or cupped boards may need to be cut shorter or ripped narrower, and you will lose some thickness.
How long does the changeover take?
It varies by design. Review the manual or the maker’s demonstrations so you understand the steps and can judge how often you will switch.
Do I need a dust collector or will a shop vacuum do?
A shop vacuum may handle a small machine in short sessions but fills quickly and clogs. A dust collector with a properly sized hose handles the volume better. Wear a respirator either way.
Do I need a 240-volt circuit?
Not always. Smaller combos often run on 120 volts; larger ones commonly need 240. Check the nameplate and consult a licensed electrician if unsure.
Are helical cutterheads worth it?
Many woodworkers like them for the smoother finish on figured wood, lower noise and rotatable inserts, but they cost more. For straight-grained species, standard knives remain sound.
Can I mill very short or thin pieces?
Take care. Short or thin stock can be pulled in or ejected. Follow the manual’s minimums and cut small parts from a longer, safely milled board instead.
Conclusion
A jointer planer combo is a practical way for a home woodworker to get a flat face, a square edge and consistent thickness without the floor space of two full machines. The right choice follows from honest answers to a few questions: how wide and long are your boards, how much room and electrical capacity do you have, and how often will you switch modes? Choose long, flat tables, a rigid fence, a manageable changeover and a sound dust plan. Set it up carefully, follow the safety rules and maintain the cutterhead, and a combination machine can turn rough lumber into dependable stock for years.
Disclosure: As an Amazon Associate, fdwoodworking.com earns from qualifying purchases. Links marked as sponsored may earn a commission at no extra cost to you.
Related guides
More from Amazon
Programs that pair well with the guide above. Offers and eligibility are set by Amazon and may change.
A free business account with business pricing and bulk-buying tools for work, shop or home office.
Create a business accountFree shipping on eligible items, Prime Video and more. Eligible new members can start with a free trial.
Start a Prime free trialAudiobooks and podcasts to listen to on the go. Eligible new members can start with a free trial.
Try Audible freeAd-free music streaming. Eligible new subscribers can start with a free trial.
Try Music Unlimited freeAs an Amazon Associate we earn from qualifying purchases.

Write Your Review
No reviews yet. Be the first to share your experience!