Jointer vs Planer For Beginners
Key takeaways
- A criteria-led look at jointer vs planer for beginners, covering what each machine really does and which one earns bench space first.
What's inside
- Jointer vs Planer for Beginners: Which One Earns the Space First
- The Mechanical Criteria That Actually Separate Good From Bad
- Helical Cutterheads, Straight Knives, and Where the Money Goes
- When the Jointer Becomes the Right Purchase
- The Milling Sequence That Prevents Most Beginner Frustration
- Frequently Asked Questions
- The Verdict
- Jointer vs Planer for Beginners: Which One Earns the Space First
- The Mechanical Criteria That Actually Separate Good From Bad
- Helical Cutterheads, Straight Knives, and Where the Money Goes
- When the Jointer Becomes the Right Purchase
- The Milling Sequence That Prevents Most Beginner Frustration
- Frequently Asked Questions
- The Verdict
As an Amazon Associate I earn from qualifying purchases. This post may contain affiliate links at no extra cost to you.
Almost every beginner asks the wrong version of this question. It is rarely “which machine is better,” because a jointer and a thickness planer do not compete. They perform two different halves of the same job. The reason jointer vs planer for beginners comes up so often is that lumber from a home center looks flat, feels flat, and then cups, twists, or bows within a week of sitting in a heated shop. At that point glue lines open up, case sides rock on the bench, and no amount of clamping pressure fixes it.
Here is the short version before we get into criteria. A jointer creates one flat face and one straight edge, square to each other. A planer takes that flat reference face and cuts the opposite face parallel to it at a chosen thickness. A planer alone cannot flatten a twisted board, because its rollers press the workpiece against the bed and it springs back after the cut. A jointer alone cannot produce boards of consistent thickness across a project. Understanding that split is the whole decision.
As an Amazon Associate we earn from qualifying purchases at no extra cost to you. Product prices and availability are accurate as of the date shown and are subject to change.




| Machine | What it actually does | What it cannot do | Typical beginner footprint |
|---|---|---|---|
| Jointer | Flattens one face, straightens one edge, squares edge to face | Make two faces parallel or set thickness | 6 in benchtop or 6-8 in floor-standing |
| Thickness planer | Cuts the second face parallel, dials in exact thickness | Remove cup, twist, or bow on its own | 12-13 in benchtop, portable |
| Planer plus sled | Flattens a face using a shim jig | Handle long or wide stock efficiently | Same as planer |
| Track saw or table saw | Straight-line rips an edge | Flatten a face | Already common in most shops |
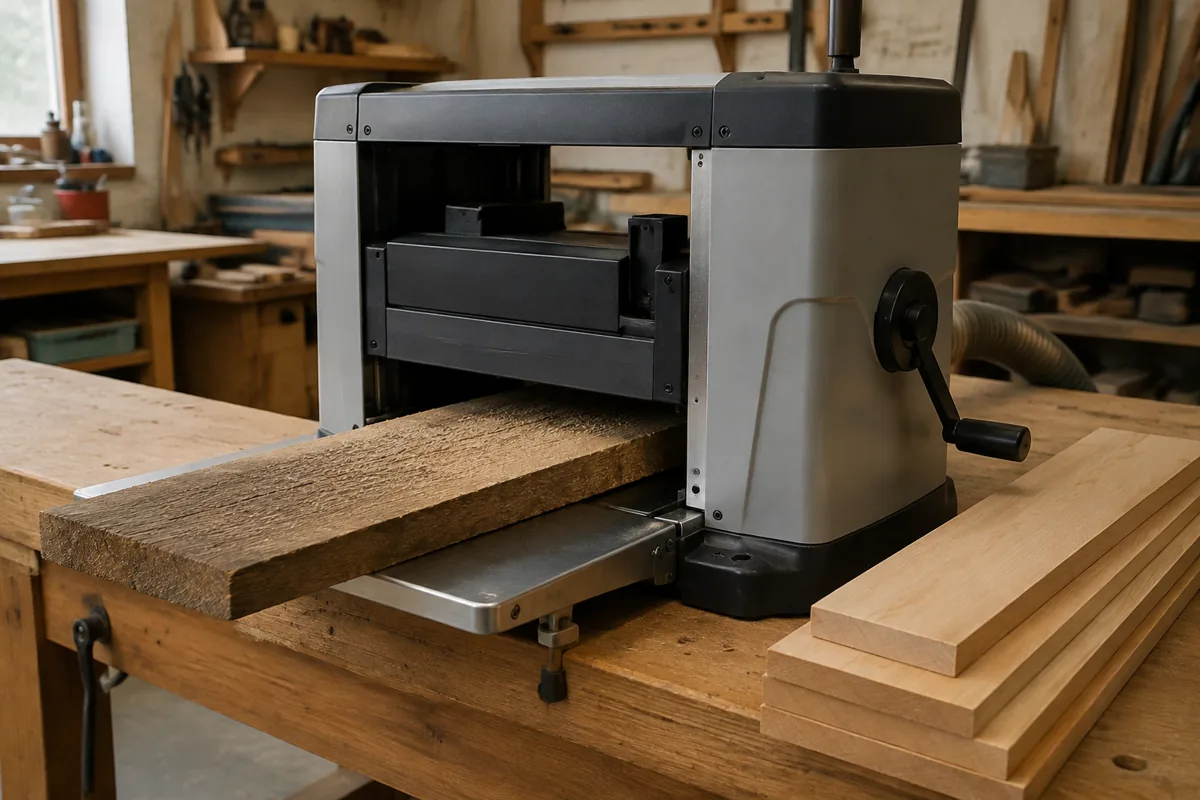
Jointer vs Planer for Beginners: Which One Earns the Space First
Our position, and it is not a popular one on forums, is that most beginners should buy the planer first. Not because it is the more capable machine in a milling sequence, but because the jointer’s job can be substituted with jigs and saws far more easily than the planer’s job can. You can flatten a face on a planer with a shop-made sled and hot glue shims. You can straighten an edge with a track saw, a table saw jig, or a hand plane and a winding stick. What you cannot easily fake is bringing six boards to identical thickness within a few thousandths, repeatably, in an afternoon.
There is also a lumber-supply argument. If you buy surfaced-two-sides material and only fight seasonal movement, a planer plus a sled covers you. If you buy rough-sawn stock from a local mill, which is where the real savings live, you will eventually want both machines. The sequence still starts with the planer for most people because rough stock at least gets you to a usable thickness, whereas a jointer alone leaves you with a nice flat face and a board that is still tapered.
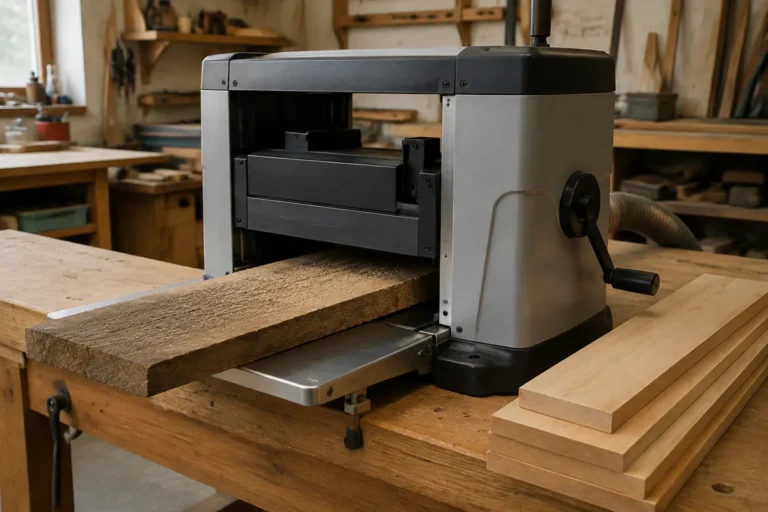
Benchtop thickness planer, 12 to 13 inch class
This is the category that changes the most for a beginner. Look for a two-post or four-post design with a positive cutterhead lock, a real dust port rather than a stamped hole, and reversible carbide-insert or double-edged knives you can actually source. Snipe is normal and largely manageable with infeed support and a slight lift at the ends. Ignore horsepower marketing and check the feed rate and knife-change procedure instead.
The Mechanical Criteria That Actually Separate Good From Bad
We judge both machines on hardware you can inspect, not on advertised specs. On a jointer, the fence is the single biggest differentiator. It needs to be genuinely flat along its length, tall enough to support a board on edge, and it must lock at ninety degrees without creeping under load. A fence that flexes when you press a board against it will produce a rocking, out-of-square edge no matter how sharp the knives are. The second criterion is table coplanarity. Infeed and outfeed tables must sit in the same plane, and on cheaper machines the adjustment is either a wedge-bed casting or a pair of eccentric dovetail ways. Wedge beds hold their setting better over time.
On a planer, the criteria shift to the cutterhead lock and bed support. A cutterhead that can lift under cutting pressure is the primary cause of severe snipe, and a mechanical lock is worth more than any anti-snipe marketing claim. Bed extensions should be adjustable and stay where you put them. Look at the dust port geometry too, because a planer produces an astonishing volume of chips and a poorly angled port will pack solid in a single pass on wide stock.
Vibration is the third criterion for both. A benchtop machine with a stamped sheet-metal base will walk across a workbench and transmit chatter into the cut surface. Cast-iron mass helps, and so does bolting a lighter machine to a torsion-box stand. If you can rock the machine by hand, you will see the result in the surface finish.
Helical Cutterheads, Straight Knives, and Where the Money Goes
Segmented helical cutterheads with carbide inserts are now available across most of the price range, including as aftermarket upgrades. They are quieter, they leave a cleaner surface in figured wood, and rotating a dull insert takes a hex key instead of a knife-setting jig. The tradeoff is a slightly scalloped surface that needs sanding or a final hand-plane pass on show faces, plus a real cost premium.
Straight knives are not obsolete. On a well-tuned machine with a properly seated set, they leave a surface that can go almost straight to finish. The catch is that they nick easily on hidden grit and mineral streaks, and a nick shows up as a raised line down every board in the run. For a beginner buying used, factor in a fresh set of knives as part of the purchase price.
- ✔ Planer first covers thickness consistency, which jigs cannot replicate
- ✔ A planer sled plus a track saw or table saw jig substitutes for a jointer on most beginner projects
- ✔ Helical insert heads dramatically reduce maintenance frustration
- ✔ Benchtop planers store on a shelf and roll out only when needed
- ✘ A planer alone cannot flatten cupped or twisted stock without a sled
- ✘ Jointer-substitute jigs are slow and get tedious past a few boards
- ✘ Both machines demand serious dust collection, not a shop vac on a small hose
- ✘ Six-inch jointers limit you on wide panel stock, so many owners upgrade twice
When the Jointer Becomes the Right Purchase
The jointer moves to the front of the line under three conditions. First, if you are buying rough-sawn hardwood in quantity and milling regularly, the sled workflow becomes a bottleneck fast. Second, if you build casework and glue up wide panels, edge jointing quality directly determines whether your glue lines disappear. Third, if you have already solved edge straightening some other way but keep fighting twist, a jointer is the direct fix.
For width, six inches is the entry point and the source of most regret. Most furniture-width boards get ripped and re-glued anyway, so six inches is workable, but an eight-inch machine with a longer bed handles the boards you actually want to keep whole. Bed length matters more than beginners expect. Short beds cannot reference a long board, which is why a five-foot board on a two-foot bed tends to come out with a gentle curve.
Six-inch jointer, benchtop or floor-standing
Check the fence before anything else. Sight along it with a straightedge, confirm it locks square without deflection, and make sure the height adjustment does not shift the fence out of plane. Longer beds reference longer stock, so prioritize bed length over cosmetic features. Benchtop models save space and can do good work on shorter pieces, but they will frustrate you on anything over about four feet.
The Milling Sequence That Prevents Most Beginner Frustration
Order of operations matters more than machine choice. Let rough lumber acclimate in the shop for at least a week, longer if it came from an unheated warehouse. Cut parts roughly to length first, because a shorter board has less twist to remove and wastes less thickness. Flatten one face, either on the jointer or in a planer sled. Run the opposite face on the planer until you have two parallel faces. Then joint one edge and rip the second edge parallel. Do the final thicknessing in light passes, alternating faces if you can, so moisture exposure stays even and the board does not cup overnight.
Mill in two stages when the project allows. Take stock close to final dimension, let it sit a day or two, then take the last thirty-thousandths. Boards move as internal stress releases, and that second pass is the difference between flat parts and parts that need coaxing at glue-up.
Frequently Asked Questions
Can I use a planer without a jointer? Yes, and many people do for years. Build a planer sled from a stiff piece of plywood or MDF, shim the board’s high spots with hot glue and thin wedges so it cannot rock, and run the assembly through to flatten the up-facing side. Flip the board, remove the sled, and plane the second face parallel. It is slower than a jointer and awkward past four or five feet, but the results are genuinely flat.
Do I need both machines for a simple project like a cutting board or shelf? Not usually. Surfaced-two-sides poplar, maple, or oak from a home center will build a shelf fine if you select carefully, sighting down each board and rejecting anything with visible cup or twist. The machines earn their keep when you start buying rough lumber, building furniture that must sit flat, or gluing panels where every joint shows.
Is a benchtop jointer good enough to start with? For short parts, yes. The limitation is bed length rather than cutter width. A benchtop jointer will edge-joint drawer sides and small frame stock well, but it cannot reference a long board, so table aprons and door stiles will come out with a slight bow. If space and budget force the choice, a benchtop jointer paired with a hand plane for long edges is a reasonable compromise.
The Verdict
Buy the thickness planer first. It solves the problem that jigs cannot solve, it stores on a shelf, and paired with a shop-made sled and a straight-line ripping method it will carry you through a surprising number of projects. Add a jointer when the sled workflow starts costing you more time than the machine costs money, and when you get there, buy on fence quality and bed length rather than on cutterhead marketing. Judge either machine by whether the fence stays square under load, whether the tables are coplanar, whether the cutterhead locks positively, and whether the dust port can move the volume of chips these tools produce. Those four criteria predict satisfaction better than any spec sheet.
Check prices on Amazon →