80-Tooth vs 60-Tooth Table Saw Blade for Crosscutting Cabinet Parts
What's inside
As an Amazon Associate I earn from qualifying purchases. This post may contain affiliate links at no extra cost to you.
For crosscutting cabinet parts on a table saw, an 80-tooth blade is usually the cleaner choice—but not always the better buy. A good 60-tooth combination or crosscut blade can produce excellent results, cost less, and cut faster through larger panels. The practical choice depends on the material, the visible edge, the number of parts you need to cut, and whether you plan to sand or machine the edge afterward.
As an Amazon Associate we earn from qualifying purchases at no extra cost to you.


Contents
The Basic Difference
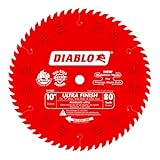
Tooth count is only part of the story. An 80-tooth blade typically has smaller gullets, thinner chips, and a higher number of cutting points contacting the wood. That tends to produce a smoother crosscut, especially in plywood veneer, melamine, and solid hardwood.
A 60-tooth blade has larger gullets and fewer teeth. It removes waste more aggressively and usually feeds more easily. That makes it a useful general-purpose blade for cutting cabinet rails, stiles, shelves, stretchers, and plywood parts.
| Characteristic | 60-tooth blade | 80-tooth blade |
|---|---|---|
| Typical crosscut finish | Very good with a quality blade and proper setup | Excellent, with fewer visible saw marks |
| Feed rate | Generally faster and less demanding | Slower; requires a steadier feed |
| Best material range | Solid wood, plywood, MDF, and general shop work | Cabinet plywood, hardwood edging, veneer, and finish parts |
| Burning risk | Lower when feeding steadily | Higher if the blade is dull or the feed is too slow |
| Purchase value | Better if you need one blade for many operations | Worthwhile when finish quality is the priority |
When 80 Teeth Makes Sense
Choose an 80-tooth blade when the cut will be highly visible and you want to minimize sanding, tear-out, and chipped veneer. This is particularly useful for cabinet door parts, face-frame components, hardwood edging, and crosscuts across plywood veneer.
The extra teeth help when the material is thin. A 3/4-inch plywood panel may show a clean edge with either blade, but a 1/4-inch veneer panel or narrow hardwood strip can benefit from the finer tooth spacing. An 80-tooth blade can also reduce the size of isolated chips at the exit side of a cut, although it cannot compensate for poor support or a misaligned saw.
Finer blades are useful for batch work where every part must look consistent. If you are cutting 40 face-frame pieces and do not want to touch every end with a sanding block, the smoother 80-tooth finish can save time even though each cut takes a little longer.
Look for a true crosscut or fine-finish blade with an alternating top bevel tooth pattern, often abbreviated ATB. A blade marketed for plywood or fine crosscutting is usually a better fit than simply choosing the highest tooth count. You can compare options in an 80-tooth fine-finish table saw blade search.
When 60 Teeth Is Enough
A good 60-tooth blade is the sensible choice for many cabinet shops. It can cut cleanly enough for glue joints, hidden edges, and parts that will be eased or sanded. It is also more forgiving when you are cutting thicker solid wood or making a long series of parts.
For cabinet boxes, most crosscut edges are not final show surfaces. Shelf ends may be covered by edge banding, hidden inside a case, or trimmed after assembly. In those situations, the difference between 60 and 80 teeth may not justify buying another blade.
A 60-tooth blade also works better as a compromise blade if you do not want to change blades frequently. It can handle crosscutting while remaining usable for occasional ripping of narrower hardwood stock. Do not expect it to replace a dedicated ripping blade on thick lumber, but it is more versatile than most 80-tooth blades.
For a cost-conscious setup, start with a quality 60-tooth crosscut table saw blade. A sharp, accurately ground 60-tooth blade will outperform a cheap 80-tooth blade with uneven teeth or excessive runout.
Material and Cut Quality
Cabinet plywood is where blade choice becomes noticeable. Veneer tear-out commonly occurs on the bottom face as the teeth exit the panel. A high tooth-count blade can reduce the damage, but the blade must also be sharp, the insert opening should be narrow, and the panel needs full support.
Use a zero-clearance insert for small cabinet parts and thin stock. Keep the good face up when the blade’s upward tooth movement supports that surface; on a conventional table saw, the bottom face is more likely to chip. A sharp blade and a sacrificial backing board can matter more than going from 60 to 80 teeth.
Melamine is less forgiving than ordinary plywood. Its brittle surface chips easily, so a specialized melamine or laminate blade may outperform both standard options. If you cut a lot of veneered panels, consider a melamine and plywood table saw blade rather than assuming tooth count solves the problem.
Feed Rate, Burning, and Safety
An 80-tooth blade has less room between teeth to carry sawdust away. If you push too slowly, friction can heat the blade and burn hardwood. If you push too quickly, the finer teeth may leave washboard marks or chip the material. Use a firm, continuous feed instead of stopping in the cut.
Burning on a 60-tooth blade usually points to a dull blade, a misaligned fence, or the work pinching the blade—not simply an insufficient tooth count. Check that the fence is parallel to the miter slot and that the blade is at 90 degrees. A cut that wanders or closes behind the blade can be dangerous as well as unattractive.
Do not remove the riving knife for ordinary crosscutting, and use a crosscut sled or a properly supported miter gauge for narrow cabinet parts. A sled improves control and supports the fibers at the exit point. It also makes repeated 90-degree cuts more consistent than balancing a small part against the stock miter gauge.
What to Buy for a Cabinet Shop
If you need one blade, buy a quality 60-tooth combination or general-purpose blade and spend time setting up the saw. It is the cheaper option and is fine for most cabinet carcass parts, shelves, and hidden cuts.
If you already have a ripping blade and regularly build face frames, doors, or exposed hardwood components, add an 80-tooth finish blade. Use it for final crosscuts, then switch back to the 60-tooth blade for routine work. This two-blade approach gives better results than trying to use one expensive fine blade for every operation.
For the cleanest possible repeatable cuts, prioritize sharp carbide, low runout, a zero-clearance insert, solid work support, and a steady feed. Tooth count matters, but those setup details often decide whether the finished cabinet part is actually clean.


