
What's inside
- Contents
- What a Clamping Square Actually Does
- Quick Comparison of the Main Types
- The Main Types Explained
- Capacity, Jaw Depth and Stock Thickness
- Materials, Rigidity and Accuracy
- Using Clamping Squares in a Glue-Up
- Pairing Squares with Other Clamps
- Who Should Choose What
- Buyer Checklist
- Mistakes to Avoid
- Workshop Safety
- Frequently Asked Questions
- Bottom Line
- Contents
- What a Clamping Square Actually Does
- Quick Comparison of the Main Types
- The Main Types Explained
- Capacity, Jaw Depth and Stock Thickness
- Materials, Rigidity and Accuracy
- Using Clamping Squares in a Glue-Up
- Pairing Squares with Other Clamps
- Who Should Choose What
- Buyer Checklist
- Mistakes to Avoid
- Workshop Safety
- Frequently Asked Questions
- Bottom Line
As an Amazon Associate I earn from qualifying purchases. This post may contain affiliate links at no extra cost to you.
The short answer: the best clamping squares are the ones that hold two boards at a true right angle while the glue grabs, fit the thickness of the stock you actually build with, and stay square after a few years of workshop knocks. For cabinet boxes and carcass work, a pair of rigid, fixed-angle squares that clamp over the corner is hard to beat. For frames and odd-shaped joints, a self-centering corner clamp gives more control. Plastic positioning squares are fine for light shop projects, while metal ones suit heavier, repeated use. Whatever you pick, check it against a trusted reference square the day it arrives.
This guide does not rank individual products. It explains how each type works, what capacity and accuracy mean in practice, how to use squares during a glue-up, and which mistakes lead to racked boxes and gaps at the joint. Use it to narrow your options, then compare current listings against your own projects.
Contents
- Contents
- What a Clamping Square Actually Does
- Quick Comparison of the Main Types
- The Main Types Explained
- Capacity, Jaw Depth and Stock Thickness
- Materials, Rigidity and Accuracy
- Using Clamping Squares in a Glue-Up
- Pairing Squares with Other Clamps
- Who Should Choose What
- Buyer Checklist
- Mistakes to Avoid
- Workshop Safety
- Frequently Asked Questions
- Bottom Line
Our Top Picks
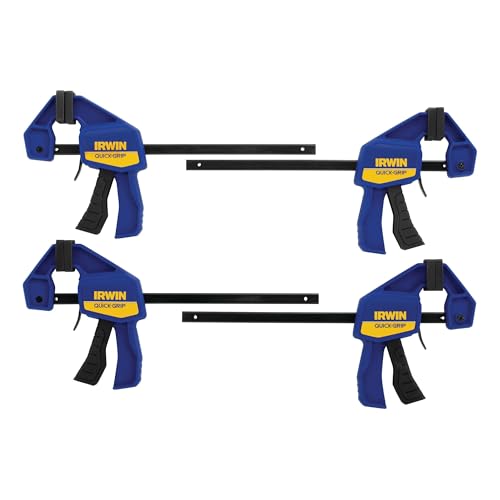 IRWIN Quick-Grip 1964758 One-Handed Mini Bar Clamp 44 Count (Pack of 1)21 x 8 x 2.5 Inches1 poundsCheck on Amazon


Contents
- What a clamping square actually does
- Quick comparison of the main types
- The main types explained
- Capacity, jaw depth and stock thickness
- Materials, rigidity and accuracy
- Using clamping squares in a glue-up
- Pairing squares with other clamps
- Who should choose what
- Buyer checklist
- Mistakes to avoid
- Workshop safety
- Frequently asked questions
- Bottom line
What a Clamping Square Actually Does
A clamping square is a right-angle jig that locates two workpieces against each other and, in most designs, holds them there while a separate clamp supplies the pressure. Glue is slippery. The moment you tighten a bar clamp across a freshly glued box, the joint wants to slide and the whole assembly wants to rack into a parallelogram. A clamping square resists that movement at the corner, which is exactly where accuracy is lost.
It helps to be clear about what the tool does not do. It does not square a box that was cut badly. If the parts are not the same length, or the ends are not cut square, the corner can be held at ninety degrees while the rest of the box twists. Think of the square as an assistant that preserves the accuracy you already built into your parts, not one that creates it.
These tools show up most in cabinet and carcass assembly, drawer boxes, shop furniture, frames, and any glue-up involving pocket screws, dowels, biscuits or simple butt joints. They are also handy as a third hand when you drive screws into a joint, because the pieces stop wandering while you work. If you build more than the occasional shelf, a couple of good squares pay for themselves in saved rework.
Quick Comparison of the Main Types
| Type | Best for | Main strength | Main watch-out |
|---|---|---|---|
| Fixed-angle corner squares | Cabinet carcasses and boxes | Quick, rigid, repeatable | Limited stock thickness range |
| Self-centering corner clamps | Frames, mitres and mixed thicknesses | Screw pressure and centering action | Slower to set and adjust |
| Plastic positioning squares | Light shop projects and hobby builds | Low cost, light weight | Can flex or wear over time |
| Adjustable-capacity squares | Shops that switch stock sizes often | Flexible jaw opening | More moving parts to keep true |
| Clamp-on assembly squares with fences | Large panels and long runs | Wide reference face | Bulkier to store and handle |
The rows above map to the sections that follow, so jump straight to the type that matches your work. If you are unsure, the fixed-angle style covers the greatest share of everyday carcass jobs.
The Main Types Explained
Fixed-angle corner squares
These are solid blocks or L-shaped bodies with two faces machined at ninety degrees. You seat the corner of the assembly into the square and then bring a bar clamp or parallel-jaw clamp across the joint. Because they have no adjustment, nothing can loosen, which makes them quick and dependable. Their weakness is that each model only suits a stated range of board thickness, so read that range before buying. A pair set at opposite ends of a panel handles most cabinet sides.
Self-centering corner clamps
This design has a screw drive that closes both jaws onto the workpieces together, often with a mechanism that keeps the corner centered. They work well for frames, mitred joints and situations where the two boards differ in thickness. The trade-off is time. Each clamp needs winding down, and the screw pressure can crush softer wood or squeeze out too much glue if you overtighten. Treat them as precision tools for frames and smaller assemblies rather than a fast way to build twenty boxes.
Plastic positioning squares
Molded squares are the budget entry point. They are light, easy to store, and often shaped to hold the corner while you drive a screw. For pine shelving, shop cabinets and weekend builds they can be perfectly adequate. Over time, edges can wear and the body can flex under clamp pressure, so inspect them regularly and retire any that no longer sit flat. For repeated production work, many woodworkers move to metal.
Adjustable-capacity squares
If you switch between thin drawer parts and thick cabinet sides, a square with an adjustable opening saves you from buying several fixed sizes. The extra mechanism means more parts that can wear or collect glue, so keep the sliding surfaces clean. Check that the adjustment locks firmly and that the reference faces stay at ninety degrees at every setting, not only at the one printed in the instructions.
Clamp-on assembly squares with fences
These add a longer face or fence that rests along the panel, giving a wider reference than a compact block. That makes them useful for tall sides and long carcass runs, where a small block may not control the whole edge. They take more storage space and cost more, so choose them if panel size is a regular constraint. You can browse clamping squares to compare the styles side by side before deciding.
Capacity, Jaw Depth and Stock Thickness
Capacity is the most overlooked spec. Every clamping square is built for a range of material thickness, and outside that range the tool either will not fit or will not seat correctly. Check the stated range against the stock you use: sheet goods, solid-wood sides, drawer parts and face frames all differ. If you work mostly in one thickness, a fixed square sized for it is ideal. If your projects vary, look at adjustable designs.
Jaw depth, meaning how far the square reaches back from the corner, matters too. A shallow reach holds only the very edge of the joint, which is fine for small frames but weaker on tall panels. A deeper reach gives better contact with the workpiece faces and resists twisting. Also check the clearance for your clamp heads. If the pad on a bar clamp cannot sit squarely against the tool, the clamping force will tilt the corner instead of closing it.
Some designs also leave a relief at the inside corner so squeeze-out and burrs do not push the pieces off the reference faces, which helps during glue-ups.
Materials, Rigidity and Accuracy
Material choice affects both durability and how long the tool stays accurate. Cast or machined metal bodies resist flexing and wear, which is why they suit repeated use. Molded plastics are lighter and gentler on a finished surface, but they deform more readily. Neither is automatically right; match the material to how hard and how often you work.
Accuracy is something to verify, never to assume. When a square arrives, test it. Hold it against a reference square you trust, or use the classic method of drawing a line against a straight edge, flipping the tool, and checking that the two lines coincide. Any visible gap means the angle is off. Even a small error repeats at every corner and shows up as a box that will not close or a door that will not hang evenly.
Look at the faces, too. Reference surfaces should be flat, free of molding flash or casting burrs, and smooth enough not to catch on wood fibers. A little light sanding of a rough edge is sometimes reasonable, but stop short of changing the geometry; if the angle is wrong, return the tool. Keep the working faces free of dried glue, because a thin crust is enough to push a joint out of square.
Using Clamping Squares in a Glue-Up
A good routine matters as much as good tools. Start with a dry fit so you can find problems while they are free to fix. Place the squares, tighten the clamps lightly, and check the diagonals. When the two diagonal measurements of a box match, the box is square. If they differ, loosen and adjust before any glue appears.
When you glue up, work in a sequence that gives you time. Apply adhesive, bring the parts together, seat the squares at the corners, and apply clamp pressure gradually while watching the joint. Tighten only until the joint closes and a thin bead of squeeze-out appears. More pressure does not make a stronger joint; it risks starving the glue line and bowing thin panels.
Measure the diagonals again after clamping, because pressure can shift things. Wipe or scrape away squeeze-out according to the glue maker’s instructions so it does not glue the tool to your project. Leave the assembly clamped for the time the adhesive instructions recommend, and keep the squares in place until then. A set of bar clamps provides the pressure that the squares then keep aligned.
Pairing Squares with Other Clamps
Clamping squares seldom work alone. They locate the corner while a bar, pipe or parallel-jaw clamp applies the force. Parallel-jaw clamps are particularly friendly to squares because their large, flat faces sit flush against the tool and spread pressure evenly. Lighter bar clamps work as well, though you may want to add a small scrap block to keep the pad square to the face.
For a four-corner box, use a square at each corner when you can, and add cross clamps along the length. For a long panel, space extra clamps along the joint so the middle does not bow.
Keep a trusted reference tool nearby too. A good engineer’s or machinist’s square is useful for checking the clamping squares themselves and for confirming inside corners after the glue sets.
Who Should Choose What
If you build kitchen or shop cabinets, favor fixed-angle metal squares sized to your carcass material, with a pair at least, and ideally four for a full box. If you make picture frames, small boxes or mitred work, a self-centering clamp gives the control you need. If you are a hobbyist assembling the occasional shelf unit, molded positioning squares may be all you require.
Shops that jump between stock thicknesses should favor adjustable-capacity designs or a small collection of fixed squares. Builders of large cases and tall bookshelves will appreciate designs with a longer reference face. Whichever route you take, buy for the work you do most, not the rare job that might need something special. You can always add a specialty clamp later, such as a self-centering corner clamp, when a particular project calls for one.
Buyer Checklist
- Confirm that the stated thickness range covers the stock you use.
- Decide whether you need a fixed, adjustable or self-centering design.
- Check the material and ask whether it suits how often you will use it.
- Look for a relief at the inside corner so glue and burrs stay clear.
- Make sure your clamp heads can sit flat against the tool.
- Plan how many you need: a pair for panels, four for full boxes.
- Verify the angle with a reference square as soon as the tool arrives.
- Check the return policy so you can send back one that is out of square.
- Read the maker’s current instructions and specifications before first use.
Mistakes to Avoid
Trusting the angle without checking. A square that is not square multiplies its error at every corner. Test every new tool before it touches a project.
Buying the wrong capacity. A tool that does not fit your stock thickness will rock on the surface and give a false sense of accuracy. Match the range to your material first.
Overtightening. Heavy pressure can crush soft wood, bow thin panels and squeeze out the glue you need in the joint. Snug is enough.
Ignoring cut accuracy. If parts are different lengths, the corners can be square while the box is not. Cut parts accurately and check the diagonals.
Letting glue build up. Dried adhesive on the reference faces moves the next joint out of position. Clean the tool soon after each use, following the glue maker’s guidance.
Skipping the dry fit. Problems found after glue is applied are stressful and messy. A dry run costs a few minutes and saves a project.
Workshop Safety
Clamping squares are simple, but the work around them involves screws, drills, glue and heavy panels, so treat safety as part of the routine. Always read the instructions that come with your tools and follow the maker’s current guidance.
- Wear eye protection when drilling, driving screws or cutting parts to size.
- Keep fingers clear of the space between clamp jaws and the workpiece as pressure builds, because pinch points are easy to forget.
- Support large panels so they cannot tip while you position clamps; ask for help with heavy carcasses.
- Inspect metal squares for burrs and sharp edges, and handle them with care.
- Do not use a cracked or deformed plastic square, since it may fail under clamp pressure.
- Check the glue label for ventilation advice and any skin or eye precautions.
Frequently Asked Questions
What are clamping squares used for?
They hold two boards at ninety degrees while glue sets or screws are driven, so a box or cabinet comes out square. They keep the joint from sliding when clamp pressure is applied.
How many clamping squares do I need?
A pair covers many panel joints, while four lets you control every corner of a box at once. Buy more if your projects regularly involve large assemblies.
Can a clamping square fix a box that is already out of square?
Not reliably. The tool preserves the angle of well-cut parts. If pieces are uneven or poorly cut, correct the parts first, then assemble with the squares.
Are plastic clamping squares good enough?
For light projects, often yes. They can flex or wear more than metal, so inspect them and consider metal for frequent production work.
How do I test whether a clamping square is accurate?
Compare it against a trusted reference square, or draw a line along a straight edge, flip the tool and check that the lines match. Any gap shows an error.
Do I still need other clamps?
Yes. Most squares position the corner and rely on a bar, pipe or parallel-jaw clamp for pressure, so plan to use them together.
What stock thickness will a clamping square handle?
Each design lists its own range. Check the current specifications for the model you are considering, and compare them with the material you use most often.
How should I clean and store my squares?
Remove glue while it is still soft or according to the glue maker’s guidance, keep the faces free from dings, and store them where they cannot be dropped or stacked under heavy tools.
Bottom Line
Choose clamping squares by fit and rigidity rather than by looks or price. Match the thickness range to your stock, pick the type that suits your joinery, verify the angle on arrival, and add a few good clamps to supply the pressure. Specifications change, so check current details before you order. When you are ready to compare options, start with clamping square sets and measure each listing against the checklist above.
Disclosure: As an Amazon Associate, we earn from qualifying purchases. Links marked as sponsored may earn us a commission at no extra cost to you.
Related guides
More from Amazon
Programs that pair well with the guide above. Offers and eligibility are set by Amazon and may change.
A free business account with business pricing and bulk-buying tools for work, shop or home office.
Create a business accountFree shipping on eligible items, Prime Video and more. Eligible new members can start with a free trial.
Start a Prime free trialAudiobooks and podcasts to listen to on the go. Eligible new members can start with a free trial.
Try Audible freeAd-free music streaming. Eligible new subscribers can start with a free trial.
Try Music Unlimited freeAs an Amazon Associate we earn from qualifying purchases.

Write Your Review
No reviews yet. Be the first to share your experience!