
What's inside
As an Amazon Associate I earn from qualifying purchases. This post may contain affiliate links at no extra cost to you.
Short answer: if you are buying your first hand plane, choose a jack plane of the bench-plane family for general work, then add a block plane for end grain, chamfers and small fitting. Those two cover most hobby tasks. A low-angle model, a shoulder or rabbet plane, and a smoothing plane come later as your projects demand them. Whatever you buy, the plane is only as good as its sharpening and setup, so budget time and a few honing supplies alongside the tool itself.
Hand planes have a reputation for being finicky, and a poorly set-up plane certainly is. A well-tuned one, though, is quiet, dustless, precise and satisfying. This guide explains what each major plane does, how to choose between new, vintage, metal and wooden bodies, and how to tune and sharpen so the tool cuts the way it should. It mentions no brands or prices; use the principles with whatever you find.
Contents
Our Top Picks
 Taytools #5 Premium Bedrock Style Flattop Jack PlaneOne Size Fits All0 x 0 x 0 Inches6.5 PoundsCheck on Amazon


Contents
- How a hand plane works
- Types of hand planes
- Metal, wooden and vintage bodies
- How to choose your first plane
- Features that matter
- Tuning a plane
- Sharpening the iron
- Using the plane: technique and uses
- Safety
- Maintenance
- Common mistakes
- Who should choose what
- Checklist
- FAQ
- Conclusion
How a hand plane works
A hand plane is a very simple machine. A flat sole rides on the wood. A blade, called the iron, projects through a narrow opening in the sole called the mouth. As you push the plane forward, the iron slices a thin shaving and the sole keeps the cut at a steady depth by bridging high spots on the surface.
That bridging is the reason a long plane flattens and a short plane smooths. A long sole spans dips and rides across peaks, shaving the highs until the surface is flat. A short plane follows the contours, producing a smooth surface that may still undulate. This is why jointing an edge calls for a long plane and final smoothing a shorter one.
Several adjustments govern how it cuts. The depth adjuster sets how much of the iron protrudes. A lateral lever shifts the blade side to side to make the cut even across its width. The frog, the bed that supports the iron, and the mouth opening affect tear-out: a tight mouth supports the fibers just ahead of the cut and reduces splintering. A chipbreaker, if present, curls and snaps the shaving to reduce tear-out. The bevel angle of the iron and the bed angle combine to produce the cutting angle, and a steeper effective angle tames difficult grain.
Types of hand planes
Bench planes
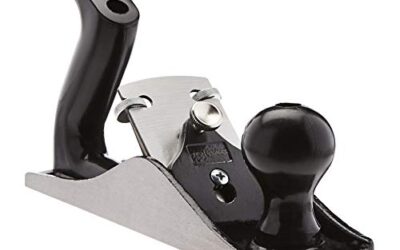
This family handles everyday surfacing and is organized by length. Short smoothing planes finish surfaces. Mid-length jack planes are the general workhorses: they take heavy shavings to remove material fast and, with a differently ground iron, can also smooth. Long jointer planes flatten long boards and shoot straight edges.
Block planes
Small, one-handed planes with a low bed angle and the bevel facing up. They excel on end grain, small chamfers, trimming joints and cleaning up edges. A standard-angle version is versatile, while a low-angle version slices end grain more easily.
Low-angle bench planes
These carry the iron at a shallow bed angle with the bevel up, which makes it easy to adjust the effective cutting angle by changing the bevel. They cut end grain and shoot miters well, and they can be set up for difficult grain by sharpening a steeper bevel. They have less of a chipbreaker effect, so tear-out control relies on a tight mouth and a high-angle sharpening.
Rabbet, shoulder and bullnose planes
Their irons extend across the full width of the body, so they cut right to the edge of a rabbet or into a corner. Shoulder planes trim tenon shoulders square, rabbet planes cut or clean up rabbets, and bullnose planes work into tight corners and stops.
Scrub and fore planes
Scrub planes have a heavily curved iron and take thick, aggressive shavings from rough boards. They leave a scalloped surface that later planes then flatten.
| Plane | Typical job | Size | Learning curve | Good first purchase? |
|---|---|---|---|---|
| Jack plane | General stock removal and smoothing | Medium | Moderate | Yes |
| Smoothing plane | Final surface finishing | Short | Moderate | Often second |
| Jointer plane | Flattening long boards, jointing edges | Long | Moderate to steep | Later |
| Block plane | End grain, chamfers, trimming | Small | Gentle | Yes, alongside a jack |
| Low-angle bench plane | End grain, miters, difficult grain | Medium | Moderate | Later or instead of a smoother |
| Shoulder or rabbet plane | Fitting joints, cutting rabbets | Small to medium | Moderate | For joinery work |
| Router plane | Leveling recess floors | Small | Gentle | For mortises and inlays |
Metal, wooden and vintage bodies
Metal-bodied planes have cast iron or steel bodies with adjustable frogs and mechanical depth and lateral controls. They are heavy, stable and quick to set. Most beginners find them the easiest to use.
Wooden planes are lighter and glide easily, with a wedge that holds the iron and a hammer-tapped adjustment. They have charm and respond well when tuned, but they need a bit more skill, and the wood sole can move with humidity and need re-flattening.
Vintage and secondhand planes can be an economical way into the craft, and many are well made. The condition matters: look for a flat, uncracked body, a frog that seats firmly, an iron with plenty of steel left, an intact tote and knob, and a mouth not widened by wear. Pitting on the sole can be cleaned but is hard to remove entirely. Expect to clean, flatten and sharpen the plane. Buying one you can inspect in person is safer than gambling on blurry photos.
| Option | Strengths | Drawbacks | Suits |
|---|---|---|---|
| New metal-bodied | Ready adjustments, predictable | Quality varies, needs tuning | Beginners and general use |
| Vintage metal-bodied | Often robust, good value | Needs restoration, condition varies | Hands-on learners |
| Wooden-bodied | Light, smooth gliding, fine feel | Skill needed, sole can move | Traditional-minded users |
| Premium boutique planes | Fine machining, ready to use | High cost | Regular users who want convenience |
How to choose your first plane
Start from the task. If you will mostly flatten and smooth boards by hand, buy a jack plane, since its medium length is forgiving and useful for both stock removal and smoothing. If your work is joinery on small projects, begin with a block plane and add a shoulder plane. If you machine your lumber and want only light cleanup, a smoothing plane or low-angle block plane may be all you need.
Consider your budget as the sum of three parts: the plane, sharpening supplies, and time. A modest plane that is flat, with a good iron kept razor sharp, outperforms an expensive plane with a dull blade. If funds are limited, buy fewer planes and put money into a sharpening setup.
Features that matter
Sole flatness. The sole should be flat, or capable of being flattened with reasonable effort. A hollow or twisted sole cannot register properly.
Iron quality. Good steel holds an edge and sharpens predictably. Thicker irons chatter less, which matters for smoothing.
Adjustable mouth. The ability to close the mouth for fine work and open it for thick shavings is a significant advantage.
Frog and bed. A solid frog that holds the iron firmly without movement prevents chatter.
Adjusters. Smooth depth and lateral controls with little backlash allow quick, fine settings. Excess slop makes accurate adjustment tiresome.
Tuning a plane
Many cutting problems are setup problems. A standard tune takes an afternoon and pays back for years.
- Flatten the sole. Rub the sole on a flat reference such as sandpaper stuck to a flat plate, working until the area in front of the mouth, behind the mouth and at the edges shows consistent scratches. Perfection is not necessary; you need a flat zone around the mouth.
- Check the frog. Make sure it is clean, seated and locked, and that its bearing surface is flat.
- Prepare the iron and chipbreaker. Flatten the back of the iron near the cutting edge until it is polished; this is the most important sharpening step. Make sure the chipbreaker’s edge is straight and touches the iron without a gap.
- Set the chipbreaker. Place it a small distance back from the edge: close for hard, difficult grain; further back for heavy shavings.
- Set the mouth. Close it for fine smoothing, open it for roughing.
- Adjust the blade. Sight down the sole from the front, extend the iron slightly and use the lateral lever until the edge protrudes evenly.
- Test on scrap. Take trial shavings and adjust until you get a thin, even, continuous ribbon.
Sharpening the iron
A hand plane cuts only as well as its edge. Sharpening is a routine, not a rescue operation, and you will touch up the iron often while working.
Method. Use abrasives of increasing fineness. Flatten the back, then hone the bevel at a consistent angle. A honing guide helps beginners hold the angle. Move to a finer abrasive and continue until the edge shows a uniform, mirror-like polish. Remove the small burr, or wire edge, that forms on the back by stropping or by a light stroke on the finest abrasive.
Bevel angle. A common primary bevel suits general work; a slightly higher angle suits hard or difficult woods; a lower angle is easier to push on soft woods but dulls faster. Add a small secondary bevel at the very tip so that touch-ups are quick and only the tiny bevel needs honing.
How often. Touch up when shavings become thick and ragged or the plane needs more force. Frequent light stropping is faster than a full regrind.
Using the plane: technique and uses
Read the grain. Look at the edge of the board: planing in the direction the fibers rise toward the surface gives clean cuts, while planing against them tears. If tear-out occurs, reverse direction, close the mouth, reduce depth or plane at a skew.
Body position. Stand with your body behind the plane, using your weight rather than arm strength. Start with pressure on the front knob, shift to even pressure through the middle and finish with pressure on the tote so the board end is not rounded.
Flattening a face. Plane diagonally across the board first with a rough setup to hit the highs, check with a straightedge, then plane along the grain to finish. Winding sticks, two straight strips placed across the ends, reveal twist.
Edge jointing. Use a long plane, keep the sole riding the full edge, and check squareness with a try square. Glue-ready edges should show no light gaps.
End grain. Use a block or low-angle plane with a very sharp iron and a shallow cut. Plane from the edges toward the center, or clamp a scrap at the far edge, to prevent blowout at the end of the stroke.
Safety
- Sharp irons cut skin. Handle the iron by its sides when removing it, and keep fingers behind the edge when sharpening.
- Secure the work. Clamp boards in a vise or against a planing stop so they cannot slide toward you. A slipping board and a sharp plane are a bad pairing.
- Keep hands behind the blade. Both hands stay on the plane, and the free hand should never sit in front of the mouth.
- Eye protection. Wear glasses, especially when planing knotty or brittle wood or end grain.
- Rest the plane on its side when pausing, so the iron does not rest on the bench. That protects the edge and your hand.
- Sharpening. Use a stable honing surface, and keep slurry and grit away from your eyes. Sweep up shavings, which are slippery underfoot.
Maintenance
Retract the iron after each session, so the edge does not touch the bench and the adjuster is not under tension.
Wax the sole. A little paste wax reduces friction and protects against rust. Wipe the sole before use so wax does not transfer to a piece you intend to finish.
Prevent rust. Metal planes rust easily in humid shops. Wipe them with a light oil or a rust inhibitor, and store them in a dry place, perhaps in a cabinet with a desiccant.
Protect the edge. Store plane irons in the tool, not rattling against other metal, or keep a protective sleeve on spare irons.
Common mistakes
- Working with a dull iron. This is the number one cause of frustration. Sharpen first.
- Skipping the back of the iron. An unflattened back never yields a truly sharp edge.
- Setting the iron too deep. The plane chatters, tears and wears you out. Aim for thin shavings.
- Ignoring grain direction. Planing against the grain causes tear-out that no setting fully cures.
- Buying many planes before learning one. One tuned plane teaches more than five neglected ones.
- Rounding board ends. Dipping the plane at the end of the stroke produces a convex edge. Maintain steady, level pressure through the cut.
Who should choose what
The complete beginner should buy a jack plane and a block plane, plus honing supplies, and learn on softwood.
The power-tool woodworker adding hand tools for cleanup will do well with a smoothing plane and a low-angle block plane.
The joinery-focused maker should add a shoulder plane and a router plane to the basic pair.
Checklist
- Decide what you will plane most: faces, edges, end grain or joints.
- Start with a jack plane or block plane according to the answer.
- Inspect any used plane for a flat body, a seated frog and an iron with steel left.
- Buy honing supplies: abrasives of increasing fineness, a flat reference, a guide and a strop.
- Flatten the sole around the mouth and the back of the iron before the first shaving.
- Set the chipbreaker close for difficult grain and further back for roughing.
- Clamp the workpiece securely before planing.
- Wear safety glasses and keep both hands behind the blade.
- Retract the iron and wax the sole after use.
- Store planes dry, with a thin film of oil or wax on bare metal.
Frequently asked questions
Which hand plane should I buy first?
A jack plane is the most useful general choice, and a block plane is the best small companion. Together they cover most beginner needs.
Is a low-angle plane better than a standard-angle one?
Not universally. Low-angle planes excel on end grain and offer flexible cutting angles through different bevels, while standard bench planes with chipbreakers handle swirling face grain more easily.
Are vintage hand planes worth buying?
Often yes, if the body is sound and you accept the restoration work. Inspect the sole, frog, iron and handles, and skip planes with cracks.
How sharp does a plane iron need to be?
Sharp enough to produce a thin, translucent, unbroken shaving and leave a clean surface straight off the plane. If you need to push hard, resharpen.
Why does my plane tear the wood?
Common causes are a dull iron, planing against the grain, too deep a cut, or a wide mouth. Reverse direction, close the mouth, set the chipbreaker closer and take a lighter cut.
Do I need to flatten the sole of a new plane?
Often a little. Check it against a flat reference. You mainly need flatness around the mouth and at the toe and heel.
Can hand planes replace a power planer?
For many tasks yes, particularly on small projects, but hand-planing a large volume of rough lumber takes time and effort. Many woodworkers combine machines for roughing with hand planes for finishing.
How do I stop rust on my planes?
Keep the shop dry, wax or lightly oil bare metal after use, avoid leaving planes on damp concrete, and consider a desiccant in the storage cabinet.
Conclusion
The best hand plane is the one you will keep sharp and use. Start with a jack plane and a block plane, add specialist tools as projects call for them, and put as much attention into flattening the sole and honing the iron as into choosing the tool. A well-tuned plane transforms rough boards into fine surfaces with nothing but a push.
Practice on softwood, learn to read the grain, and make light passes. Your skills, rather than your collection, determine the quality of the work.
When you are ready to shop, browse jack planes, block planes, sharpening stones and honing guides, and shoulder planes, and compare them against the checklist above.
Disclosure: As an Amazon Associate, fdwoodworking.com may earn from qualifying purchases made through links on this page, at no extra cost to you.
Related guides
More from Amazon
Programs that pair well with the guide above. Offers and eligibility are set by Amazon and may change.
A free business account with business pricing and bulk-buying tools for work, shop or home office.
Create a business accountFree shipping on eligible items, Prime Video and more. Eligible new members can start with a free trial.
Start a Prime free trialAudiobooks and podcasts to listen to on the go. Eligible new members can start with a free trial.
Try Audible freeAd-free music streaming. Eligible new subscribers can start with a free trial.
Try Music Unlimited freeAs an Amazon Associate we earn from qualifying purchases.


Write Your Review
No reviews yet. Be the first to share your experience!