Best Dovetail Jigs for Beginners: Easy Setup and Clean Results
What's inside
- Best dovetail jigs for beginners at a glance
- Head-to-head: which beginner jig is easiest to live with?
- Decision matrix for choosing your first jig
- Half-blind versus through dovetails for beginners
- How to set up a dovetail jig without chasing the fit
- Bits, consumables, and the real ownership cost
- Common mistakes that create poor dovetails
- Final recommendation
- Related Guides
- Best dovetail jigs for beginners at a glance
- Head-to-head: which beginner jig is easiest to live with?
- Decision matrix for choosing your first jig
- Half-blind versus through dovetails for beginners
- How to set up a dovetail jig without chasing the fit
- Bits, consumables, and the real ownership cost
- Common mistakes that create poor dovetails
- Final recommendation
- Related Guides
As an Amazon Associate I earn from qualifying purchases. This post may contain affiliate links at no extra cost to you.
The best dovetail jig for beginners is the Porter-Cable 4216 Super Jig for affordable guided learning, while the Leigh D4R Pro is the better long-term choice if you want precise half-blind and through dovetails without replacing the jig later.
A good beginner jig should do more than hold a board: it should make board orientation obvious, clamp securely without crushing the workpiece, tolerate small setup errors, and include the router bits or templates needed for the joint you intend to cut. The right choice depends mainly on whether you value low initial cost, repeatability, or flexibility.
As an Amazon Associate we earn from qualifying purchases at no extra cost to you.



Contents
- Best dovetail jigs for beginners at a glance
- Head-to-head: which beginner jig is easiest to live with?
- Decision matrix for choosing your first jig
- Half-blind versus through dovetails for beginners
- How to set up a dovetail jig without chasing the fit
- Bits, consumables, and the real ownership cost
- Common mistakes that create poor dovetails
- Final recommendation
- Related Guides
Best dovetail jigs for beginners at a glance
| Jig | Best for | Joint capability | Typical board capacity | Setup difficulty | Typical market range |
|---|---|---|---|---|---|
| Porter-Cable 4216 Super Jig | First-time users on a budget | Half-blind, through, sliding dovetail with appropriate templates | About 12 in. wide in common configurations | Low to moderate | $150–$250 |
| Rockler Dovetail Jig | Occasional cabinet and drawer work | Half-blind and through dovetails, depending on template package | Commonly up to about 11–12 in. | Low to moderate | $180–$300 |
| Leigh D4R Pro | Learning now and expanding later | Variable-spaced half-blind, through, rabbeted, and sliding dovetails | Up to 24 in. with the standard jig | Moderate | $700–$1,000 |
| Keller-style template jig | Simple repeatable through dovetails | Primarily through dovetails; half-blind work requires a separate setup or template | Usually limited by the template length | Moderate | $150–$300 before router bits |
Capacities and packages vary by revision and accessory kit, so check the current configuration before buying. The important comparison is not just maximum width: it is how clearly the jig establishes the relationship between the drawer front, sides, template, and router bit.
Head-to-head: which beginner jig is easiest to live with?
Porter-Cable 4216: the practical first jig
The Porter-Cable 4216 is a sensible starting point because its template-based system gives beginners a defined pattern rather than asking them to lay out every pin and tail by hand. Its standard package has historically included interchangeable templates and router bits for common dovetail work, although exact contents can differ between kits and replacement packages.
Its main advantage is a forgiving learning path. You can begin with half-blind drawer joints, where the outside face remains clean, then move to through dovetails after learning how template position controls joint fit. The limitation is adjustment precision: fixed or semi-fixed templates provide less freedom over tail spacing than a premium variable-spacing jig. The clamping hardware also rewards firm, even pressure rather than aggressive tightening.
Choose it when you expect to make a few drawers or boxes each year and want a complete system without spending professional-jig money.
Rockler Dovetail Jig: clear clamping and accessible instructions
Rockler’s dovetail jig range is aimed at woodworkers who want a relatively approachable setup, with a broad clamping surface and instructions designed around common drawer construction. It is often a good middle ground between an entry-level fixed template and an advanced variable-spacing jig.
Before purchase, confirm whether the package includes both half-blind and through-dovetail templates, and whether the required bits are included. Some listings separate the jig body, template, and bit packages. That matters because a seemingly cheaper kit can become more expensive once you add a 14-degree half-blind bit, a straight bit, or a template for through dovetails.
Its best use case is a small shop making repeatable drawers in standard widths. It is less attractive if you want unusual pin spacing, very thin stock, or many different dovetail layouts.
Leigh D4R Pro: the best expandable choice
The Leigh D4R Pro is the strongest choice for a beginner who is willing to learn a more involved setup. Its major advantage is flexibility: the jig supports variable spacing, so you can arrange pins and tails to suit the design rather than accepting one fixed pattern. It can handle half-blind, through, rabbeted, and sliding dovetails with the relevant accessories and bits.
That flexibility creates a steeper learning curve. You must understand template fingers, bit depth, board orientation, and the difference between the jig’s reference surfaces. A small adjustment can alter joint fit or spacing, so it is worth keeping a written setup record for each material thickness.
The D4R Pro makes financial sense for someone who expects to build furniture, multiple drawer sets, or boxes with different widths. It is excessive for a single toolbox project, but replacing a basic jig later may cost more than learning the premium one from the beginning.
Keller-style template jigs: simple through dovetails
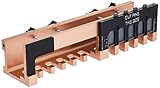
A Keller-style jig uses a separate template and guide bushing arrangement to cut through dovetails. The design is mechanically simple and can produce attractive, repeatable joints once the bit depth and board position are established. It is particularly appealing for carcases, blanket chests, and boxes where the dovetail pattern remains visible.
The trade-off is narrower scope. These jigs are not usually the easiest route to concealed half-blind drawer joints, and the cost of additional templates and bits can change the value calculation. They suit a woodworker who specifically wants through dovetails rather than a universal drawer jig.
Decision matrix for choosing your first jig
| Your situation | Best fit | Why | What to accept |
|---|---|---|---|
| Under $250 and fewer than 10 projects per year | Porter-Cable 4216 or a basic Rockler jig | Lower entry cost and guided templates | Less control over spacing and thinner-stock setups |
| Several drawers or cabinets each month | Leigh D4R Pro | Repeatable adjustments and wide capacity | More setup time and a higher bit/accessory budget |
| Very limited bench space | Compact fixed-template jig | Easy to store and quick to clamp to a bench | Narrower boards and fewer joint patterns |
| Only visible through dovetails | Keller-style template jig | Simple layout and consistent exposed tails | Limited half-blind capability |
| You want custom pin spacing | Leigh D4R Pro | Variable template fingers allow design control | More decisions during setup |
Half-blind versus through dovetails for beginners
Half-blind dovetails are usually the best first project for drawers. The joint is hidden from the front, and the jig’s template controls the visible drawer-face appearance. The critical setup is depth: too much router penetration can expose the joint, while too little produces a shallow, weak fit.
Through dovetails are easier to inspect because the tails and pins pass through both boards. They are excellent for learning board orientation and router travel, but errors remain visible. The joint fit is controlled by bit depth and template alignment, so test cuts are essential.
For either style, begin with scrap from the same species and thickness as the project. A 1/16-inch difference in stock thickness can change the apparent spacing and the depth relationship enough to invalidate an otherwise correct setup.
How to set up a dovetail jig without chasing the fit
- Flatten and square the stock. The jig cannot correct a bowed board or an edge that is not square to the face.
- Mark the reference faces. Put a clear “outside” mark on every board. Many failed dovetails come from reversing one workpiece.
- Install the guide bushing and bit specified by the template. A bushing with the wrong outside diameter changes the cut pattern.
- Clamp the board with even pressure. Tighten enough to prevent movement, then check that the board has not tilted or shifted upward.
- Set bit depth conservatively. On a test joint, adjust in small increments—about 1/64 inch at a time—rather than making a large correction.
- Cut a test joint and label the result. Record bit depth, template position, stock thickness, and router model.
- Adjust one variable at a time. Changing both template position and bit depth makes it difficult to identify the cause of a loose or tight joint.
A tight joint is not automatically a good joint. If the tails must be hammered together, fragile fibers can split. Aim for a firm hand fit that closes fully with light tapping, especially in softwood.
Bits, consumables, and the real ownership cost
Router bits are the consumable most likely to affect results. Dull carbide leaves fuzzy shoulders, increases heat, and encourages the operator to force the router. A replacement bit commonly costs about $25–$70, depending on carbide quality and configuration. Guide bushings, template screws, and clamps are less frequently replaced but should be checked for burrs and damaged threads.
For example, suppose a $200 jig is used for 20 drawer projects and each project requires four routed corners. The jig cost is about $2.50 per routed corner before bits and lumber:
$200 ÷ (20 projects × 4 corners) = $2.50 per corner.
If a premium $850 jig is used for 100 projects, its equivalent is about $2.13 per corner. The premium option only becomes economical through frequent use, greater flexibility, or avoided replacement purchases—not because it automatically makes a beginner’s first joint perfect.
Common mistakes that create poor dovetails
- Using a board thicker or thinner than the template instructions specify.
- Forgetting that half-blind and through-dovetail bits may use different angles or cutting lengths.
- Clamping the workpiece against dust or chips, leaving it slightly tilted.
- Moving the router in the wrong direction or taking an overly deep pass.
- Failing to support the exit edge, causing tear-out on through dovetails.
- Adjusting the template and bit depth at the same time.
- Assuming included bits are still sharp enough for clean results.
Final recommendation
For most first-time users, the Porter-Cable 4216 is the best dovetail jig for beginners because it offers a manageable setup and a practical route into both half-blind and through dovetails. Choose a Rockler jig if its current package gives you better clamping ergonomics or the exact templates you need. Choose the Leigh D4R Pro when long-term flexibility, custom spacing, and frequent use justify the higher cost. If your goal is specifically visible through dovetails, a Keller-style template jig may be the simplest specialized solution.
