
What's inside
- What You Need to Get Started
- 1. King 1000/6000 Combination Whetstone
- 2. Norton Combination India Oilstone
- 3. Veritas Mk.II Honing Guide
- 4. Flexcut Gold Polishing Compound
- 5. Narex Richter Bevel Edge Chisel Set
- Step-by-Step Sharpening
- Keeping Edges Sharp Longer
- Setting Up a Simple Sharpening Station
- Common Mistakes
- Frequently Asked Questions
- Conclusion
- What You Need to Get Started
- 1. King 1000/6000 Combination Whetstone
- 2. Norton Combination India Oilstone
- 3. Veritas Mk.II Honing Guide
- 4. Flexcut Gold Polishing Compound
- 5. Narex Richter Bevel Edge Chisel Set
- Step-by-Step Sharpening
- Keeping Edges Sharp Longer
- Setting Up a Simple Sharpening Station
- Common Mistakes
- Frequently Asked Questions
- Conclusion
As an Amazon Associate I earn from qualifying purchases. This post may contain affiliate links at no extra cost to you.
To sharpen a chisel or plane iron, flatten the back, set the bevel angle in a honing guide, work through coarse to fine stones, and finish on a strop. A sharp edge takes a few minutes once you have the right setup, and it makes every cut safer and cleaner. This guide covers the steps, the gear, and the errors that waste time.
| Pick | Best for | Key feature |
|---|---|---|
| King 1000/6000 Combination Whetstone | A beginner-friendly stone | Two grits in one block |
| Norton Combination India Oilstone | Traditional oilstone sharpening | Coarse and fine sides |
| Veritas Mk.II Honing Guide | Repeatable bevel angles | Holds blades square |
| Flexcut Gold Polishing Compound | Stropping to a polished edge | Fine abrasive for leather |
| Narex Richter Bevel Edge Chisel Set | A solid chisel set to practice on | Well-regarded steel for the category |
Contents
- What You Need to Get Started
- 1. King 1000/6000 Combination Whetstone
- 2. Norton Combination India Oilstone
- 3. Veritas Mk.II Honing Guide
- 4. Flexcut Gold Polishing Compound
- 5. Narex Richter Bevel Edge Chisel Set
- Step-by-Step Sharpening
- Keeping Edges Sharp Longer
- Setting Up a Simple Sharpening Station
- Common Mistakes
- Frequently Asked Questions
- Conclusion
Our Top Picks

What You Need to Get Started
You can sharpen well with a few simple items: a coarse and fine stone, a honing guide, a flat surface, and a leather strop. Water stones cut quickly but need soaking and flattening. Oilstones are more traditional, last a long time, and are less messy. Either approach works if you keep the stone flat and use a consistent angle. A honing guide takes much of the guesswork out of that angle, which is why beginners often do better with one.
1. King 1000/6000 Combination Whetstone
A combination stone gives you a medium grit for shaping and a fine grit for refining in one block, which keeps cost and storage simple. The King is a widely recommended starter water stone. It cuts quickly and gives a good edge, though it wears and dishes with use, so it needs regular flattening. Soak it before use and keep it wet. It is a sensible choice if you are new to sharpening and want predictable results.
King 1000/6000 Combination Whetstone
2. Norton Combination India Oilstone
Oilstones have been used for generations, and the Norton India combination is a familiar example. The coarse side removes metal, and the fine side refines the edge. Oilstones do not need soaking and wear slowly, which makes them durable. They cut more slowly than water stones and leave oil on the tool, so wipe it off before use. For someone who likes simple, long-lasting gear, this is a good fit.
Norton Combination India Oilstone
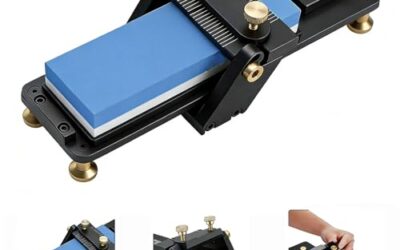
3. Veritas Mk.II Honing Guide
A honing guide clamps the blade at a fixed angle so every pass is consistent. The Veritas Mk.II is a well-known design that holds chisels and plane irons square and makes it easy to repeat a bevel angle. It takes some time to learn how to set it properly, but once you do, it speeds up the process. Check that it fits the width of your blades, and use the setting jig for repeatable results.
4. Flexcut Gold Polishing Compound
A leather strop with polishing compound removes the last burr and brings the edge to a mirror finish. Flexcut Gold is a common choice, applied by rubbing the bar on a strop or a piece of flat leather. A few strokes can refresh an edge between sharpenings. Keep the strop clean and flat, and avoid rolling the blade, which rounds the edge. It is a small purchase with a big payoff.
Flexcut Gold Polishing Compound
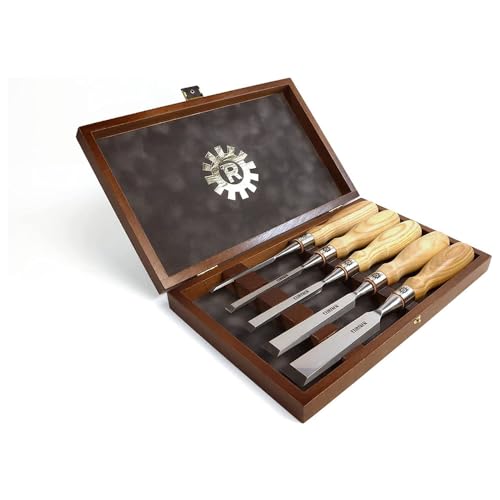
5. Narex Richter Bevel Edge Chisel Set
If your chisels are poor to begin with, no amount of sharpening will make them great. Narex Richter chisels have a good reputation among hobbyists for taking and holding an edge. They are an excellent set to practice on, and they come in common sizes. Check that the back is reasonably flat out of the box, but expect to flatten and polish the first inch or so before you use them.
Narex Richter Bevel Edge Chisel Set
Step-by-Step Sharpening
- Flatten the back. Rub the flat side of the blade on the coarse stone until the first inch near the edge has an even scratch pattern. Repeat on finer stones until it is polished.
- Set the guide. Place the blade in the honing guide with the bevel facing down and set the angle, commonly around 25 degrees for general chisels.
- Grind the bevel. Push the blade forward on the coarse stone with even pressure until you raise a small burr along the back edge.
- Refine. Move to the fine stone and repeat until the scratches are uniform and the burr is small.
- Remove the burr. Lay the back flat on the stone and take a stroke or two, then strop the bevel and the back lightly.
- Test. A sharp edge slices end grain cleanly and leaves a shiny surface.
Keeping Edges Sharp Longer
Strop often and sharpen only when stropping no longer restores the edge. Store chisels in a roll or a rack so edges do not knock together. Avoid prying and chopping hard knots, which damages the edge. Use a mallet on chisels designed for it, and keep a coarse chisel for rough work. Little habits keep your best chisels crisp.
Setting Up a Simple Sharpening Station
Sharpening is more likely to become a habit if the setup is always ready. Dedicate a corner of your bench or a small cart to it. A flat, stable surface is essential, so use a board with a non-slip mat or a stone holder that keeps the stones from sliding. Keep a spray bottle or a small container of water nearby for water stones, or a can of honing oil for oilstones, along with a rag and a small brush.
Stones need flattening, because they wear unevenly with use. A coarse diamond plate or a flattening stone does the job, and a quick check with a straightedge shows whether the surface is still true. Many people draw a pencil grid on the stone and rub until the lines disappear, which indicates it is flat. Do this at the start of a session and your edges will be more consistent.
Light matters too. Position a lamp so you can see the reflection on the edge, because a dull edge shows as a bright line while a sharp one disappears. If the line is still visible along the edge, keep working. Finally, clean the tools after use, wipe them with a light oil or rust inhibitor, and put the stones away in a dry spot. A few minutes of care keeps your setup ready for the next session.
Common Mistakes
- Skipping the back. A rough back leads to a rough edge no matter the bevel.
- Rocking the blade. It rounds the bevel; use a guide or steady hands.
- Using a dished stone. A stone that is not flat sharpens unevenly.
- Not raising a burr. If there is no burr, you have not reached the edge.
- Heating the blade on a grinder. It can ruin the temper.
Frequently Asked Questions
What angle should I use?
Many woodworkers use 25 degrees for chisels and plane irons, with a slight microbevel. Adjust for the wood and the tool.
Do I need a honing guide?
Not strictly, but it helps beginners get consistent results.
Water stones or oilstones?
Either works. Water stones cut faster, oilstones last longer. Choose what you will actually use.
How often should I sharpen?
Whenever the tool tears fibers or requires more force. Strop frequently to extend time between sharpenings.
Conclusion
Sharpening is a skill, and it pays off quickly. Based on specifications and reviewer feedback, a combination stone, a honing guide, and a strop with compound are all you need. Flatten the back, hold a steady angle, remove the burr, and your chisels and planes will cut cleanly.
As an Amazon Associate we earn from qualifying purchases.
Related guides
More from Amazon
Programs that pair well with the guide above. Offers and eligibility are set by Amazon and may change.
A free business account with business pricing and bulk-buying tools for work, shop or home office.
Create a business accountFree shipping on eligible items, Prime Video and more. Eligible new members can start with a free trial.
Start a Prime free trialAudiobooks and podcasts to listen to on the go. Eligible new members can start with a free trial.
Try Audible freeAd-free music streaming. Eligible new subscribers can start with a free trial.
Try Music Unlimited freeAs an Amazon Associate we earn from qualifying purchases.



Write Your Review
No reviews yet. Be the first to share your experience!