Best Monitor Light Bars for Glare-Free Desks
What's inside
As an Amazon Associate I earn from qualifying purchases. This post may contain affiliate links at no extra cost to you.
The best monitor light bars for glare-free desks are the BenQ ScreenBar Halo for premium dual-screen setups, the Xiaomi Mi Computer Monitor Light Bar for value, and a USB-powered bar with adjustable color temperature for buyers who need broad, inexpensive task lighting.
A monitor light bar is useful when you want to illuminate a keyboard, notebook, or small workbench without placing a lamp beside the screen. The right choice depends less on maximum brightness than on the bar’s mounting clearance, beam direction, control range, and ability to keep light off the display.
As an Amazon Associate we earn from qualifying purchases at no extra cost to you.



Contents
Best monitor light bars by situation
| Situation | Best fit | Why it suits the situation | Main compromise |
|---|---|---|---|
| Premium desk, curved or dual monitors | BenQ ScreenBar Halo | Front light, rear bias lighting, wireless control, and a substantial counterweight | High price and a larger mount |
| Single monitor and restrained budget | Xiaomi Mi Computer Monitor Light Bar | Remote brightness and color adjustment with a compact cylindrical bar | Rear lighting and compatibility depend on the monitor shape |
| Lowest-cost functional lighting | USB-powered adjustable monitor light bar | Simple front illumination, usually with touch controls and multiple color modes | More uneven quality between models; many use a cable-mounted controller |
| Monitor with a thick camera or accessory shelf | Bar with a deep, adjustable clamp | Leaves more room above the screen and reduces interference with webcams | May weigh more and need a sturdier monitor bezel |
| Wide desk or two screens | Two matched light bars, or a wide bar rated for the desk width | Better coverage than forcing one short bar to illuminate both work areas | More cables, controls, and reflected light to manage |
Head-to-head: the leading designs
BenQ ScreenBar Halo: best for demanding desk setups
The ScreenBar Halo is the strongest choice when the desk needs both task lighting and softer ambient light. Its front light is aimed toward the work surface rather than directly at the screen, while its rear light can wash the wall behind the monitor. That combination makes it more flexible than a front-only bar, especially in a dark room.
It uses a wireless control puck for brightness, color temperature, and front/rear lighting adjustments. The monitor mount is designed to balance on the top edge without requiring adhesive, and the counterweight is useful on screens with thin bezels. The mount is still relatively large, so check that it will not collide with a top-mounted webcam, microphone arm, or monitor shelf.
Choose it if you use a monitor for several hours most days, want a cleaner desk than a conventional lamp provides, or need light behind the display as well as in front. Skip it if you only need a small pool of light for occasional paperwork; its extra features may not justify the cost.
Xiaomi Mi Computer Monitor Light Bar: best value for a single screen
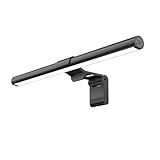
The Xiaomi Mi Computer Monitor Light Bar uses a compact cylindrical light and a rotary wireless controller. It offers adjustable brightness and color temperature, making it practical for switching between focused work, reading, and a warmer evening setting.
Its mount is less visually intrusive than a desk lamp, and the rotating bar helps aim light toward the keyboard instead of the screen. The main limitation is installation clearance. A curved display, unusually thick top housing, or a webcam sitting directly on the bezel can prevent the bar from seating correctly. It also provides less rear-lighting flexibility than the BenQ ScreenBar Halo.
This is a sensible middle ground for a home office with one conventional monitor. Confirm the regional power adapter and USB requirements before buying, because package details can differ between markets.
Generic USB adjustable bars: best when price matters most
USB monitor light bars are available in many lengths and usually provide three or more color modes, touch controls, and a dimming range. They can be excellent value, but the product category is inconsistent. Two bars with similar-looking housings may differ substantially in LED density, diffuser quality, clamp stability, and electrical noise.
Prioritize a model with a separate adjustable hinge, a padded clamp, a matte diffuser, and a brightness memory function. A simple front-only bar is enough for a small single-monitor desk. For a 34-inch ultrawide or two monitors, look for a bar around 45 to 55 centimetres wide, or use two independent units.
What to compare before buying
1. Screen compatibility and mount clearance
Measure the top housing, not just the screen size. Most bars rest on the upper edge and use a counterweight behind the panel. They can be awkward on monitors with a very narrow top bezel, a deeply curved back, a top-mounted camera, or a rear shell that slopes sharply.
OLED and LCD screens generally do not need different light bars, but the mount must not press against a fragile panel surface. The bar should rest on the frame or top housing. Avoid models that require you to force a spring clamp into position, since that can twist a thin display.
For a dual-monitor arrangement, decide whether the light should illuminate one keyboard area or the entire desk. A single 45-centimetre bar centred over one monitor will not evenly cover two screens separated by a gap.
2. Brightness and color temperature
Brightness is useful only when it can be reduced as well as increased. A bar that is powerful at full output but harsh at its lowest setting can still create eye-catching reflections on glossy furniture or a white wall.
A useful color-temperature range is approximately 2700K to 6500K. Warm settings suit evening paperwork and reduce the stark appearance of a dark room; neutral settings around 4000K to 5000K are practical for general desk work; cooler settings can make a white page appear more neutral during daytime use. Color temperature does not fix glare by itself, so beam direction and positioning remain more important.
3. Glare prevention
Look for an asymmetrical downward beam, a recessed LED strip, and an opaque or frosted diffuser. The light should reach the desk while keeping the LED emitters out of your direct line of sight. A bar that shines equally forward and downward is more likely to reflect in a glossy display.
Place the bar slightly behind the front plane of the monitor, then angle it toward the keyboard. If you can see bright LED points reflected in the screen, rotate the bar downward, lower the brightness, or move it a few centimetres backward. Increasing room brightness with indirect rear light can also reduce the contrast between the screen and surrounding darkness without washing out the display.
4. Desk coverage
Estimate coverage before buying. If a bar produces a useful pool roughly 40 centimetres wide at the keyboard and your desk’s active writing area is 80 centimetres wide, one centred bar will leave the edges darker. Two bars can solve that, but overlapping beams may create a bright strip in the middle. A rear-biased ambient light is often better for filling the rest of the desk than simply increasing front brightness.
5. Power and webcam clearance
Most monitor bars use USB power, but the power source still matters. A bar may work from a computer port, monitor USB hub, docking station, or USB wall adapter; some models are less stable when connected through an unpowered hub. A long cable is helpful when the monitor’s ports are on the opposite side from the desk’s cable channel.
Measure the distance between the bar and the webcam. A top-mounted camera can block the bar, tilt it forward, or cast a shadow. If the camera is essential, choose a bar with a taller or stepped mount, move the camera to a monitor arm, or use a small webcam shelf designed to sit behind the light bar.
A practical setup procedure
- Clean the monitor’s top edge and the mount’s contact pads with a dry microfiber cloth. Dust can make the bar slip.
- Centre the bar over the primary work area rather than automatically centring it over the screen.
- Set the bar to a neutral temperature and medium-low brightness before adjusting its angle.
- Tilt the light toward the keyboard or notebook until the screen shows no bright reflection.
- Turn on rear light, if available, at a lower level than the front light. This fills the background without competing with the display.
- Check the webcam, microphone, monitor hinge, and cable path through the full range of adjustment.
For example, if a bar draws 5 watts and operates for six hours a day, it uses about 0.03 kilowatt-hours per day. At an electricity rate of $0.20 per kilowatt-hour, that is roughly $0.006 per day, or about $2.20 per year. Power consumption is therefore rarely the deciding cost; mounting quality, comfort, and longevity matter more.
Ownership issues that listings often omit
The first parts likely to cause trouble are the USB cable, hinge, control puck battery, and rubber contact pads. Do not leave the bar hanging from a cable or repeatedly swing it through its full hinge range. Route the cable with slack and avoid sharp bends at the light’s connector.
Dust the diffuser and wipe it with a barely damp microfiber cloth after unplugging the unit. Do not spray cleaner directly onto the bar. A hazy diffuser can make the light appear dimmer and less even, encouraging you to run it at an unnecessarily high setting.
Common mistakes include mounting the bar too far forward, selecting maximum brightness in a dark room, placing a glossy notebook directly under the brightest section, and assuming a monitor bar replaces all room lighting. It is a focused task light, not a complete ceiling-light substitute.
Final buying recommendation
Buy the BenQ ScreenBar Halo if you want the most complete glare-controlled setup, including rear illumination and convenient wireless adjustment. Choose the Xiaomi Mi Computer Monitor Light Bar for a single conventional monitor and a more restrained budget. Choose a well-specified USB adjustable bar when cost is the priority, but verify its mount dimensions, diffuser, beam direction, and warranty rather than relying on appearance alone.